Remove existing agitators, Figure 4 remove old paddles, Apply new decals – Great Plains Series II Native Grass Agitator Vintage Drills User Manual
Page 3: Figure 5 warning decal location, Install new agitators, Mount blades, Chain is already dismounted. skip to step 9
Great Plains Mfg., Inc.
Installation Instructions
3
04/05/2007
202-609M
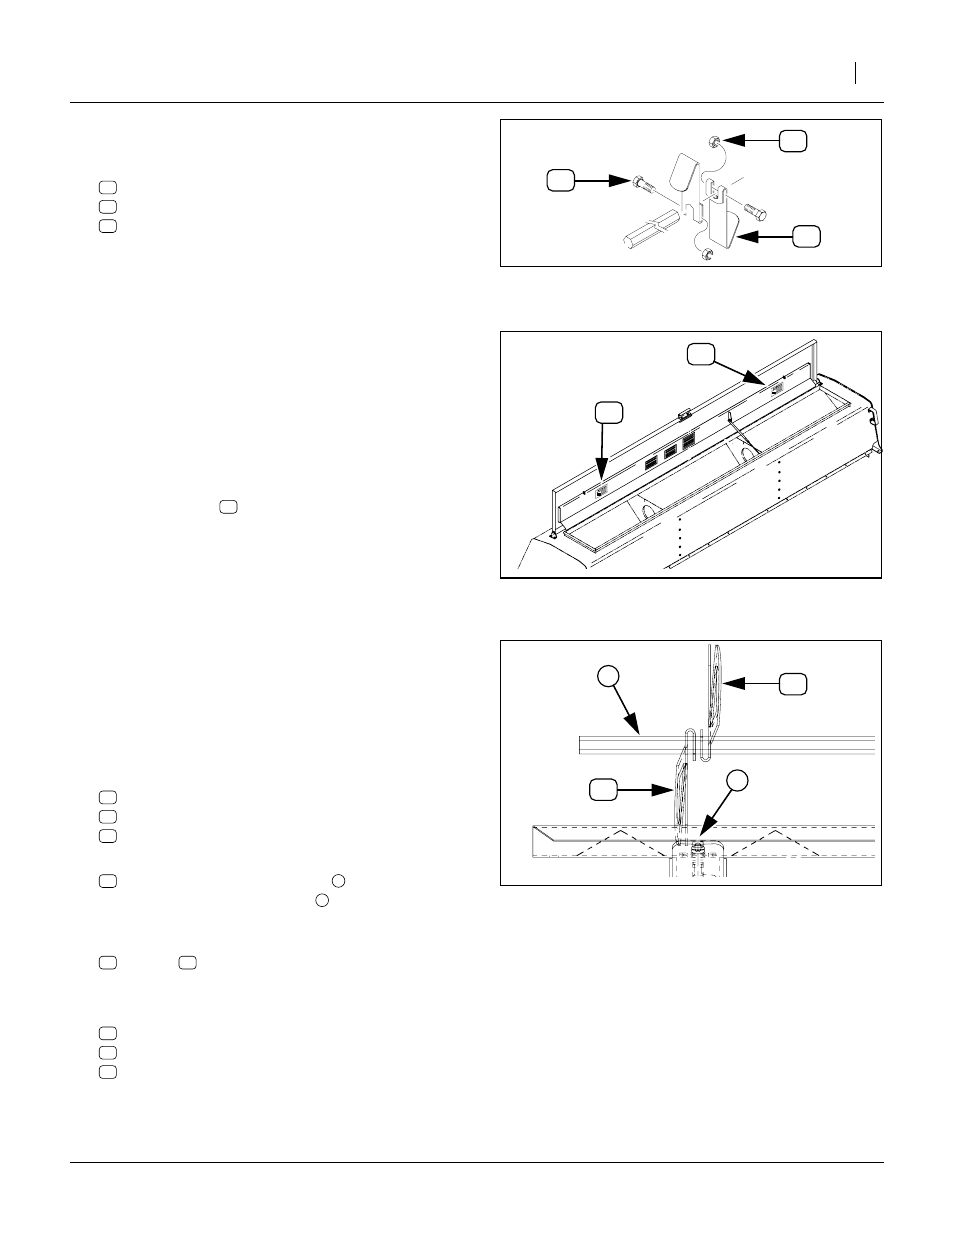
Remove Existing Agitators
8.
At each row, remove two each existing:
NUT HEX NYLOCK 5/16-18 PLT
HFSS 1/4-20X2 GR5
NG AGITATOR PADDLE
These parts are not re-used.
Apply new Decals
The new Warning decal location is on the stiffener rib on
the underside of the Native Grass box lid. Do not cover
any existing decals.
Note: Your kit includes one decal per row. As you will
have more than two decals per box, not all are
needed for the drill update.
9.
Place two decals
in each lid, or a foot or two from
each end of the lid.
10. Clean the location(s) for the Crush warning decal(s).
Peel the release paper backing from the decal, align
and apply it. Smooth it with a clean rag to remove
bubbles.
Install New Agitators
Mount Blades
11. Pick a starting feeder cup row that is not adjacent to
a seed box partition (to assure a starting example
using all four blades).
12. Select one each new:
202-281D LH NG SERIES 2 AGITATOR
802-448C HFSS 1/4-20 X 2 GR5
803-088C NUT HEX LOCK 1/4-20 FLG
13. Position the (black, fan-shaped) Left Series II agitator
to the left of a feeder sprocket
. The slot in the
agitator fits over the drive shaft
. The short side of
the “U” bend faces the sprocket.
14. Loosely attach the agitator to the shaft with a screw
and nut
15. Rotate the shaft 180
°.
16. Select one each new:
202-280D RH NG SERIES 2 AGITATOR
802-448C HFSS 1/4-20 X 2 GR5
803-088C NUT HEX LOCK 1/4-20 FLG
Figure 4
Remove Old Paddles
25125
52
53
51
53
52
51
Figure 5
Warning Decal Location
26290
Figure 6
Agitator Inside Blades
(viewed from back of drill)
25126
2
1