Setting the coulter depth gage – Great Plains Max Cover Verti-Till Ripper Operator Manual User Manual
Page 28
5, 7, & 9 Shank
596-098M
8/6/07
26
Refer to Figure 15
3.
To adjust this reading, loosen the two bolts
joining the tip depth link and lengthen or short-
en as needed. Retighten and check the setting
from the tractor seat.
Note: The tip depth link has two notches that can
be aligned with each other and used as a starting
point when adjusting the length of this link.
Once set, the tip depth indicator will show actual
tip depth and is very accurate through a range of 6”
to 16”.
Before moving on to the next step, the unit can be
raised from the full 16” depth. The depth you chose
in not critical, but should be at least 6” deep.
Setting the Coulter Depth Indicator Gage
1.
Adjust the cutting depth of the coulters to
about 2” or 3” while traveling through the field.
Stop the tractor and dig to find the bottom of
several coulters. Measure or estimate an aver-
age cutting depth.
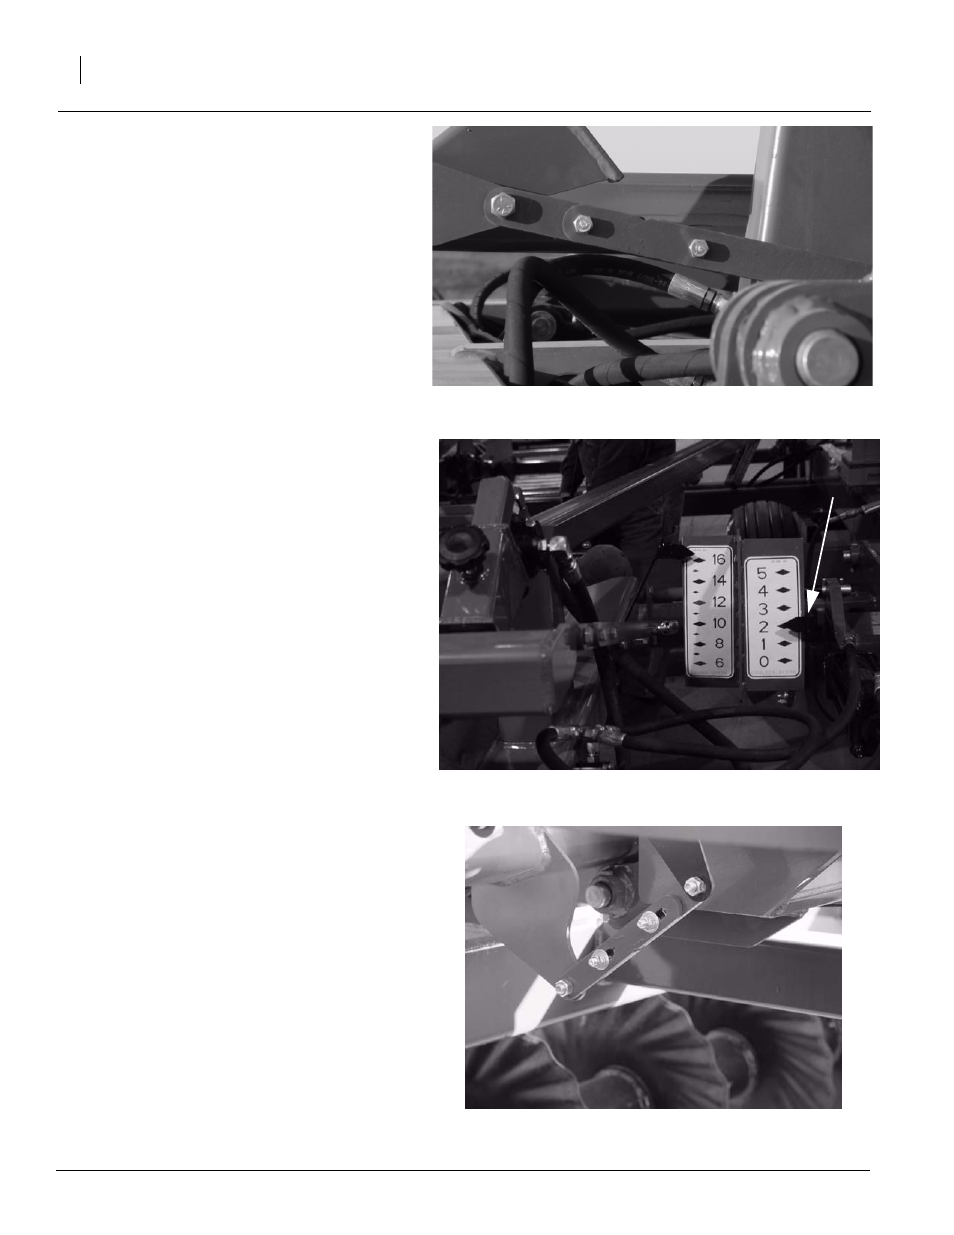
Refer to Figure 16
2.
Observe from the tractor seat the coulter
depth pointer. Adjust the coulter depth linkage
until the indicator reads the same depth you
averaged in step 1 above.
Refer to Figure 17
3.
To adjust the coulter depth pointer, loosen the
two bolts joining the coulter depth link and
lengthen or shorten as needed. Retighten and
check the setting from the tractor seat.
Note: The coulter depth link has two notches that
can be aligned with each other and used as a start-
ing point when adjusting the length of this link.
Once set, the coulter depth indicator will show ac-
tual coulter depth and is very accurate through a
range of 1” to 4”.
Note: As the coulter blades wear you will not be
cutting the same depth as with a new 20” blade.
The coulter depth linkage can be adjusted period-
ically as the blade wears so it will continue to re-
port an accurate cutting depth.
21660
Figure 16
Coulter Depth Indicator
21659
Depth
Pointer
Figure 15
Tip Depth Pointer Linkage
Figure 17
Coulter Depth Pointer Linkage
21661