Great Plains SS1700 Operator Manual User Manual
Page 17
Great Plains Manufacturing, Inc.
Preparation and Setup
13
06/14/2012
596-086M
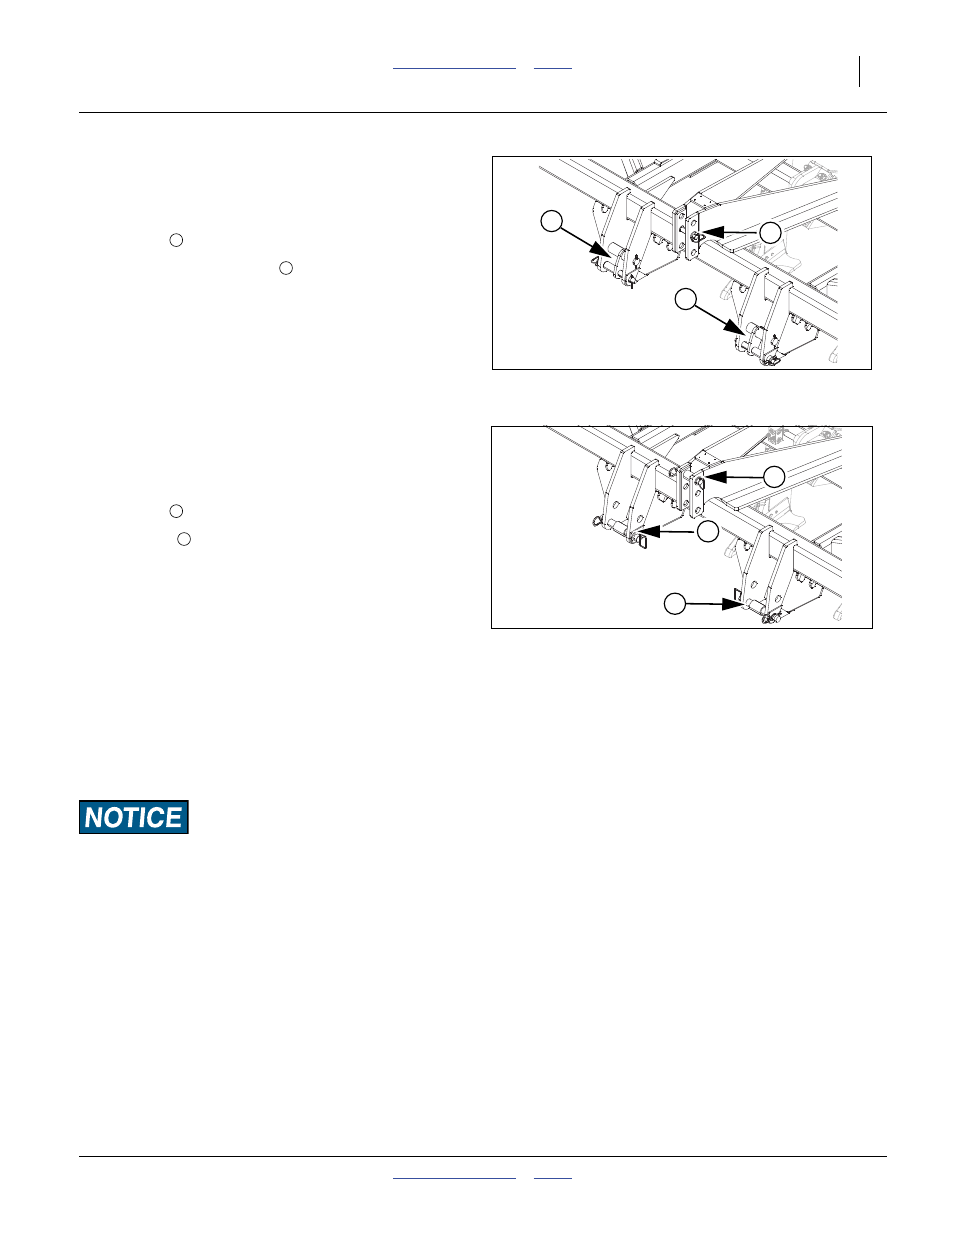
Refer to Figure 3
6.
See drawing for correct pins and hole positions for
Category II.
7.
Pin upper arm to implement. For category II, install
hitch pin
in middle hole.
8.
Install hitch pin supports
in brackets as shown.
Refer to Figure 4
9.
See drawing for correct pins and hole positions for
Category III.
10. Pin upper arm to implement. For category III, install
hitch pin
in top hole.
11. Install pin
in lower holes.
12. Connect your tractor 3-point to the sub-soiler 3-point
hitch. If using quick hitch be sure sub-soiler locks into
hitch securely.
13. Slowly raise implement. Watch for cab interference.
14. Set your tractor 3-point draft control to float position.
15. Plug lead from implement light harness into tractor
receptacle.
16. Raise tractor 3-point just enough to relieve pressure
from parking stands.
17. Raise and pin up 3-point stands. See “Store Parking
Stands” on page 14.
Load Sway Risk:
Adjust 3-point hitch arms and sway blocks to minimize any side-
to-side sway to assure proper tracking in the field and safe road
travel.
Figure 3
Cat II Hitching
42780
2
2
1
1
2
Figure 4
Cat III Hitching
42781
2
2
1
1
2