Clevis hitch, Category iii hitch, Clevis hitch category iii hitch – Great Plains 4000TC Operator Manual User Manual
Page 20
16
1200-4000TC
Great Plains Manufacturing, Inc.
586-239M
08/01/2012
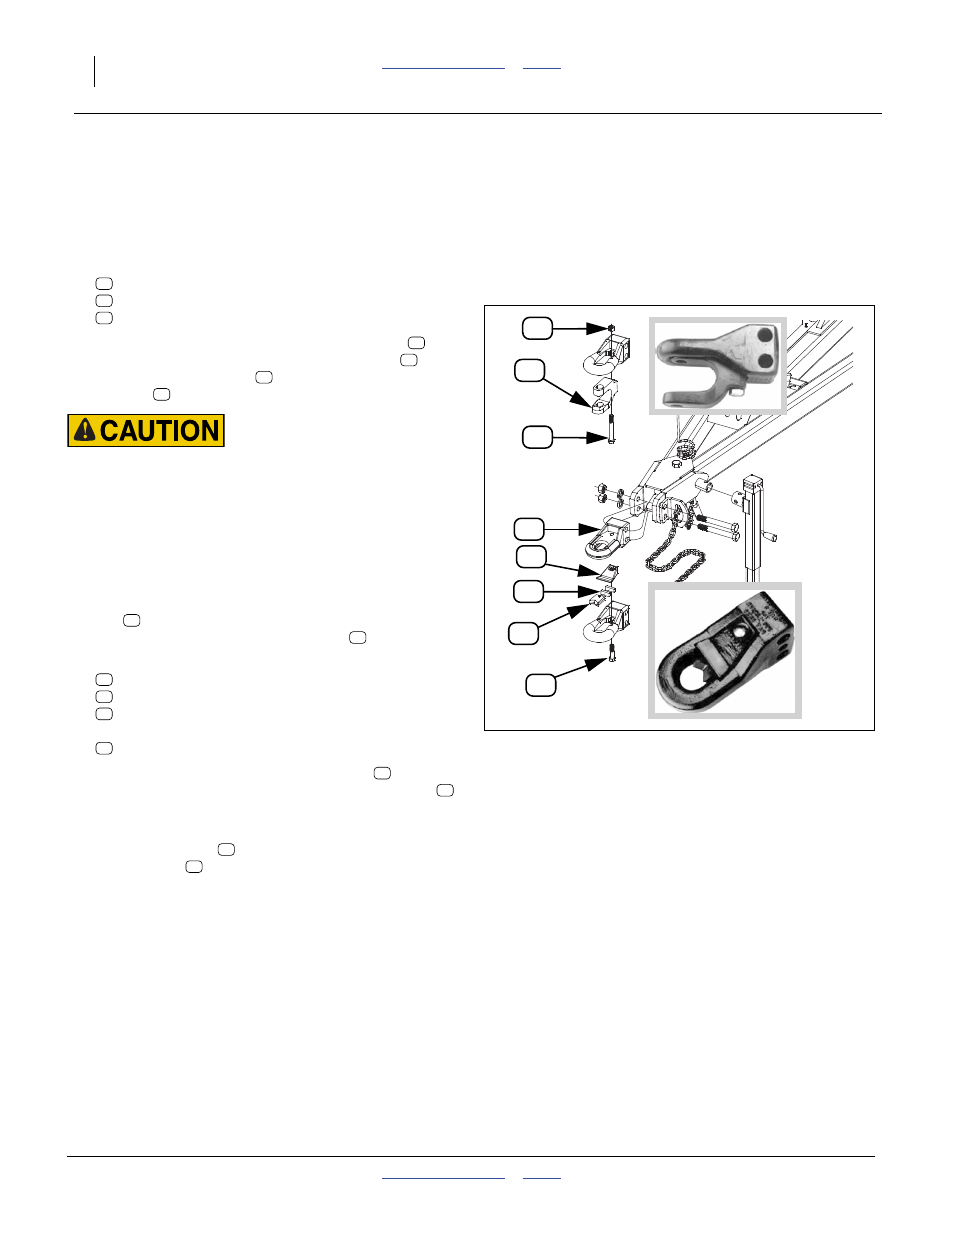
Clevis Hitch
Refer to Figure 6
The base hitch must be upright (with the recessed notch
on the bottom) for this configuration. This places the
tongue weight on the base hitch, and not the clevis.
1.
Select one each:
890-798C HITCH CLEVIS
802-487C HHCS 3/4-10X6 GR8
803-367C NUT HEX TOP LOCK 3/4-10 PLT
2.
With the square-shouldered end of the clevis
up,
fully seat the clevis in the upright base hitch
.
Insert the Grade 8 bolt
from below. Secure with
lock nut
.
Hitch Failure Hazard:
Install the hitch base and assemble the clevis parts as shown.
Incorrect installation or assembly may result in failure of the
clevis bolt, leading to hitch failure. This could result in a seri-
ous highway accident or severe machine damage.
Category III Hitch
The base hitch must be inverted (with the recessed
notch on the top) for this configuration. Set the
V-block
to allow some vertical articulation of the draw
bar pin. Always use at least one cushion
.
1.
Select one each:
PPI-302V TOP PLATE - CAT 3
PPI-203VR V-BLOCK
802-383C HHCS 3/4-10X3 GR5
and two:
PPI-205H CUSHION
2.
Set the cushions inside the hitch recess
, just for-
ward of the vertical bolt hole. Position the V-block
forward of the cushions and check the size of the
resulting pinning hole. Remove a cushion if needed.
3.
Add the top plate
. Secure from below with
Grade 5 bolt
.
Figure 6
Configure Hitch
31740
42060
31741
83
47
48
89
88
87
82
62
82
48
62
82
83
48
62
87
88
89
87
47
88
88
87
89
47