Install rear hitch (optional), Completing setup, Install rear hitch (optional) completing setup – Great Plains 8560 FCF Predelivery Manual User Manual
Page 14
10
8323-8560FCF
Great Plains Manufacturing, Inc.
560-484Q
02/10/2014
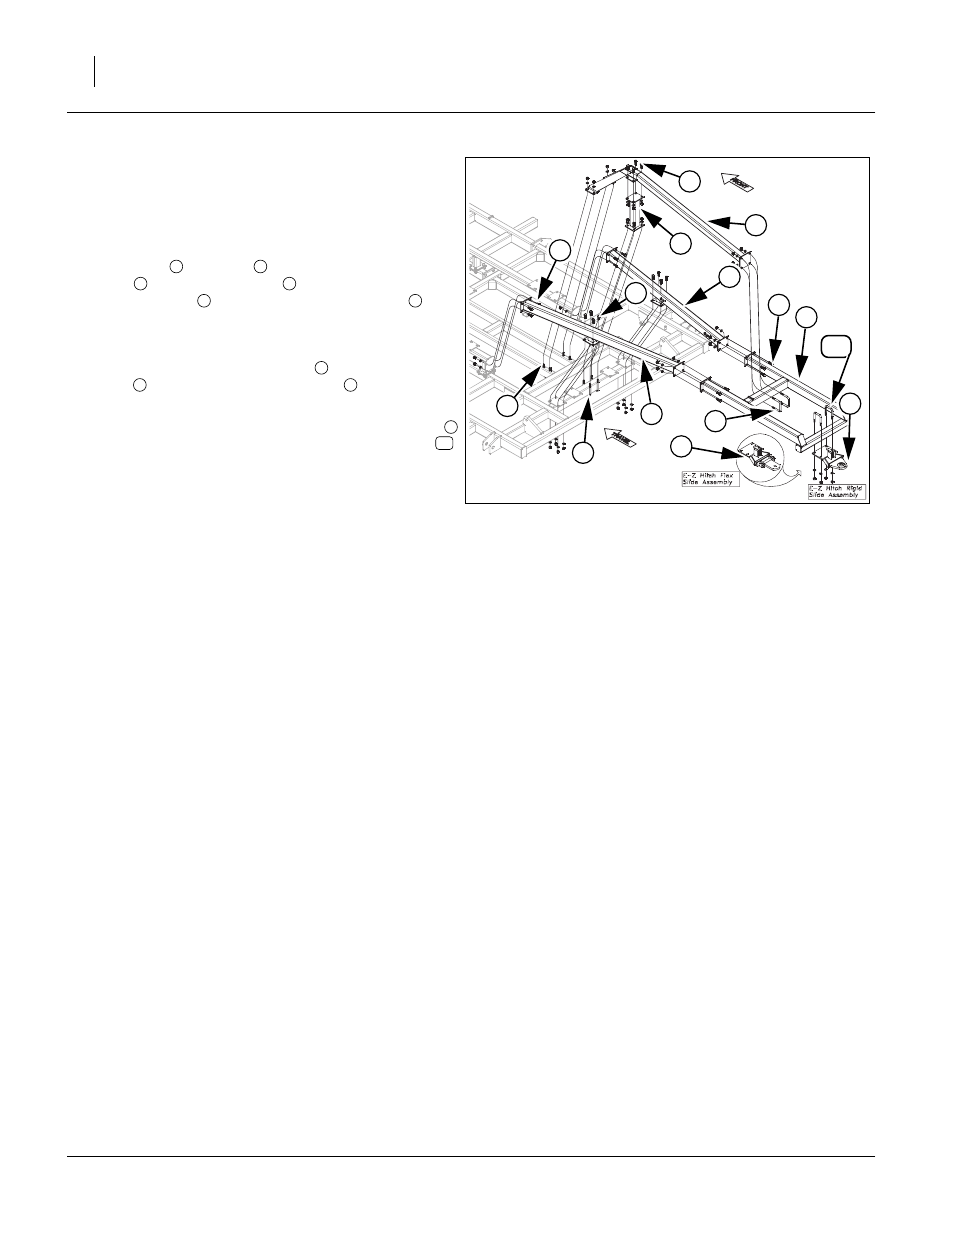
Install Rear Hitch (optional)
Refer to Figure 8
Note: The rear tow hitch will be shipped with big compo-
nents banded together and bolts will be in a box.
Carefully un-band the components.
54. Attach left
and right
rear hitch arms, rear hitch
truss
, rear truss support
to center frame using 5/
8 x 1 1/2 bolts
, 5/8 x 3 1/32 x 5 1/2 u-bolts
,
secure with 5/8 lock washers and 5/8 nuts.
Note: Do not tighten any bolts until every thing is installed.
55. Now install the rear hitch frame
using 5/8 x 1 1/2
bolts
, 5/8 x 4 1/32 x 4 1/4 u-bolts
, secure with 5/
8 lock washers and 5/8 nuts.
56. The bolt on sleeve assembly with rigid or flex slide
may be fastened using 5/8 x 3 1/32 x 4 1/2 u-bolt
,
secure with 5/8 lock washers and 5/8 nuts.
57. Tighten all bolts to specs, See “Torque Values
58. If machine is equipped with optional rear hitch acces-
sory kit may be installed as shown in “Parts Manual”.
59. Route hoses and light harness along hitch and frame
with hose clamps and hose wraps, provided.
Note: Be sure hoses and light harness is fastened secure-
ly so they don’t drag or get pinched.
Completing Setup
60. If the Field Cultivator is equipped with an optional fin-
ishing attachment, refer to “Parts Manual” for parts
breakdown.
61. Once the options are installed, fold the Field Cultiva-
tor to check for clearance and interferences. Slowly
fold Field Cultivator while watching that hoses and
wiring harnesses do not become pinched or kinked
while watching for interferences.
Note: Double check that all bolts are tightened to specs,
See “Torque Values Chart” on page 11.Consult
the operating instructions, “Operator’s Manual”, for
the first time field adjustments before going to the
field.
Figure 8
Rear Hitch
41883
8
7
6
4
1
9
2
9
5
6
6
3
6
10
7
2
1
4
5
6
7
3
6
8
9
10