Installation, Location, Location 3.2. installation – Wheatheart Livestock Waterer User Manual
Page 11
W
HEATHEART
- L
IVESTOCK
W
ATERER
3. I
NSTALLATION
M
ODELS
: H50, H50L, EH50, EEFH50, SH50, ESH50, C50, EC50, C100, EC100, C200, EC200
IM11 R1
11
3. Installation
This waterer comes assembled and ready to install. You will be required to create
a level mounting surface and to bring water and electrical supply lines to the
waterer location.
3.1. LOCATION
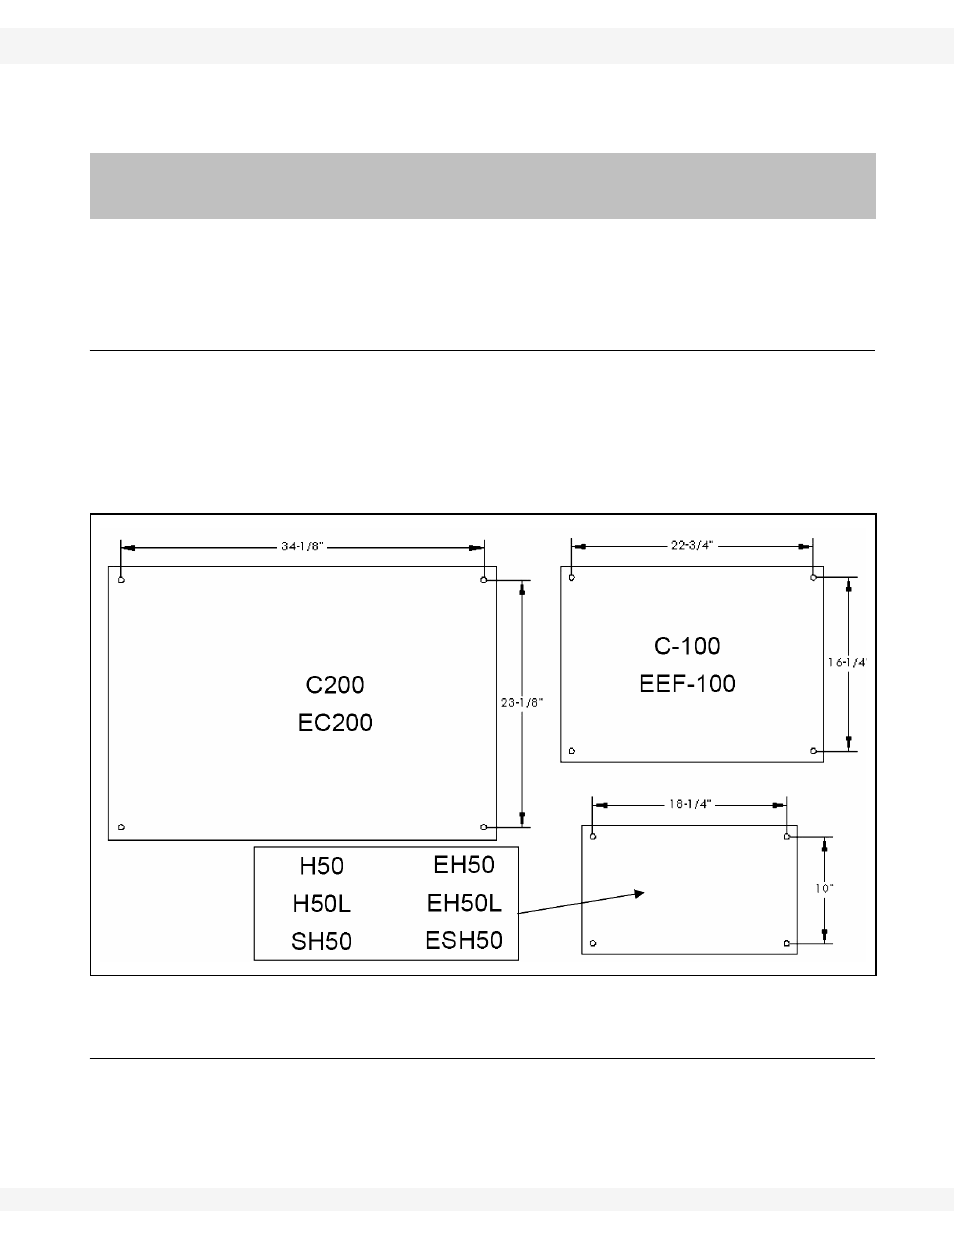
Before pouring the concrete pad, determine where to place the 1/2” x 3”
mounting bolts. Insert bolts into the concrete with 1” of thread exposed. Figure
3.1 shows the dimensional details for mounting bolts.
The concrete pad should be a minimum of 8” thick with an extra 4” rise at the
center for the waterer. It should also contain access for the riser pipe and power
supply to pass through (Figure 3.2).
Figure 3.1 Concrete Pad Mount Bolt Dimensions (top view)
3.2. INSTALLATION
1. Energy efficient models only: When installing waterer, slide up the 2” inner
lining of high-quality insulation (4 pieces) to provide access to the mounting
brackets. This allows the waterer to be bolted to the pad.
Warning: Before continuing, ensure you have read and understand the relevant information
in the safety section. Safety information is provided to help prevent serious injury, death, or
property damage.