On these days, Record trigger source, Trigger logic – Monarch Instrument Track-It User Manual
Page 19: Alarm
Track-It User Guide
Page 19
Rev 1.02 06/21/11
3.9.3.3. On These days
The unit will record on each of the days checked. If no days are checked the unit will record once based on the start
and stop times as described above.
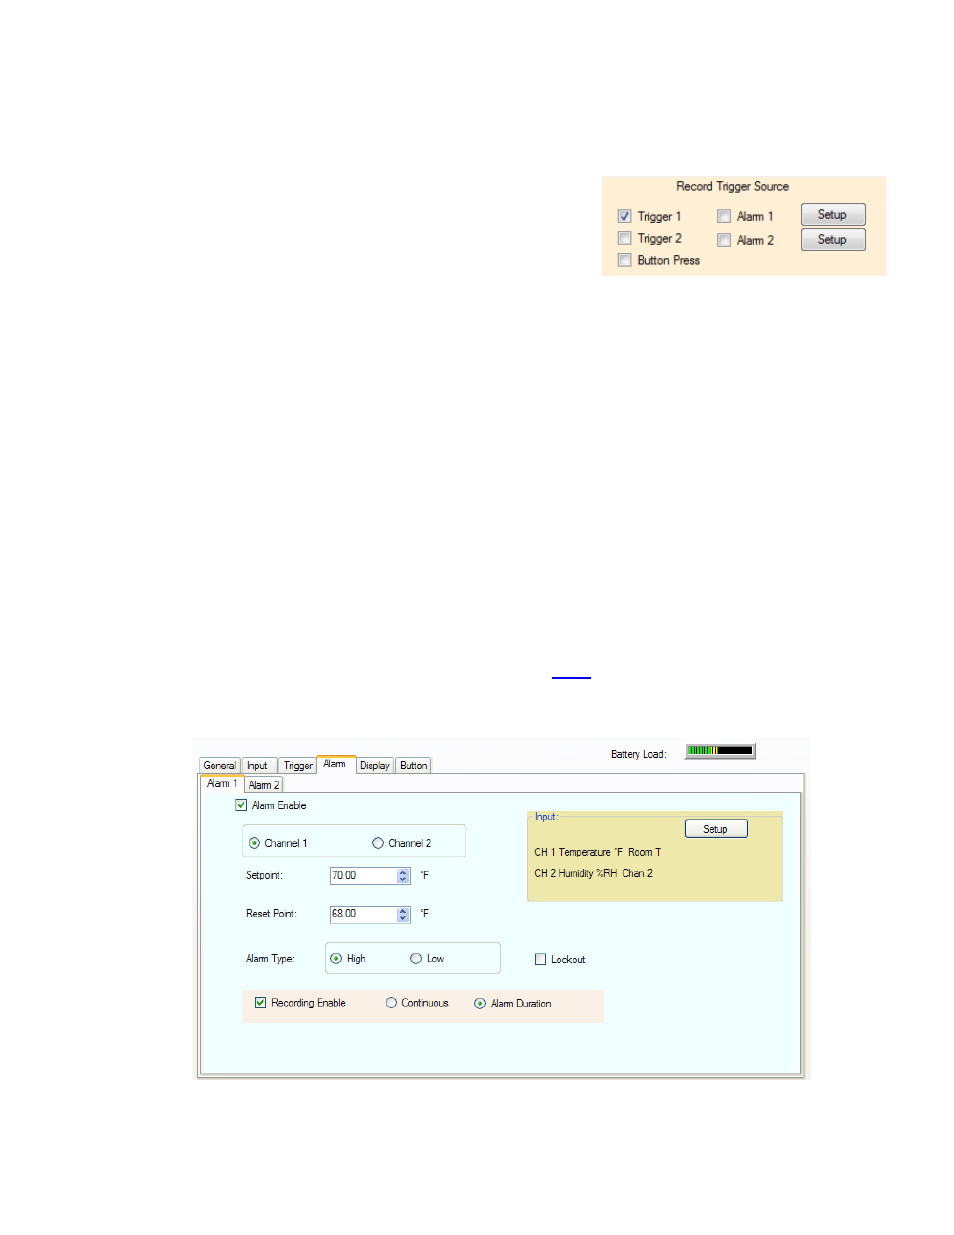
3.9.3.4. Record Trigger Source
This is a summary of the current Triggers that will affect the recording.
The check boxes can also be used to enable or disable Triggers.
Note that triggers are cumulative
– if for example Alarm 1 is checked
and no other trigger is checked the device will record whenever the
Alarm condition is true. If Alarm 1 AND Trigger 1 is checked, the
device will only record if the Trigger 1 time is active and there is an
Alarm during this period. If only Trigger 1 is checked the device will record based on the Trigger 1 settings
– start time
(and stop time if enabled). The Setup buttons take you to the Alarm tag. If Button Press is checked the button will also
initiate a recording. The button will not however override other settings.
3.9.3.5. Trigger Logic
The following logic is used to determine how the device will actually record. Note that the setup on the General Tab
will override the trigger settings unless “Advanced” is selected.
Boxes Checked
Trigger Mode
Trigger 1 (no stop time set, no cyclic mode) Unit will record when start time reached and record till memory filled
(if in cyclic mode will record forever)
Trigger 1 (with stop time set)
Unit will record when start time reached and stop at stop time.
Trigger 1 and 2 (with stop times set)
Unit will record for trigger 1 time and (then) Trigger 2 time.
Alarm 1 (or Alarm 2)
Unit will record whenever alarm condition is true. Refer to Alarm Setup
Alarm 1 AND Trigger 1
Unit will record when alarm condition is true DURING time set by Trigger 1
Alarm 1 AND Trigger 1 AND Trigger 2
Unit will record when alarm condition is true DURING time set by Trigger 1
and Trigger 2
3.9.4. Alarm
The logger can be programmed to simply show an alarm condition or can be set to record on an alarm condition. The
method of showing an alarm varies by device but the graph can be
so that points in alarm are a different color to
normal conditions. For devices with a display the alarm enabled icon is a bell and there are icons to show whether high or
low alarms are active. See device user manual for details.
There are two alarms - 1 and 2. Each has its own tab. The alarms operate independently but their effect is cumulative.
In order for any alarm action to occur the Alarm Enable checkbox has to be checked. The user has to select the channel to
which the alarm will apply - check the radio button for Channel 1 or Channel 2.