Creating module labels, Changing the label type, Using barcodes – Dymo RHINO 4200 User Manual
Page 12: Adding a barcode, Editing a barcode, Creating module labels changing the label type, Adding a barcode editing a barcode
11
6
Press .
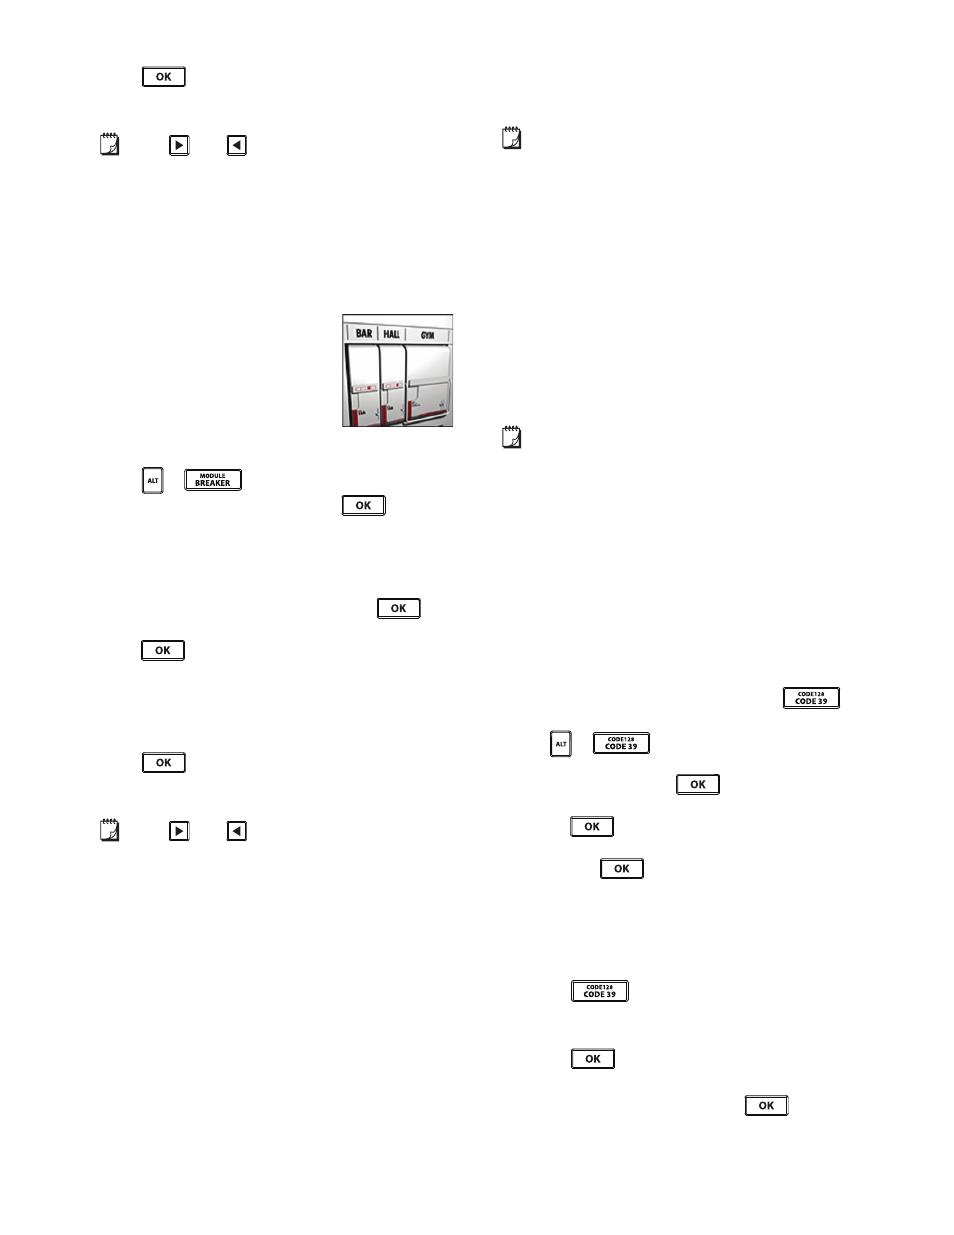
Each breaker is separated by a line in the display.
7
Enter the text for each breaker in the label.
Press
and
to move from breaker
to breaker.
By default, a separator line is printed between each cell
on a breaker label. To turn off the separator lines, see
Printing Separator Lines between Cells on page 15.
To create data for the breakers automatically, see
Creating a Series of Labels on page 12.
Creating Module Labels
A module label is a multi-cell label used
to label a row of modules of varying
widths. You set the width of a module
and the number of modules, enter the
text for each module, and print. You
can use multipliers to adjust the width
of individual modules as necessary.
To create a module label
1
Press
+
.
2
Select the module length and press
.
Select the length that applies to the smallest size
module. You can then use multipliers to increase the
size of individual modules that are larger. The default
module length is 17.5 mm (0.5”).
3
Select the number of modules and press
.
4
Select the multiplier for each module and
press
.
5
Select one of the following:
• On to print empty modules at the end of the label.
• Off to not print empty modules at the end of
the label.
6
Press .
Each module is separated by a line in the display.
7
Enter the text for each module.
Press
and
to move from module
to module.
By default, a separator line is printed between each cell
on a module label. To turn off the separator lines, see
Printing Separator Lines between Cells on page 15.
To create data for the modules automatically, see
Creating a Series of Labels on page 12.
Changing the Label Type
Once you create a label using one label type, you can
easily change the label type without losing your data.
If the data from one label type will not fit in the new label
type, the text that will not fit is shaded in the display.
When you change from a multi-cell label, such as a
breaker label, to a single cell label, such as general or flag,
each cell becomes a new label. All blank cells are deleted.
When you change from a multi-cell label type to
another multi-cell label type, make sure the new label type
contains the same number of cells.
To change the label type
1
Press the Hot Key for the new label type.
2
Make any necessary adjustments to the settings for
the new label type.
Using Barcodes
The printer can generate Code 39 and Code 128
barcodes. You can add a barcode to the following
label types:
Barcodes cannot be printed on 6 mm (1/4”) labels.
The barcode prints horizontally along the label. You can
choose to print the barcode text in small print either
below or above the barcode. Optionally, you can add text
before and after the barcode and serialize barcodes.
Adding a Barcode
The barcode text appears on the label in the display just
like any other text. If the cursor is positioned within the
barcode text, the type of barcode and the position of the
barcode text are displayed in the caption bar.
To add a barcode
1
Do one of the following:
• To add a Code 39 barcode, press
.
• To add a Code 128 barcode, press
+
.
2
Enter the text for the barcode within the barcode on
the display and press
.
3
Select whether or not to show the barcode text and
press .
4
If necessary, select the location for the barcode text
and press
.
The barcode appears as text in the display.
Editing a Barcode
You can edit the text for an existing barcode.
To edit a barcode
1
Press .
A message appears asking if you would like to edit
the barcode.
2
Press .
The text of the existing barcode is displayed.
3
Edit the barcode text and press
.
General
Flag
Fixed length
Module