Dymo LabelManager 100 User Manual
Page 8
4
position the cursor under the character to the right of
the insertion point, then type in the characters required.
PRINTING
• Press
to print the label.
• Use cutter lever E to release the label – see page 2.
PREVIEW
Allows you to preview your label before printing it.
• Press
+
PREVIEW
and the entire text will scroll across
the display.
Note with a 2 line label, the message will be previewed as
a single line message.
SPACE KEY
• Press
to insert a space into the text.
FEED KEY
• Press
+
FEED
to feed out 35mm
(1.37 inches) of blank tape
SYMBOLS
SYMBOL
• Press to select a symbol character – see ‘Symbols and
special characters’ and the symbols table on page 2.
TEXT SIZE
SIZE
• Press to display the symbols for the six text print sizes:
half-height, condensed
full height, condensed
half-height, normal
full height, normal
half-height, extended
full height, extended
The cursor will be positioned over the current selection.
• Either press
DEL
to exit, or use
or
to move
the cursor over the size symbol required, then press
or
SIZE
to confirm the selection, or
to confirm
the selection and print the label.
VERTICAL TEXT
+
VERT
BOX/UL
• Rotates the text through 90° so that the label is printed
, as confirmed by the
VERT
indicator, top right of the display.
• Press again to cancel and return to horizontal text.
Note: Vertical text is not available on two-lines.
2-LINE PRINTING
• Press
to start the second line of text on a two-line
label. The two lines will be printed half-height and
ranged left, e.g.
This is a two
line label in the display will be
printed as:
This is a two
line label
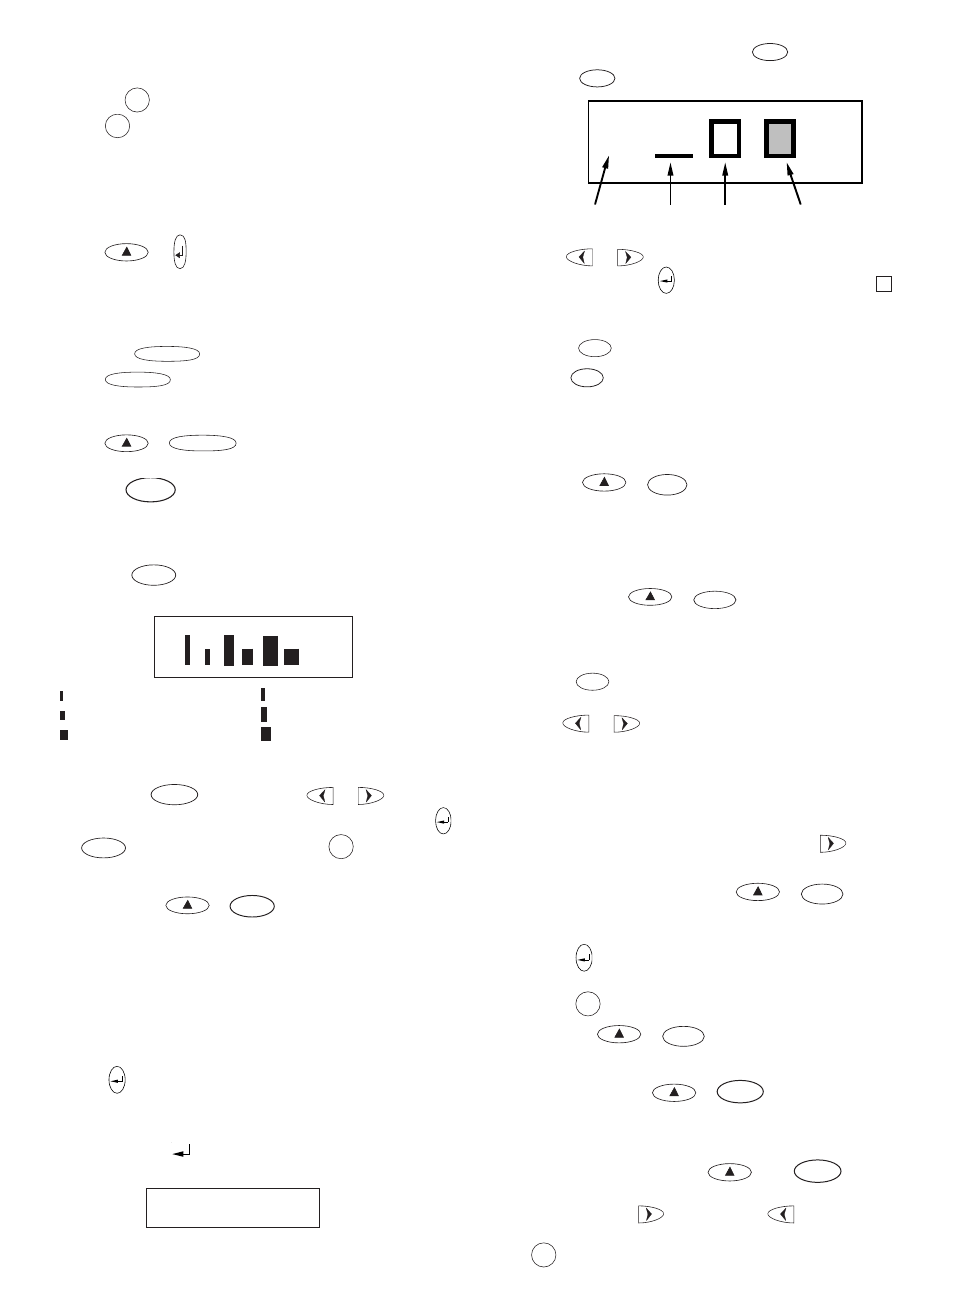
BOXED/UNDERLINED PRINTING
BOX/UL
• Press
BOX/UL
once to display the menu below.
A A
Normal
text
Underlined
Box
around
Shaded box
around
• Use
or
to move the cursor under the desired
option and press
to enter. (Confirmed by the
or
— indicator displayed.
• To return to previously selected Box/Underline text
press
DEL
.
ITALIC
ITALIC
• Press once to set
italic text (confirmed by the ITALIC
indicator in the display).
Press again to cancel and return to normal text.
OUTLINE
+
ITALIC
OUTLINE
• Press shift followed by “outline” to print the label in
outline text (confirmed by the
OUTLINE indicator in the
display). Press shift and outline again to cancel and
return to normal text.
LABEL LENGTH
+
SIZE
LENGTH
Displays the current label length. The length is normally
calculated automatically, according to the length of the
text on the label.
• Press
DEL
to exit the length function without changing
the length, or:
• Use
or
to increase (400mm / 15.6 inches
max.) or decrease the length in 2mm / 0.1 inch steps.
The display will flash if you try to make the label
shorter than the text.
• If the length displayed is preceded by the > symbol, the
length has already been fixed; the label is too short for
the text and it will not print. Either press
to
increase the length in 2mm / 0.2 inch steps until the >
symbol disappears, or press
+
DEL
CLEAR
to cancel
fixed length; the label is now long enough for the text
and can be printed.
• Press
to fix the length for all subsequent labels,
confirmed by the
LTH SET indicator in the display, or
• Press
to fix the new length and print the label.
• Pressing
+
DEL
CLEAR
will cancel the fixed length
and restore the automatic length.
MULTIPLE COPIES
+
COPIES
SYMBOL
• Your Labelmaker can provide multiple copies within the
range 1-99.
• To use this facility press
then
COPIES
SYMBOL
to show
n = 1 on the display. To increase the number of copies
required press
. By pressing
you can work
backwards from 99. To print the desired quantity press
.
v
e
r
t
i
c
a
l
l
y