Casio QV-R61 User Manual
Page 158
PRINTING IMAGES
158
10
.
Use [
̆] and [̄] to select the paper size you
want to use for printing, and then press [SET].
• The following are the print sizes that are available.
3.5˝
Ч 5˝
5˝
Ч 7˝
A4
4˝
× 6˝
By Printer
• Selecting “By Printer” prints using the paper size
selected on the printer.
• Available paper size settings depend on the
connected printer. For full details, see the
instructions that come with your printer.
11
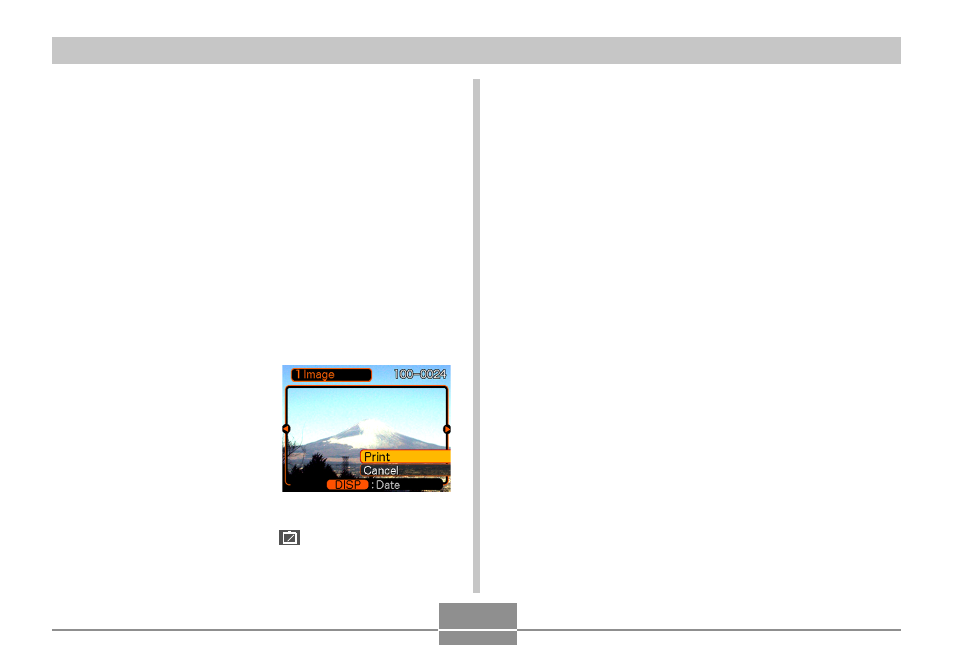
.
On the print menu, use
[
̆] and [̄] to select “1
Image”, and then press
[SET].
• You can use [
̇] and [̈]
to select the image you
want to print.
• You can toggle date stamping of the image on and
off by pressing [DISP]. The
12
12
1
icon indicates that
date stamping is turned on.
12.
On the camera’s monitor screen, use [
̆] and
[
̄] to select “Print”, and then press [SET].
• This starts printing and displays the message
“Busy.... Please wait...” on the monitor screen. The
message will disappear after a short while, even
though printing is still being performed. Pressing any
of the camera’s buttons while printing is in progress
will cause the message to reappear.
• The print menu will appear when printing is
complete.
• To print again, repeat this step.
13.
The camera will turn off automatically when
printing is complete. After this happens,
disconnect the USB cable from the camera.