Installation instructions, Step 1, Step 2 – Quoizel NA1616BN New England User Manual
Page 2: Step 3, Step 4
INSTALLATION INSTRUCTIONS
2 OF 3
STYLE NUMBER NA1616BN
:
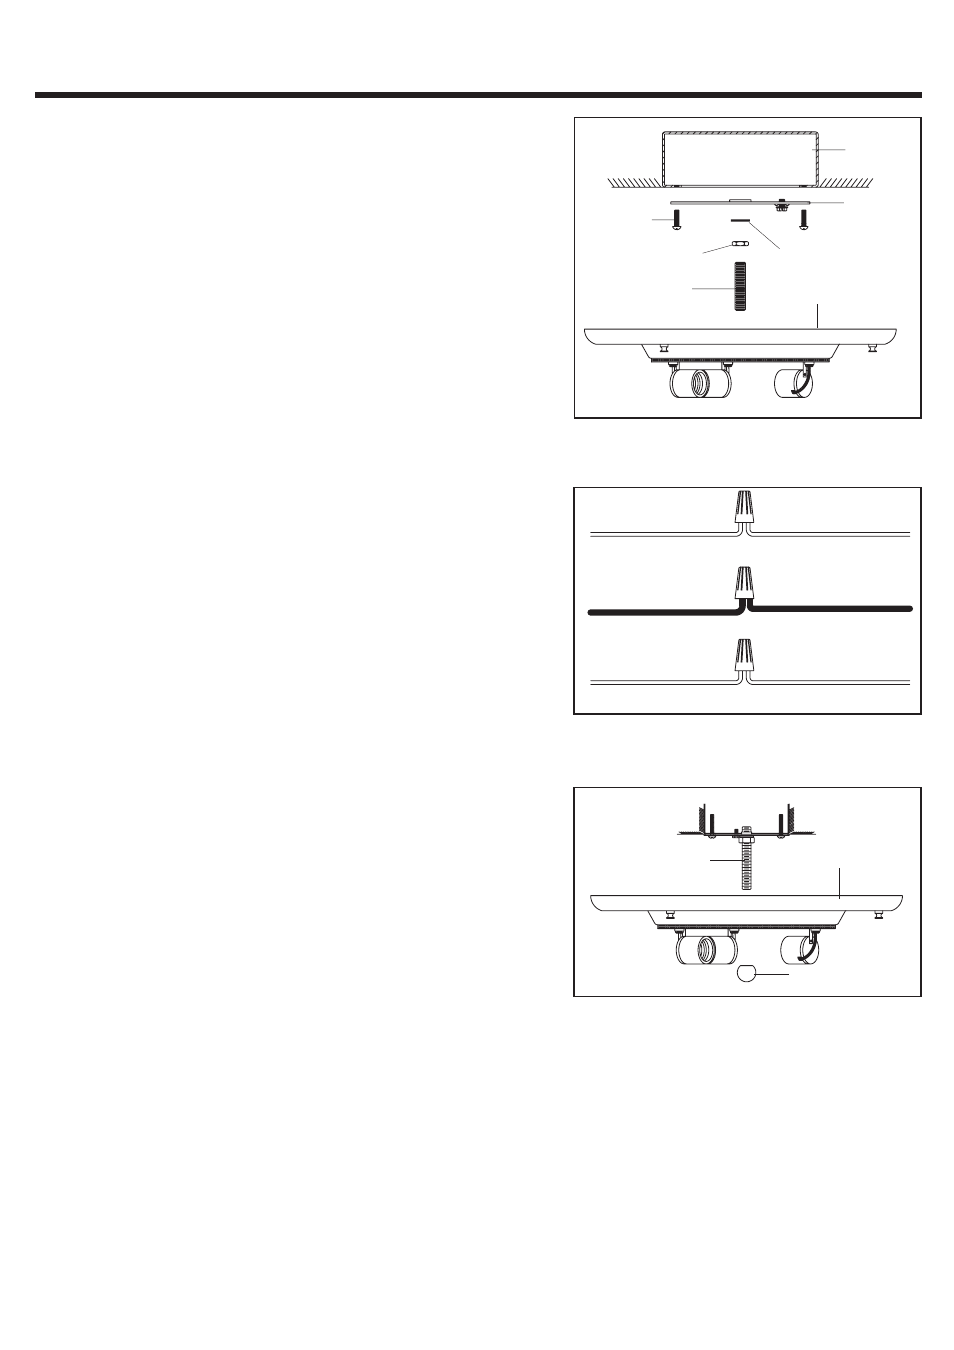
Outlet Box
Outlet Box
Screw
Hex Nut
Crossbar
Lock Washer
Nipple
Ceiling Canopy
STEP 1
:
a
Locate the Crossbar and attach it to the Outlet Box
using the Outlet Box Screws
not supplied
b
Locate the Nipple and thread one Hex Nut onto it
about half way. Slip a Lock Washer onto it and thread
one end of the nipple into the center hole of the
Crossbar
c
Position the Ceiling Canopy over the outlet box,
passing the mounting hole in the center of the Ceiling
Canopy over the end of Nipple
d
Adjust the Nipple so approx
3 8
inch of the Nipple is
protruding from the mounting hole. This adjustment
may take a few tries.
e When this length is achieved, remove the Ceiling
Canopy and tighten the Hex Nut up against the
underside of the Crossbar with pliers.
.
.
.
.
.
(
).
.
.
. / "
WHITE OR RIBBED
BLACK OR RED WIRE
(
)
FROM HOUSE
GROUND WIRE
GROUND WIRE
FROM HOUSE
FROM FIXTURE
WHITE OR RIBBED
FROM FIXTURE
FROM HOUSE
FROM FIXTURE
BLACK OR SMOOTH
STEP 2
:
*
(
)
.
.
.
(
)
(
)
.
(
)
(
).
.
.
Use Wire Connectors not supplied to connect the
wires
a
Connect the House Ground Wire to the Fixture Ground
Wire.
b
Connect the House White
or Ribbed
Wire to the
Fixture Supply Wire White or Ribbed Side .
c Connect the House Black or Red
Wire to the Fixture
Supply Wire Black or Smooth Side
d Wrap each connection with approved electrical tape and
carefully stuff all of the connected wires into the Outlet
Box
Nipple
Ceiling Canopy
STEP 3
:
a
Position the Ceiling Canopy to the ceiling by
.
passing
the Nipple through the center hole. Secure the Ceiling
Canopy by threading the Knob onto the Nipple. Hand-tighten
until snug.
Knob
STEP 4 :
a
Install correct bulbs referring to fixture markings and or labels for maximum wattage
.
/
.