Work piece and work area set up, General operating instructions – Chicago Electric 14 Industrial Cut-off Saw 68104 User Manual
Page 7
Page 7
For technical questions, please call 1-800-444-3353.
Item 68104
Work Piece and Work Area Set Up
1. Designate a work area that is clean and well-lit.
The work area must not allow access by children
or pets to prevent distraction and injury.
2. Route the power cord along a safe route to reach
the work area without creating a tripping hazard or
exposing the power cord to possible damage. The
power cord must reach the work area with enough
extra length to allow free movement while working.
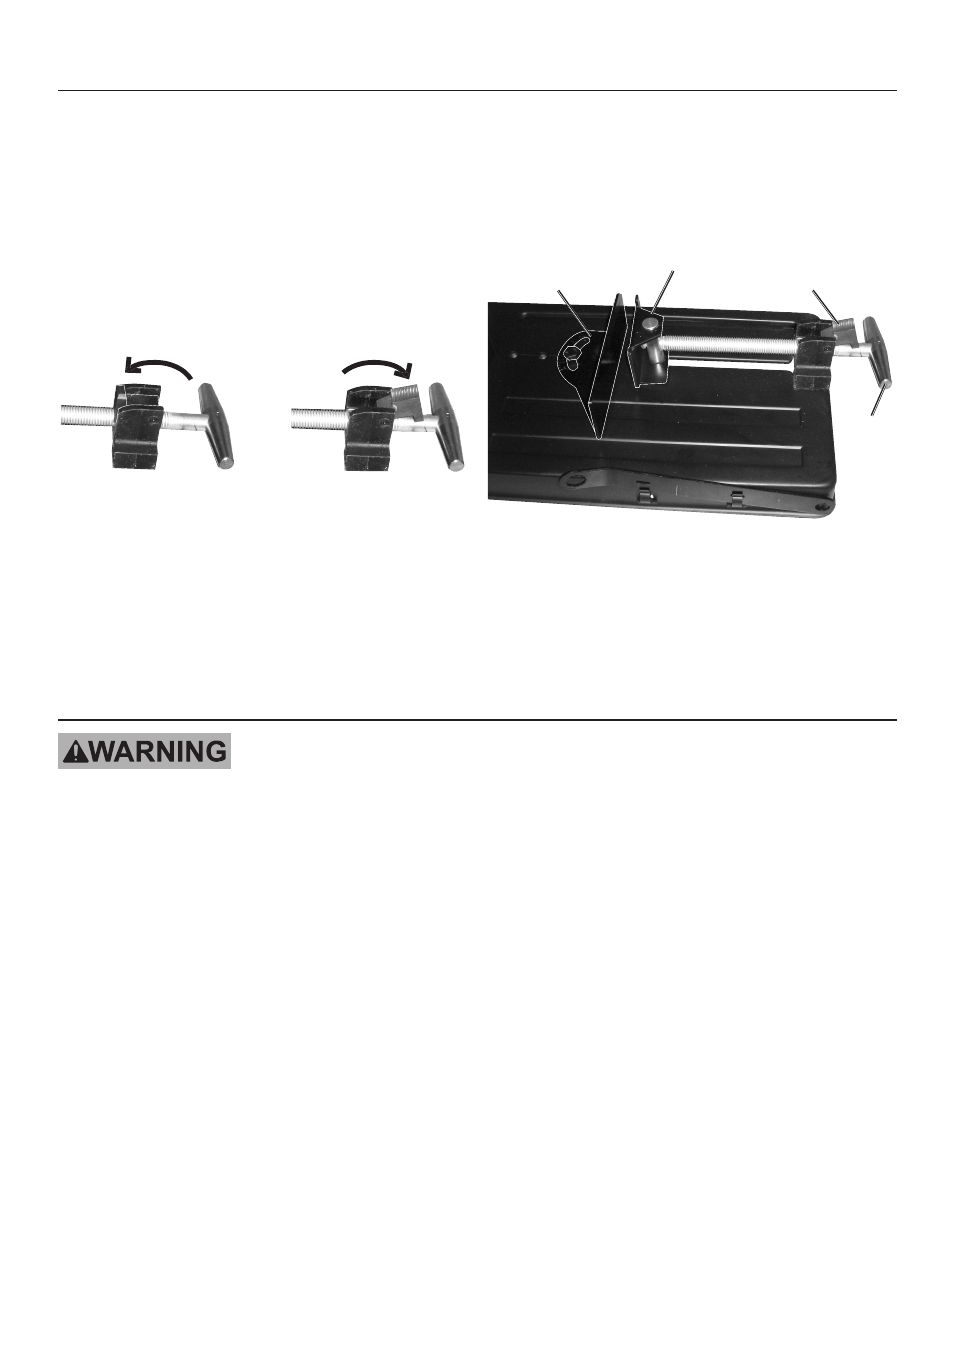
3. Secure loose work pieces using the vise
to prevent movement while working:
Engaged
Released
Figure E: Quick Release Positions
a. To use the Quick Release, put the Quick Release
tab in the position shown on the left in Figure E
and push the Vise (18) up against the workpiece.
Then tighten the Vise Crank. When releasing,
loosen the Vise Crank about a turn, lift up the
Quick Release, and pull the Vise Crank open.
b. To cut at various angles (up to 45°),
adjust the Angle Scale by loosening the two
Bolts (17). Adjust the Angle Scale to the desired
setting and then tighten the Bolts (17).
c. To reposition the Angle Scale, remove both of
the Bolts (17), and reattach the Angle Scale
using the other holes in the Base.
Angle
Guide (16)
Vise (18)
Vise
Crank
(8)
Quick
Release (15)
Vise (18)
Vise (18)
Guide (16)
Guide (16)
Guide (16)
Release (15)
Figure D: Vise Functions
General Operating Instructions
TO PREVENT SERIOUS INJURY:
DO NOT OPERATE WITH ANY GUARD DISABLED, DAMAGED, OR REMOVED. Moving guards must
move freely and close instantly. Bolt (39) MUST be loose before operation.
1. Using the Vise, secure your workpiece and,
if necessary, adjust the angle of the cut.
2. Raise the Saw by pushing down on it
and pulling out the Lock Ball (21).
3. Plug the Power Cord into the nearest 120 V~,
grounded, electrical outlet. Squeeze the
Trigger and press the Safety Button to start
the Saw. Allow the Cut-off Wheel to attain
full speed for one minute before working.
4. With one hand on the Handle and the other hand
clear, slowly bring the Saw down, letting the Saw
do the work. Do not apply excessive force.
5. If the Cut-off Wheel does not cut all the way through
the workpiece, raise the Saw and release the
Trigger. Unplug the unit. Wait until the unit comes
to a full stop. Remove the workpiece. Set the Depth
Bolt to a deeper setting and bring the Saw all the
way down to make sure the Cut-off Wheel doesn’t
contact the Base. If it does contact any part of
the Base, re-adjust the depth so it doesn’t.
6. Do not remove the workpiece until the
Cut-off Wheel has stopped moving.
7. After use, to prevent accidents, turn off the tool,
disconnect its power supply, and lock it down
by pushing it down as far as it will go, and then
pushing the Lock Ball (21) in after use. Clean,
then store the tool indoors out of children’s reach.