Step 3, Installation instructions, Step 4 – Quoizel DW5009C Downtown User Manual
Page 3: Step 5, Step 6, Step 7
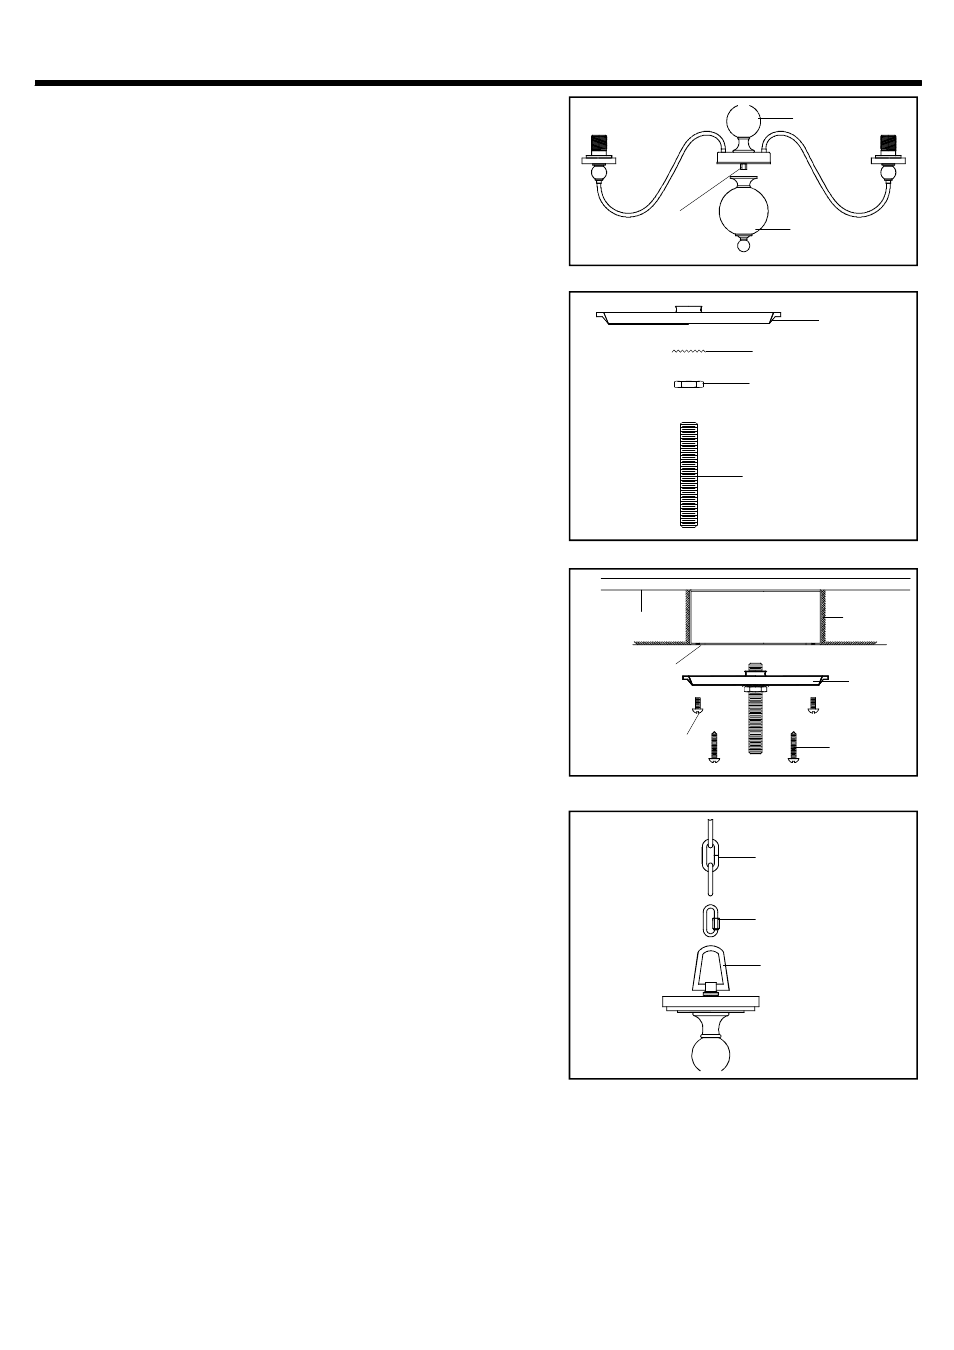
STEP 3 :
a
Thread the Bottom Assembly onto the Hex Coupling on
the bottom center of the Socket Assembly
Hand tighten
until snug
.
.
.
Socket Assembly
Bottom Assembly
INSTALLATION INSTRUCTIONS
STYLE NUMBER
DW5009C
:
Hex
Coupling
3 OF 5
STEP 4:
*
.
Plier is required on this step
a
Thread one Hex Nut onto top end of the Nipple
b
Place one Lock Washer over the top end of the Nipple
and then thread the Nipple into the center hole of the
Crossbar
Hand tighten until snug
c Using pliers
thread the Hex Nut against the Crossbar
and hand tighten until snug
.
.
.
.
.
.
,
.
Crossbar
Lock Washer
Hex Nut
1 4 IPS Nipple
/
STEP 5:
a
Drill a 5 8
diameter clearance hole on the top inside
center of the Outlet Box and through the Structural
Support Member
b
Place Crossbar onto the Outlet box and line up Mounting
Holes with a set of holes on Crossbar.
c. Thread Outlet Box Screws into the mounting holes on
the Outlet Box and tighten until snug to secure the
Crossbar
d Using portable screwdriver
thread Mounting Screws
into the Structural or Bridging Member and tighten until
snug
.
/ "
.
.
.
.
,
.
Crossbar
Outlet Box
Outlet Box Screw
not supplied
(
)
Mounting
Screw
Structural or
Bridging Member
Mounting Hole
STEP 6:
a
b
.
Locate the Fixture Chain and attach one end of it to
the Fixture Loop at the top of the Fixture with a Quick
Link Connector
Decide the length of the chain needed for your
application
You will be required to remove excess
links with bolt cutters
.
.
.
.
Fixture Chain
Quick Link
Fixture Loop
STEP 7:
a
Unravel the Fixture Wires
Ground Wires
Ground Wires and Safety Cable
b
Pass the wires through alternating links on the chain
Proceed to pass the wires through the
following mounting components in this turn
Canopy Lock Ring
Ceiling Canopy
Canopy Chain Loop
Lock Washer and Hex Nut
Nipple and
Crossbar
.
,
,
.
.
.
:
,
,
,
,
.