Quoizel CRA2826MC Cloverdale User Manual
Page 3
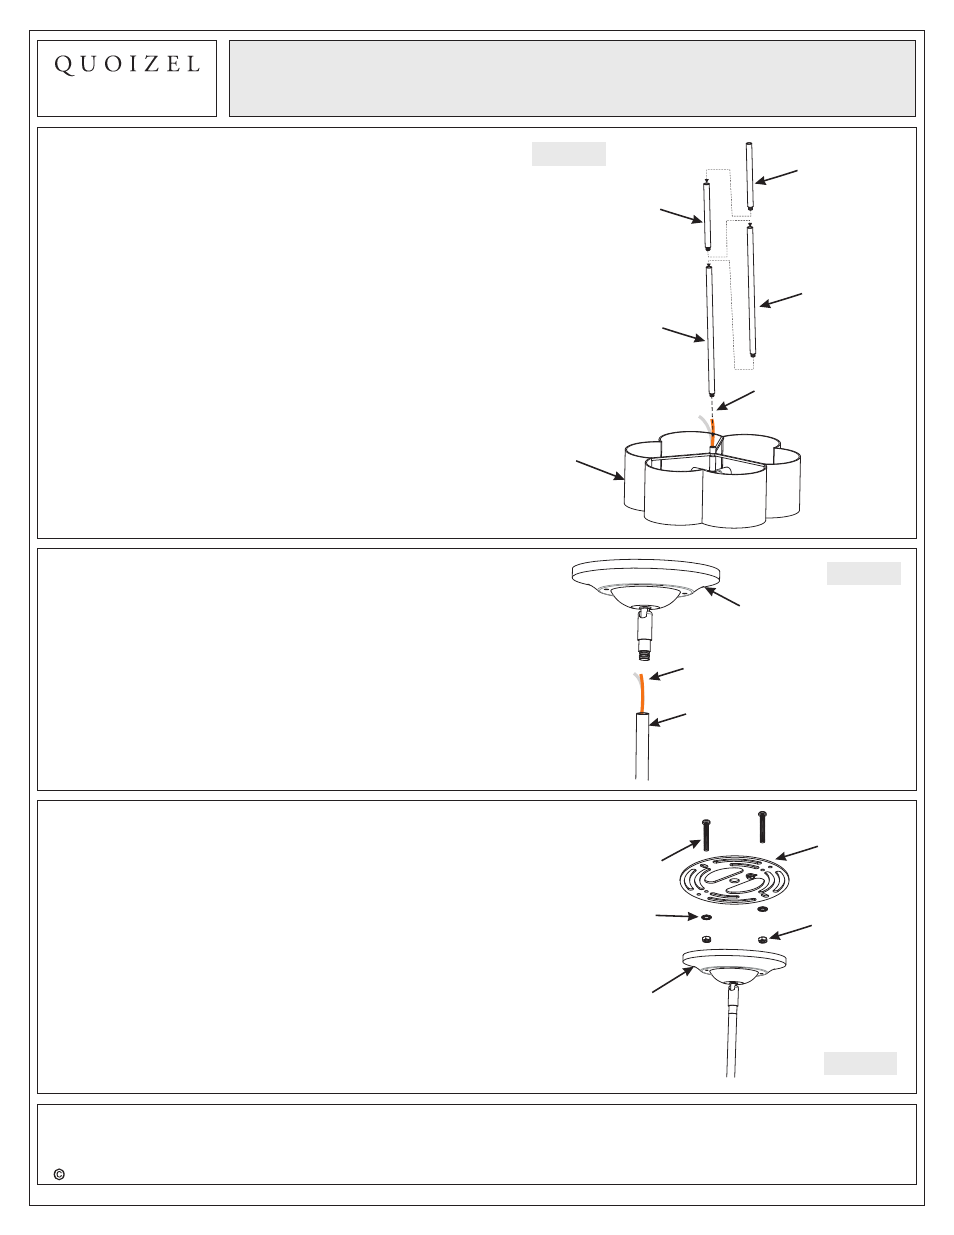
Figure 1
12” Rod with
Nipple
Thank you for purchasing a Quoizel product.
Need assistance with parts or assembly? Call Quoizel customer service at 1-631-273-2700
or visit us on-line at www.quoizel.com
3of6
STEP 1
Assemble Rods
-
A. Determine the Rods (G/H) to be assembled to the Socket
Assembly (I) according to your hanging height.
B. Pass Supply Wires and Ground Wire through the chosen
Rods (G/H) and then thread the chosen Rods (G/H) and
the Socket Assembly (I) together. Hand tighten until snug.
6” Rod with
Fixture Loop
6” Rod
12” Rod
Socket
Assembly
Supply Wire and
Ground Wire
Assembly Instruction Sheet #IS-CRA2826MC
For Style CRA2826MC
6 CORPORATE PARKWAY
GOOSE CREEK SC 29445
www quoizel com
,
.
.
.
2013 QuoizelInc.
STEP 2
Assemble Ceiling Canopy to Upper
Rod
-
A. Pass Supply Wires and Ground Wire through the Ceiling
Canopy (F) and then thread the Ceiling Canopy (F) and
the Upper Rod together. Hand tighten until snug.
Ceiling
Canopy
Upper Rod
Supply Wire and
Ground Wire
Figure 2
Figure 3
Crossbar
Mounting Screw
Lock Washer
Hex Nut
Ceiling
Canopy
STEP 3 - Attach Mounting Screws, Lock
Washers and Hex Nuts to Crossbar
A. Line up a set of holes on the Crossbar (A) and Holes on
the Ceiling Canopy (F).
B. Thread Mounting Screws (B) into the holes on the
Crossbar (A), pass Lock Washers (C) and thread Hex Nut
(D) onto the Mounting Screws (B). Hand tighten until
snug.
April2013