Quoizel ATM5005K Atrium User Manual
Page 6
Thank you for purchasing a Quoizel product.
Need assistance with parts or assembly? Call Quoizel customer service at 1-631-273-2700
or visit us on-line at www.quoizel.com
6of7
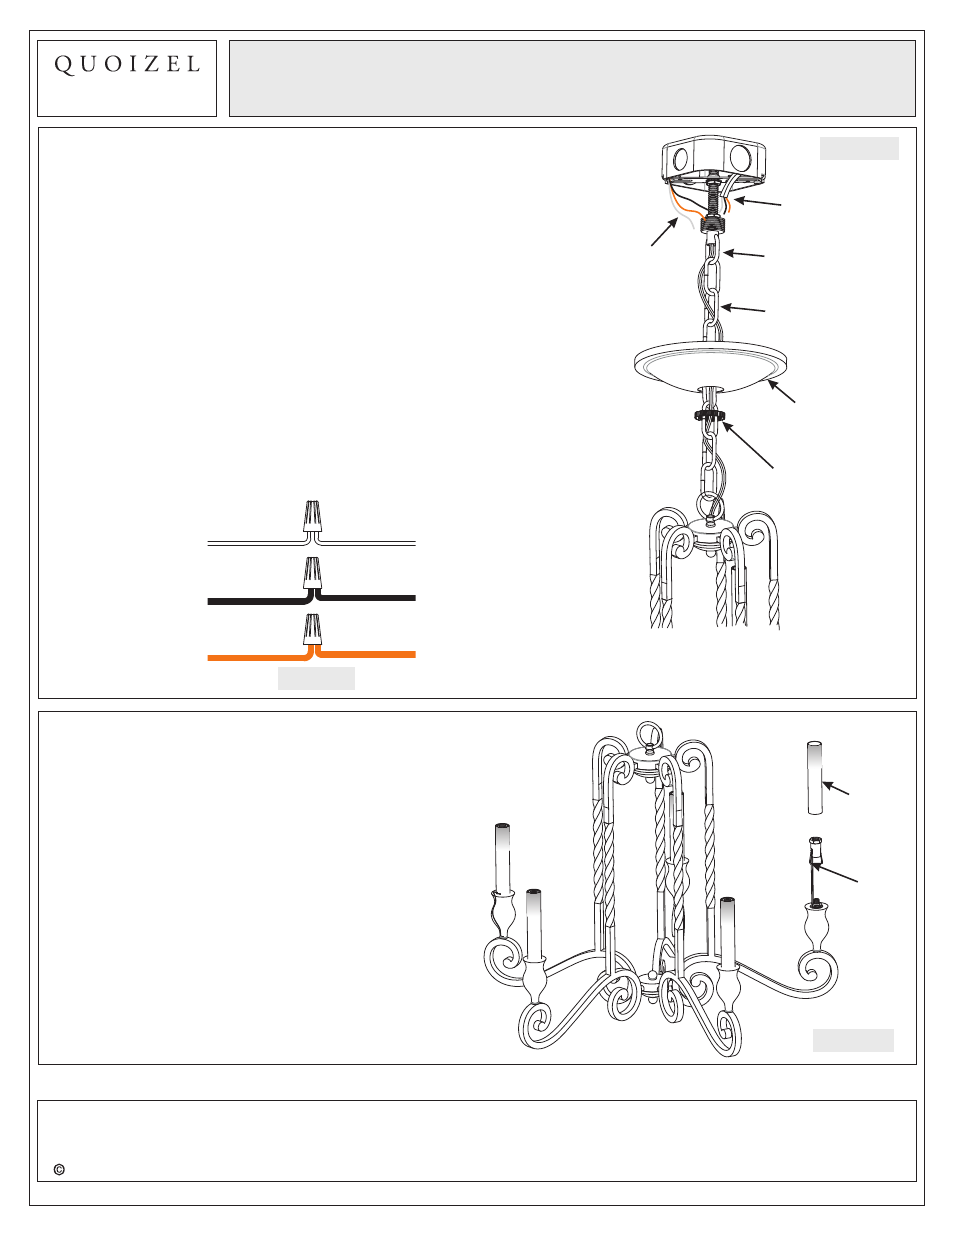
Figure 10
STEP 10 - Make Wire Connections
A. Un-thread the Canopy Lock Ring (F) and slide Canopy Lock
Ring (F) and Ceiling Canopy (H) down the Fixture Chain (G).
B. Push all slack fixture wire through Canopy Chain Loop (E)
into Outlet Box. Trim excess fixture wire leaving a minimum
of 6 inch. Hanging out of the Outlet Box.
C. Use standard wire connectors to make all wire connections.
(Connectors are not included with fixture.) Strip and prepare
wire ends according to instructions supplied with connectors.
D. Connect White Supply Wire from the Outlet Box to Ribbed
side Wire from fixture.
E. Connect Black (or Red) Supply Wire from the Outlet Box to
Smooth side Wire from fixture.
F. Connect Ground Wire from the Outlet Box to Ground Wire
from fixture.
G. Twist connectors until wires are tightly joined together.
H. Wrap each connection with approved electrical tape and
carefully stuff all the connected wires into the Outlet Box.
I. Re-attach the Ceiling Canopy (H) as shown in Step 7.
Figure 11
White wire from supply
Ribbed side wire from fixture
Black wire from supply
(or Red)
Smooth side wire from fixture
Ground wire from supply
Ground wire from fixture
Assembly Instruction Sheet #IS-ATM5005K
For Style ATM5005K
6 CORPORATE PARKWAY
GOOSE CREEK SC 29445
www quoizel com
,
.
.
.
Canopy Chain
Loop
Fixture Chain
Supply Wire and
Ground Wire
Supply Wire and
Ground Wire from
Outlet Box
Ceiling Canopy
Canopy Lock Ring
2013 QuoizelInc.
August2013
Candle
Cover
STEP 11
Install Candle Cover
-
A. Place Candle Cover (N) over the Socket properly with
Antique End is at the upper end.
Socket
Figure 12
Antique
End