Quoizel ATM5005K Atrium User Manual
Page 3
Thank you for purchasing a Quoizel product.
Need assistance with parts or assembly? Call Quoizel customer service at 1-631-273-2700
or visit us on-line at www.quoizel.com
3of7
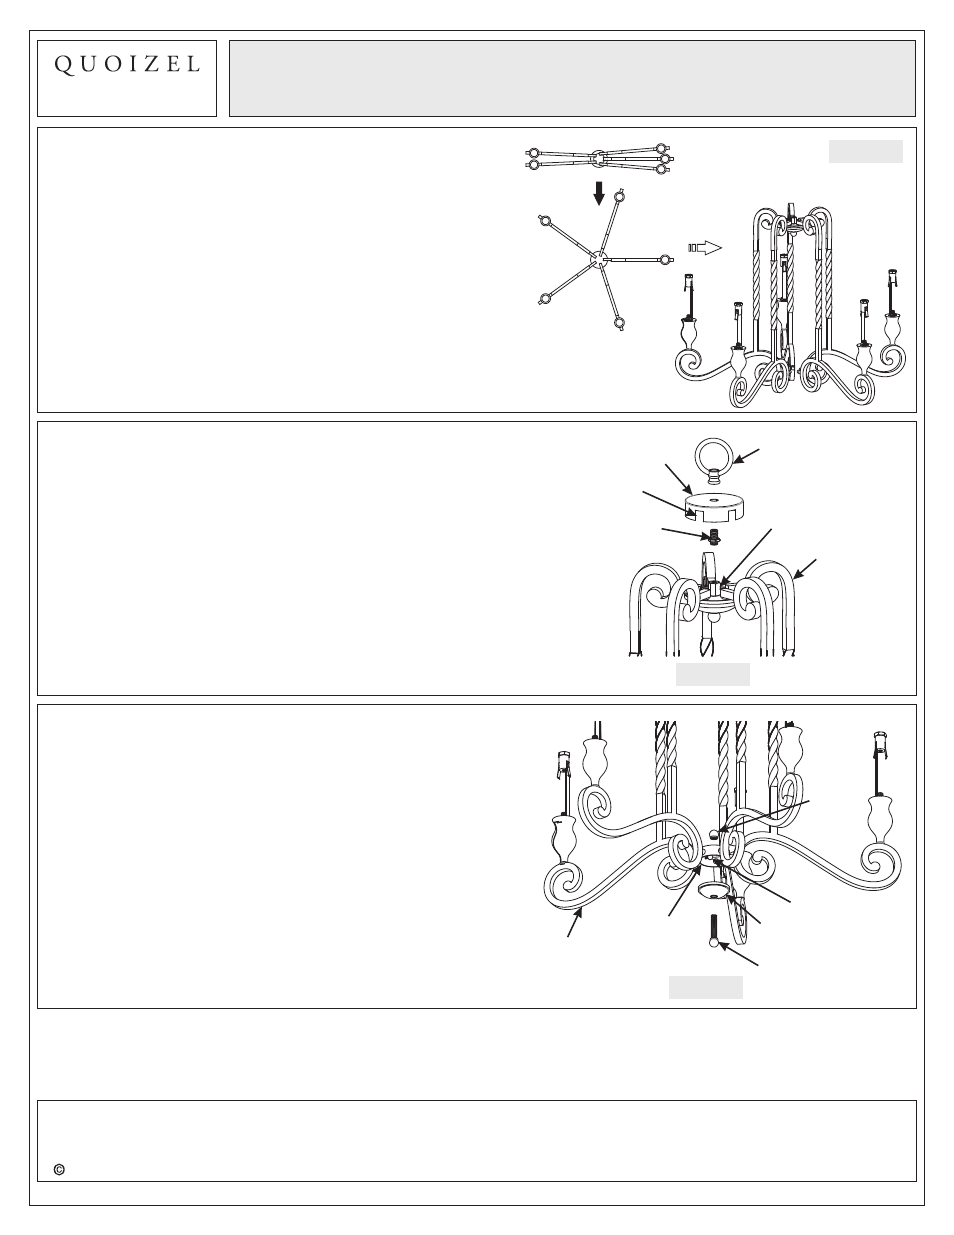
Figure 1
Assembly Instruction Sheet #IS-ATM5005K
For Style ATM5005K
6 CORPORATE PARKWAY
GOOSE CREEK SC 29445
www quoizel com
,
.
.
.
2013 QuoizelInc.
August2013
STEP 1
Unfold Support Arms
-
A. Unfold the Support Arms of the Socket Assembly (K) to
proper locations.
STEP 2 - Attach Cover with Gap to Socket
Assembly
A. Screw one end of the Nipple with Hex Nut (L) into the
Hex Coupling on the top center of the Socket Assembly
(I). By using pliers, thread the Hex Nut against the Hex
Coupling and hand tighten until snug.
B. Place the Cover with Gap (K) over the Nipple (L). Make
sure the Gaps on the Cover catch the Support Arms.
Secure by threading the Fixture Loop (J) onto the
Nipple (L). Hand tighten until snug.
Figure 2
Fixture Loop
Cover with Gap
Support Arm
Gap
STEP 3
Install Fixture Body
-
A. Unscrew the Finial on the top of the Fixture Body (M) to
separate the Finial with Nipple, Cap and the Fixture
Body.
B. Remove Lock Screws from Support Arms. Attach the
Fixture Body to the Support Arms and secure with Lock
Screws. Hand tighten until snug.
C. Pass the Cap and the Finial with Nipple back through
the Fixture Body and secure with the Finial. Hand
tighten until snug.
Finial with Nipple
Cap
Lock Screw
Support Arm
Finial
Fixture Body
Figure 3
Nipple with
Hex Nut
Hex Coupling