Battery cables installation / inside the cab, Battery cables installation / outside the cab – Tundra HDi3000 User Manual
Page 10
E_ HD(i)_Guide (E-HD(i)-GD-1113-EN)
10
Installation schema
3.6
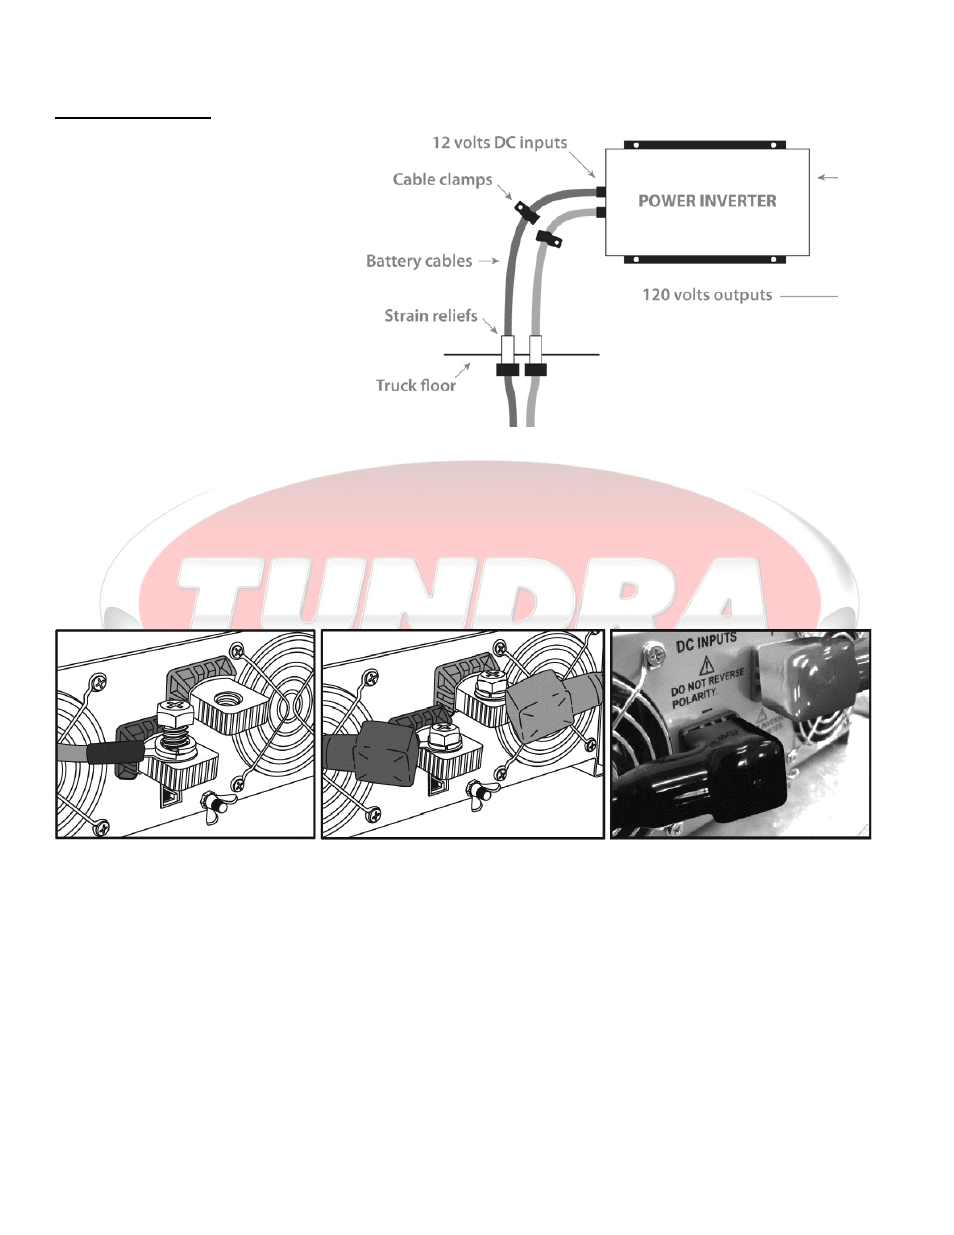
Battery cables installation / Inside the cab
Insert the cables through the holes you just drilled in order to permanently install the strain reliefs. Tighten the
nuts firmly using pliers or a wrench. Do not over tighten! Insert the include rubber insulators on the cables.
Install cables on DC inputs of the inverter respecting the polarities. RED = POSITIVE (+) / BLACK =
NEGATIVE (-). Install the rubber insulators. Adjust the cable length between the strain reliefs and the inverter
DC input in order to allow minimal movement of the cables and consequently reduce the stress on the inverter’s
inputs. Install cable clamps to avoid unnecessary vibration.
3.7
Battery cables installation / Outside the cab
Starting from underneath the cab (from the strain reliefs), insert ALL the remaining portion of the battery cables
in the plastic loom tubing. Run both cables together (tied together using the plastic cable ties) toward the
batteries using the metal clamps and cross members as support.
CAUTION!
This step requires skill and carefulness. Cables must be strongly attached so they
don’t rub on anything sharp and away from exhaust pipes, AC lines, coolant lines.
WARNING!
If your truck is equipped with an Air Ride system, cables must be able to move along
with the cab. Make sure to leave a “half a loop” of cable at the intersection where the
cables are linked between the cab and the battery box.