Triton RTA 300 User Manual
Page 4
6
7
GB
GB
Fitting the table
Assembly of this product is best done with the
table fitted to a workcentre or router stand.
Fitting to a Triton Series 2000 Workcentre
Fit the Series 2000
workcentre locking hook
(5) to the front tube of the
Table (1) using the M4 x
35mm countersunk screw
(6) and M4 hex nut (7).
(Fig 1)
Locate the hook into the
slot in the front end panel
of the workcentre and
lower the rear of the table
onto the bearing channels.
(Fig 2)
The router table is packed with the rear locking
catches positioned to fit the workcentre (domed
posts on the inside and catches slide toward one
another). Swing the post
ends of the latches out
toward the rear end panel,
and allow the rear of the
table to sit down flat on the
bearing channels. Secure
the rear down by swinging
the catches forward into the bearing channels.
(Fig 3)
Fitting to a Triton MK3
Workcentre
Place the Table (1) behind
the front end panel of the
workcentre and rest it on
the bearing channels. Align
the keyholes in the front
end panel of the workcentre with those in the
front tube of the router table and use the MK3
table locking pins to lock the table in position.
(Fig 4)
Secure the rear of the table down as described
above in the last paragraph of ‘Fitting to a Triton
Series 2000Workcentre’. (Fig 3)
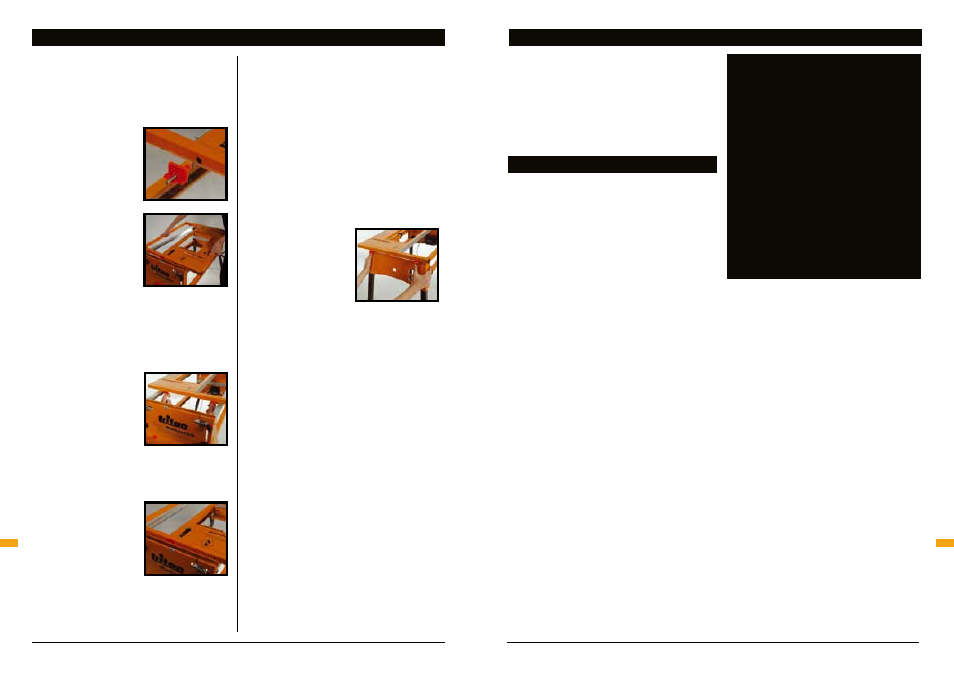
Fitting to a Triton Router Stand
Fit the Table (1) over the front end panel of
the router stand with the conical pins locating
through the holes on the inside face of the front
tube of the table.
The rear locking latches must be reversed from
their packed position by swinging the domed
post ends of the catches outward and sliding the
catches inwards toward one another. Secure the
rear of the table down
by lowering it onto the
tabs in the rear end panel
then sliding the catches
outward to engage into
the forms
on the panel. (Fig 5)
New Model Router Stand - RSA300:
There are four hanging hooks supplied with the
new model Triton Router Stand (RSA300) which
snap onto the lower tubes of the stand. The two
wide hooks are used for storage of the router
able fence - it hangs via the scale pointer holes.
These should be fitted to the right hand side
of the stand (when viewed from the switchbox
end). The two narrow hooks are for storage of
the pressure finger assembly swhich hang via
the finger slots. These should be fitted on the
left side. This model stand also has a hole in
the rear panel for storage of the protractor (3).
For a tight fit bend the tab in the top of the hole
downward slightly.
Fitting The Table
Warranty
FITTING THE TABLE
Triton Precision Power Tools guarantees
to the purchaser of this product that if
any part proves to be defective due to
faulty materials or workmanship within
12 MONTHS from the date of original
purchase, Triton will repair, or at its
discretion replace, the faulty part free of
charge.
This guarantee does not apply to
commercial use nor does it extend to
normal wear and tear or damage as a
result of accident, abuse or misuse.
* Register online within 30 days.
Terms & conditions apply.
This does not affect your statutory rights
To register your guarantee visit our web site at
www.tritontools.com* and enter your details.
Your details will be included on our mailing list
(unless indicated otherwise) for information on
future releases. Details provided will not
be made available to any third party.
PURCHASE RECORD
Date of Purchase: ___ / ___ / ____
Model: RTA300
Retain your receipt as proof of purchase
WARRANTY
FIG 1
FIG 2
FIG 4
FIG 5
FIG 3