Using the camera – Stealth Cam STC-U732K UNIT-7 User Manual
Page 7
WWW.STEALTHCAM.NET
Toll Free 877-269-8490
25
8AM to 8:30PM. Out of the time lapse time, said 20:30 to 08:00, the
camera will sleep no matter of activity level. NO capture at all.
If a user selected the Time lapse mode, and set the start time from
00:00 and end time at 00:00, and then selected the timeout to be
05:00 with a burst shot of 3P, this means the camera will keep taking
burst shot of 3 pictures for every 5 min, 24 hours non‐stop.
WWW.STEALTHCAM.NET
Toll Free 877-269-8490
26
USING THE CAMERA
Once all program settings have been setup properly, your Stealth Cam
is ready for field use.
Getting started
Listed below are some helpful pointers on how to use your camera to
get the best results.
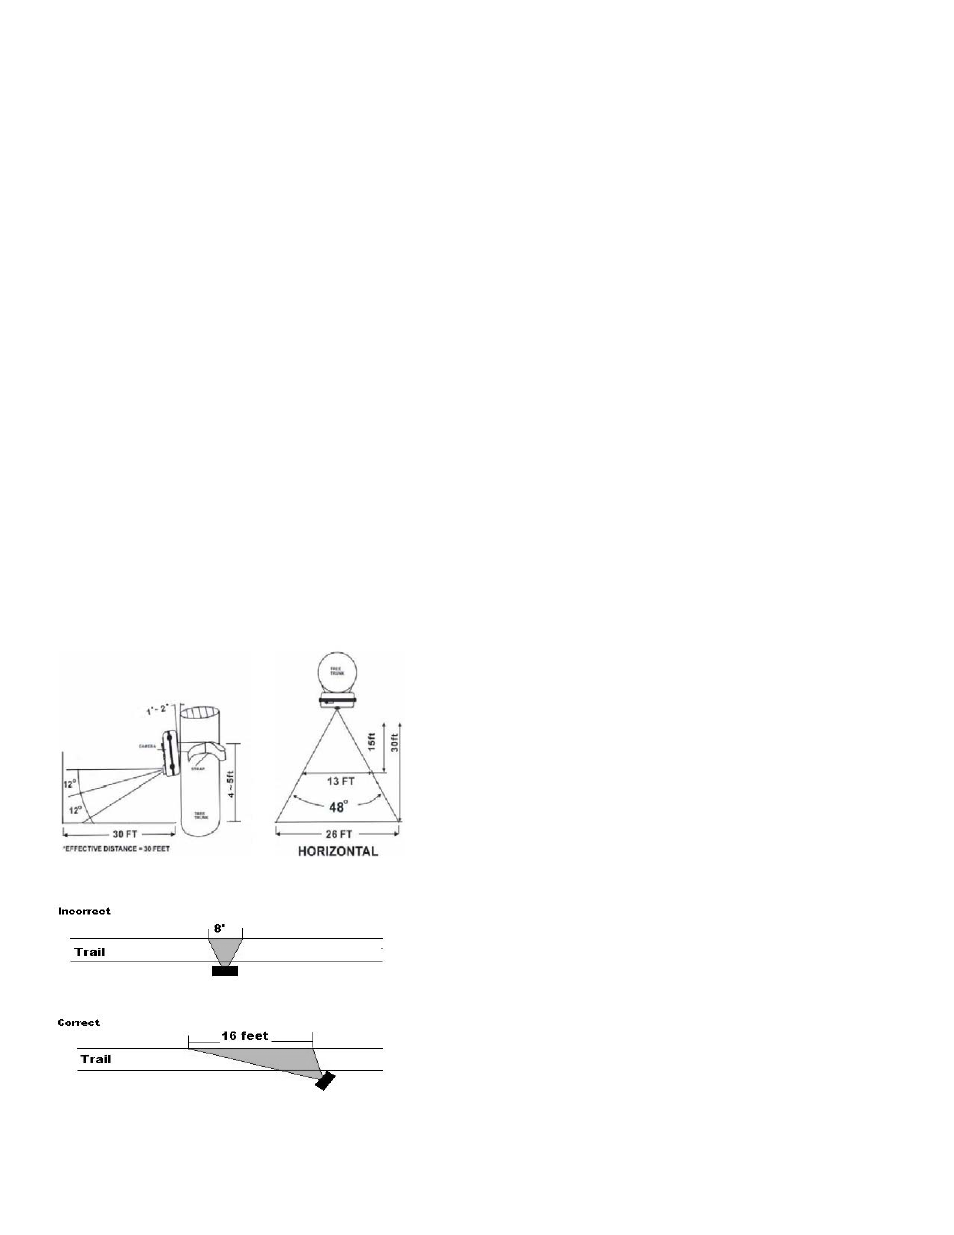
• Mount the camera about 4‐5 feet high with the camera pointed at
a slight downward angle.
• Mount the camera facing north or south NOT east or west due to
the rising and setting of the sun could produce false triggers and
overexposed images.
• If you’re covering a trail, face the camera down or up the trail.
Most commercial cameras take 1‐3 seconds to sense motion/heat
and take a picture.
• Clear out any brush or weeds in front of camera. This will cause
false pictures caused wind or high temperature days.
• Double check battery before turning on the camera for use.
• Make sure to insert the memory card after setting up the game
camera.
• Make sure to turn the camera ON (or take out of Test Mode)
before you leave.
• Verify time and date is correct.
WWW.STEALTHCAM.NET
Toll Free 877-269-8490
27
(Example: Mounting)
(Example: Trail Setup)
WWW.STEALTHCAM.NET
Toll Free 877-269-8490
28
Using the camera in PIR detection mode
• Mount the camera to the tree or other sturdy object using either a
tree screw (optional accessory) or supplied mounting strap.
• Open the front housing and move the switch to the ON position.
At this point, you have 30 seconds to start making any program
changes.
To Capture Videos, make sure display reads VIDEO:
• If display does not read VIDEO then,
¾ Press the [MENU] button once.
¾ The word CAMERA will blink.
¾ Press the [UP] button TWO times to toggle to Video mode.
¾ Press the [OK] button TWO times.
¾ Press the [MENU] button once to exit.
To Capture Images, make sure display reads CAMERA:
• If display does not read CAMERA then,
¾ Press the [MENU] button once.
¾ The word CAMERA will blink.
¾ Press the [UP] button ONE time to toggle to Camera mode.
¾ Press the [OK] button TWO times.
¾ Press the [MENU] button once to exit.