Viewing and deleting files – Stealth Cam STC-AC540IR Archer's Choice User Manual
Page 8
www.stealthcam.com
Toll Free 877-269-8490
29
Using the camera in PIR detection mode with customized
setting.
• Mount the camera to the tree or other sturdy object using either a
tree screw (optional accessory) or supplied mounting strap.
• Open the front housing and move the switch to the ON position
and the Program Selection switched to the CUSTOM position. At
this point, you have 30 seconds to start making any program
changes.
To Capture Videos, make sure display reads VIDEO:
• If display does not read VIDEO then,
¾ Press the [MENU] button once.
¾ The word CAMERA will blink.
¾ Press the [UP] button TWO times to toggle to Video mode.
¾ Press the [OK] button TWO times.
¾ Press the [MENU] button once to exit.
To Capture Images, make sure display reads CAMERA:
• If display does not read CAMERA then,
¾ Press the [MENU] button once.
¾ The word CAMERA will blink.
¾ Press the [UP] button ONE time to toggle to Camera mode.
www.stealthcam.com
Toll Free 877-269-8490
30
¾ Press the [OK] button TWO times.
¾ Press the [MENU] button once to exit.
• 30 seconds after you’ve made your adjustments, the camera’s
green LED light will begin blinking and enter count down mode.
This is your indication to leave the coverage area within one
minute.
• After one minute, the camera will enter either image burst mode
or adjustable video mode based on your program setting. The
camera will then time out between 0‐59 seconds or 0‐59 minutes,
depending on your program setting.
NOTE: The time between motion detection and the camera taking
the pictures may vary due to lighting conditions, program settings,
and battery power level. The IR Emitter will only activate in low light
conditions.
www.stealthcam.com
Toll Free 877-269-8490
31
VIEWING AND DELETING FILES
The STC‐AC540IR cam offers the user different options for viewing
their images. You can view images or videos through either a
handheld LCD monitor or your home TV that is equipped with and RCA
Input jack. The external LCD display on the front of the housing will
show the number of images in memory.
NOTE: The instructions below are based on starting with a camera
that’s power is turned off.
For viewing on handheld LCD monitor:
• Attach the appropriate cable to the TV port on the side of the
camera.
• Insert the other end into the VIDEO IN jack on the handheld LCD
video monitor.
• Turn on both the camera and the monitor.
• You will see a series of thumbnail images on your monitor.
• Press the [UP] or [DN] button to navigate though your thumbnail
images.
• On the upper left hand corner of your TV monitor, it will either
display the image OR the image with a video icon which
indicates it’s a video clip.
• To view in full screen, press the [OK] button.
• Press the [OK] button again, it will return to the thumbnail view
from the full screen image.
www.stealthcam.com
Toll Free 877-269-8490
32
For viewing on your home TV monitor:
• Attach the appropriate cable to the TV port on the side of the
camera.
• Insert the other end into the RCA VIDEO IN jacks on the TV.
• Turn on both the camera and the TV monitor.
• Make sure to switch to AUX / VIDEO IN mode on your TV.
¾ (See your TV owner’s manual for directions).
• The camera’s TV OUT is set to NTSC by default. (NTSC – Standard
North American TV format)
¾ If the TV monitor doesn’t flicker, then you do not need to
change your camera’s TV OUT setting. Proceed to the next
section called Thumbnail Images.
¾ If the TV monitor does flicker, then you will need to proceed
to the next step to change your camera’s TV OUT from NTSC
to PAL (Standard European TV format).
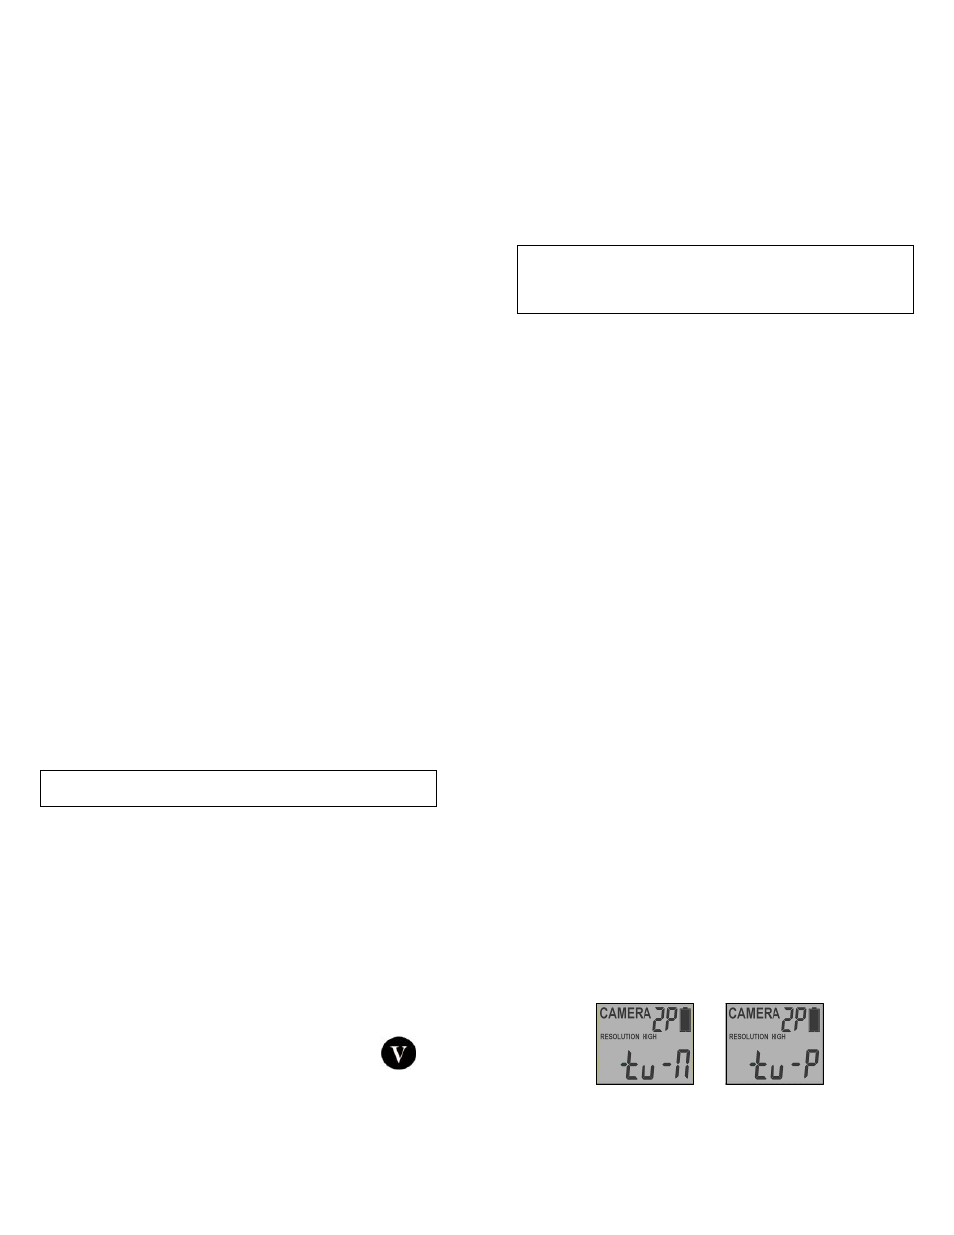
• Press the [MENU] button once.
• The word “ tu ” on the camera’s internal screen will be blinking.
• Press the [OK] once and now you’ll see “ tu –
n
“ blinking.