Starlight Xpress Lodestar-C imager/guider User Manual
Page 3
Lodestar C handbook Issue 1 May 2011
be very ‘washed out’ (chlorophyll reflects infrared very strongly). Also, the infrared focusing of many
lenses and refractors is poor, leading to fuzzy star images, if the IR is not filtered out. Please bear these
points in mind when choosing a lens or telescope, you may find that an infrared blocking filter is
essential for many such optics.
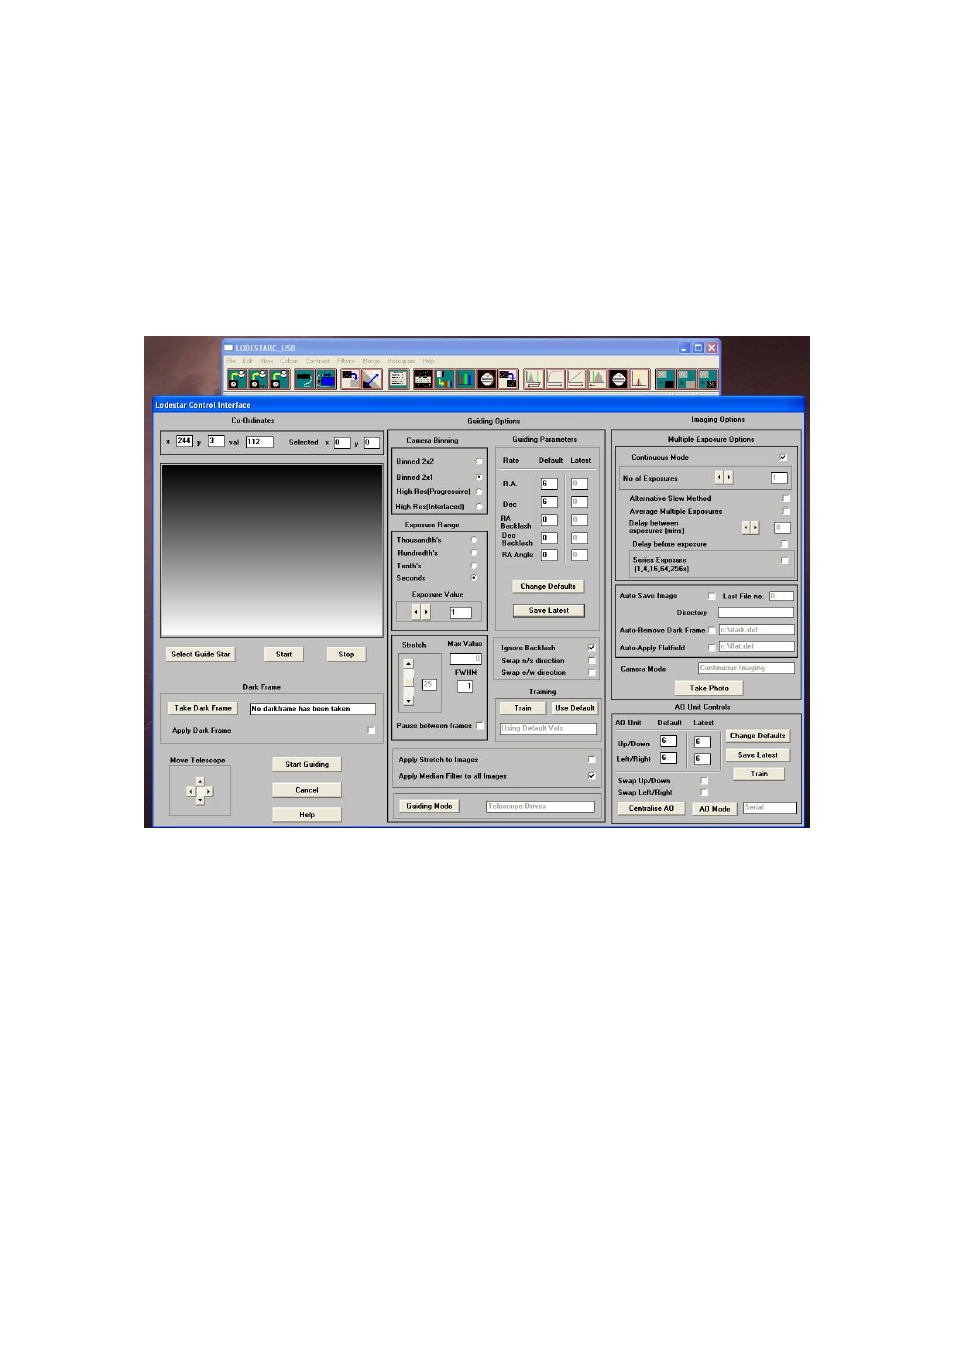
Once you have decided on your lens or telescope, attach the Lodestar C so that the CCD is close to the
focal plane and then point the ‘scope at a bright star. Start the Lodestar C software and select the
camera symbol from the top row of icons. The camera control panel should open, but if you see ‘USB
device not found’ please check that the Lodestar is connected correctly and, if so, try opening ‘Set
Program Defaults’ from the ‘File’ menu and select ‘Ignore VID/PID’. Save this setting and try opening
the camera dialog again.
Once you see the camera control panel, as above, select ‘Continuous Mode’, 1 second exposure and
‘Binned 2 x 1’. You can now press ‘Take Photo’ and you will see a steady stream of images appear in
the display panel. With luck, you will see one or two out of focus stars and you can then refine the
telescope focusing to get the sharpest possible result. Press ‘Esc’ to end the Continuous Mode
sequence.
Once the focus is optimum, switch the imaging mode to High Res (Progressive) and increase the
exposure time to about 30 seconds (switch off Continuous Mode). You should now see a star field with
a wide range of star brightness – you might also detect a hint of a ‘grid’ across the image, but this is
normal. The grid is caused by the filter matrix on the CCD, but will disappear when the images are
converted to colour.
I suggest that you now try imaging something with good colour, such as M42 or M27. M42 needs
about 60 seconds exposure at F5, while M27 will need about 5 minutes for a reasonable image density.
Save a selection of unprocessed image frames for experimenting with and practising your processing
techniques. Don’t spend much time colour processing at the ‘scope – this will waste good imaging
time! Once you have some good images to experiment with, you can try some colour processing, as
follows:
Open an image and then select ‘Set program defaults’. Make sure that the Pixel and Line offsets in
‘Camera Offsets’ are both unchecked – this affects the way that the colour filters on the CCD are
assumed to be organised and both ‘off’ is usually correct. You can confirm this by taking a daylight