8_english, For eq2 mount, Telescope assembly – Sky-Watcher EQ2 MOUNT User Manual
Page 8: Tripod set up
8
FOR EQ2 MOUNT
INSTALLING COUNTERWEIGHT (Fig.18)
1) Slide counterweight halfway onto rod. Hold the counterweight with one hand and insert
counterweight rod into threaded hole on mount with the other hand. Tighten
counterweight rod onto mount.
2) Tighten thumbscrew to lock counterweight in place.
INSTALLING CONTROL CABLES (Fig.19)
1) Locate the control cables. The control
cables have two different lengths.
Although you can mount either cable
to each direction axis, it is recommended
that you mount the longer cable to the
declination axis and the shorter cable
to the right ascension axis (setting circle).
2) To install the control cables, slide the
sleeve end of the cable over the nipple
on the end of the worm gear. Tighten
the cable using the set screw against
the flat surface on the nipple.
(long)
(short)
TELESCOPE ASSEMBLY
Fig.18
Fig.19
ADJUSTING TRIPOD LEGS (Fig.15)
1) Slowly loosen the height adjustment clamp and
gently pull out the lower section of each tripod leg.
Tighten the clamps to hold the legs in place.
2) Spread the tripod legs apart to stand the
tripod upright.
3) Adjust the height of each tripod leg until the
tripod head is properly leveled. Note that the
tripod legs may not be at same length when
the equatorial mount is level.
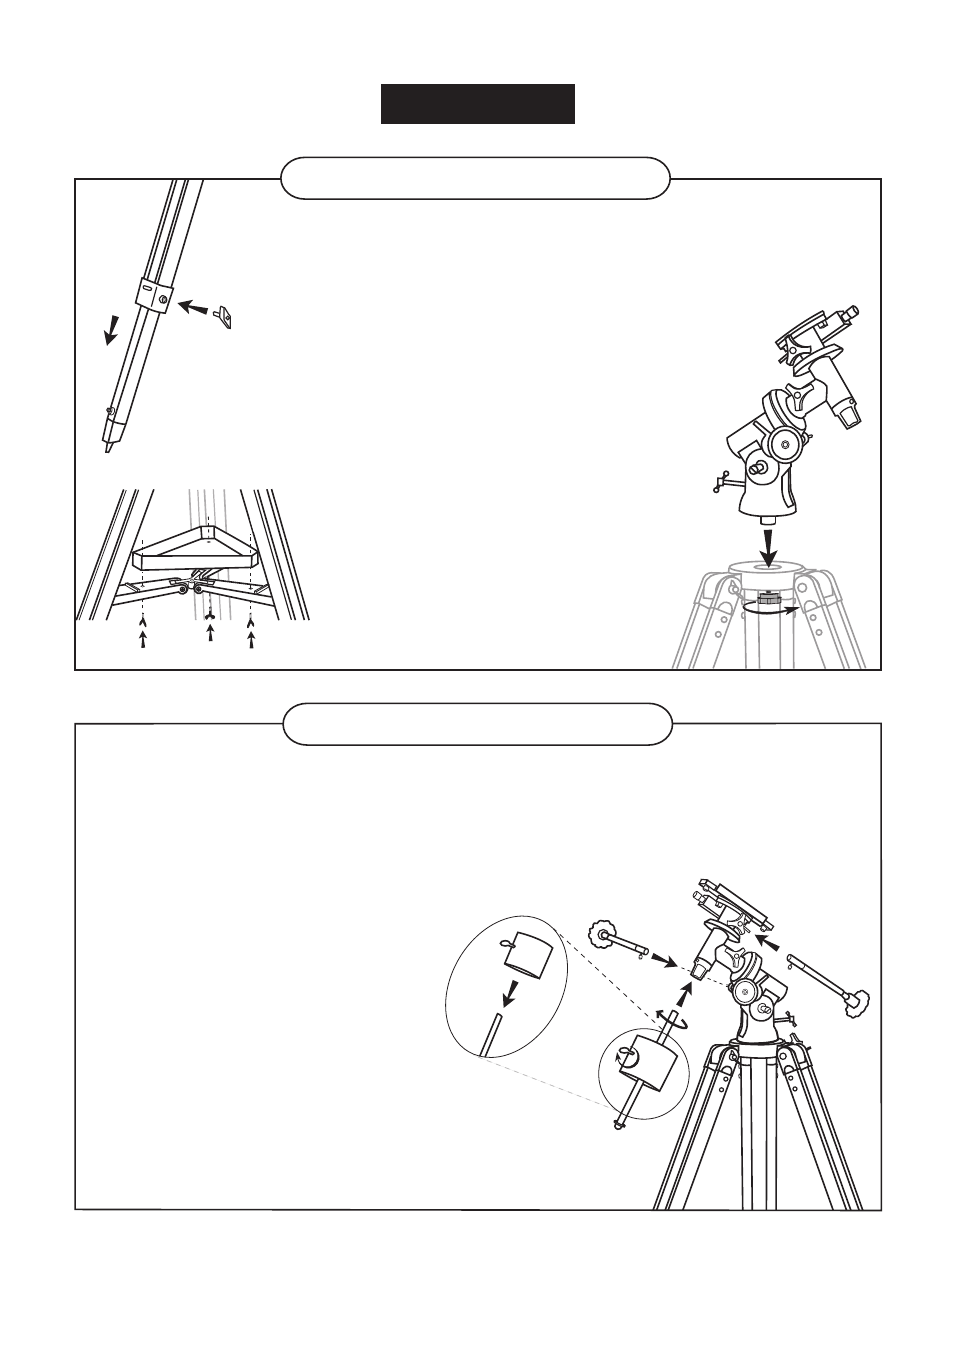
ATTACHING THE ACCESSORY TRAY (Fig.16)
1) Place the accessory tray on top of the bracket, and
secure with the locking knob from underneath.
ATTACHING MOUNT TO TRIPOD LEGS (Fig.17)
1) Place the equatorial mount inside the tripod
mounting platform.
2) Push the azimuth lock knob/locking shaft up
and thread the screw into the hole in the
bottom of the mount.
Fig. 15
Fig. 16
Fig.17
TRIPOD SET UP