11_english, Operating your telescope, Ligning the finderscope – Sky-Watcher EQ2 MOUNT User Manual
Page 11: Sing the red dot finder
OPERATING YOUR TELESCOPE
A
ligning the finderscope
11
Fig.a2
Fig.a3
Fig.b1
Fig.a1
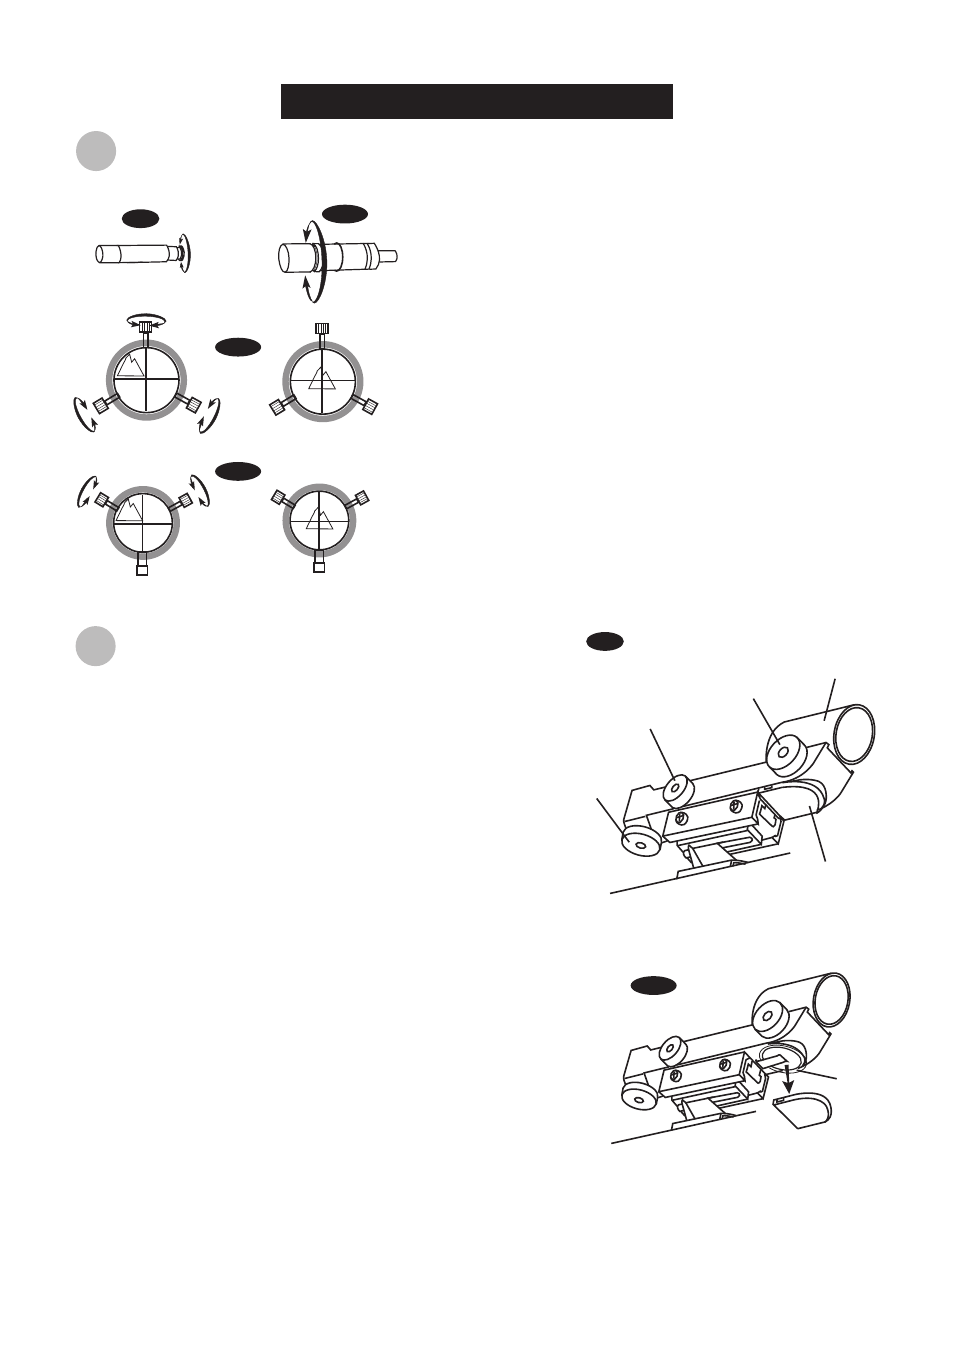
These fixed magnification scopes mounted on the optical tube are
very useful accessories. When they are correctly aligned with the
telescope, objects can be quickly located and brought to the
centre of the field. Alignment is best done outdoors in day light
when it's easier to locate objects. If it is necessary to refocus your
finderscope, sight on an object that is at least 500 yards (metres)
away. For 6x24 finderscope: twist the end of the finderscope until
focus is reached (Fig.a). For 6x30 finderscope: loosen the locking
ring by unscrewing it back towards the bracket. The front lens
holder can now be turned in and out to focus. When focus is
reached, lock it in position with the locking ring (Fig.a1).
Choose a distant object that is at least 500 yards away and
point the main telescope at the object. Adjust the telescope so
that the object is in the centre of the view in your eyepiece.
Check the finderscope to see if the object centred in the main
telescope view is centred on the crosshairs.
For the 6x24 finderscope, use the three alignment screws to
centre the finderscope crosshairs on the object (Fig.a2). For the
6x30 finderscope with spring loading, adjust only the two small
screws (Fig.a3).
1)
2)
3)
U
sing the Red Dot Finder
The Red Dot Finder is a zero magnification pointing tool that uses a
coated glass window to superimpose the image of a small red dot
onto the night sky. The Red Dot Finder is equipped with a variable
brightness control, azimuth adjustment control, and altitude
adjustment control (Fig.b). The Red Dot Finder is powered by a
3-volt lithium battery located underneath at the front. To use the
Finder, simply look through the sight tube and move your
telescope until the red dot merges with the object. Make sure to
keep both eyes open when sighting.
Azimuth
adjustment
control
ON/OFF
Brightness
Control
Altitude
Adjustment
Control
Battery cover
Sight Tube
Plastic
shipping
cover
Aligning the Red Dot Finder
Like all finderscopes, the Red Dot Finder must be properly aligned with the
main telescope before use. This is a simple process using the azimuth and
altitude control knobs.
Open the battery cover by pulling it down (you can gently pry at the 2
small slots) and remove the plastic shipping cover over the battery
(Fig.b1).
Turn on the Red Dot Finder by rotating the variable brightness control
clockwise until you hear a "click". Continue rotating the control knob to
increase the brightness level.
Insert a low power eyepiece into the telescope's focuser. Locate a bright
object and position the telescope so that the object is in the centre of the
field of view.
With both eyes open, look through the sight tube at the object. If the red
dot overlaps the object, your Red Dot Finder is perfectly aligned. If not,
turn its azimuth and altitude adjustment controls until the red dot is
merged with the object.
1.
2.
3.
4.
Fig.a
Fig.b