12_english, Alancing the telescope, Perating the eq1 mount – Sky-Watcher EQ2 MOUNT User Manual
Page 12
12
B
alancing the telescope
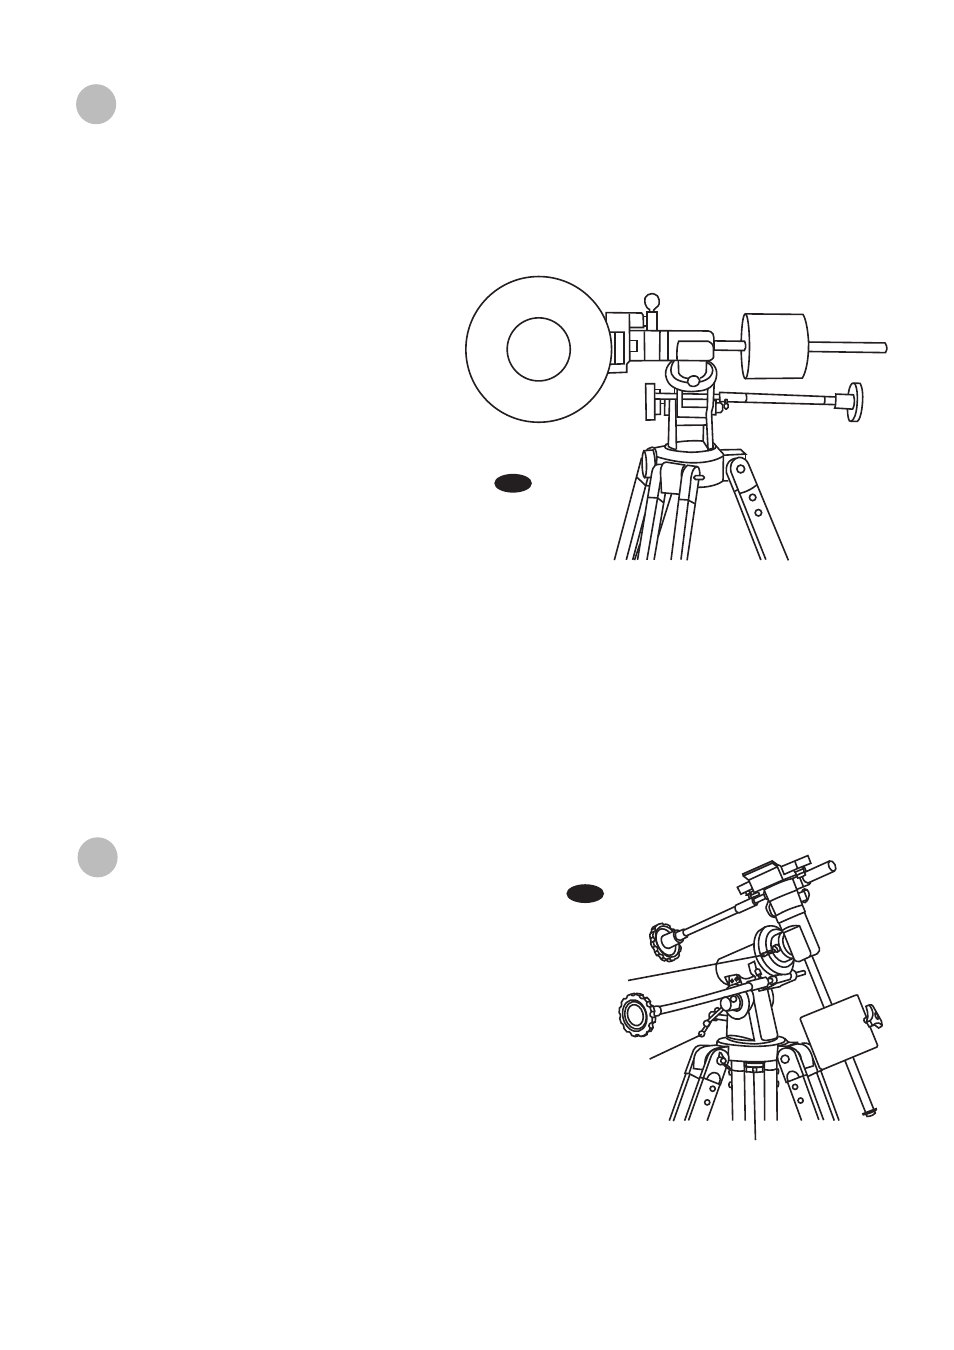
Fig.c
The telescope should be balanced before each observing session. Balancing reduces stress on the mount and allows
precise micro-adjustment control. A balanced telescope is especially critical when using the optional clock drive for
astrophotography. The telescope should be balanced after all accessories (eyepiece, camera, etc.) have been attached.
Before balancing your telescope, make sure that your tripod is in a balanced level and on a stable surface. For
photography, point the telescope in the direction you will be taking photos before performing the balancing steps.
1)
2)
3)
4)
5)
For best result, adjust the altitude of the mount to
between 15º and 30º if possible by using the
altitude adjustment T-bolt.
Slowly unlock the R.A. and Dec. lock knobs. Rotate
the telescope until both the optical tube and
counterweight rod is horizontal to the ground,
and the telescope tube is to the side of the
mount. (Fig.c)
Tighten the Dec. lock knob.
Move
the
counterweight
along
the
counterweight rod until the telescope is
balanced and remains stationary when
released.
Tighten the counterweight thumb screw to hold
the counterweight in its new position.
R.A. Balancing
DEC. Balancing
1)
2)
All accessories should be attached to the telescope before balancing around the declination axis. The R.A. balancing
should be done before proceeding with Dec. balancing.
For best results, adjust altitude of the mount to between 60º and 75º if possible.
Release the R.A. lock knob and rotate around the R.A. axis so that the counterweight rod is in a horizontal position.
Tighten the R.A. thumbscrew.
3)
4)
5)
Unlock the Dec. thumbscrew and rotate the telescope tube until it is paralleled to the ground.
Slowly release the telescope and determine in which direction it rotates. Loosen the telescope tube rings and slide
the telescope tube forward or backward in the clamps until it is balanced.
Once the telescope no longer rotates from its parallel starting position, re-tighten tube rings and the Dec. lock knob.
Reset altitude axis to your local latitude.
O
perating the EQ1 mount
Altitude adjustment
(up-down)
R.A. lock knob
Azimuth adjustment (left-right)
The EQ1 mount has controls for both conventional altitude
(up-down) and azimuth (left-right) directions of motion. These
two adjustments are suggested for large direction changes and
for terrestrial viewing. Use the large knurled knob located
underneath for azimuth adjustments. Loosen the knob and
rotate the mount head around the azimuth axis. Use the altitude
adjustment T-bolts for altitude adjustments (Fig.d).
In addition, this mount has Right Ascension (hour angle) and
declination direction controls for polar-aligned astronomical
observing. Loosen the lock knobs to make large direction
changes. Use the control cables for fine adjustment after the
lock knobs have both been locked (Fig.d1). An additional scale is
included for the altitude axis. This allows polar alignment for
your local latitude. (Fig.d2)
Fig.d