9 tests, 1 lift, 2 adjustment of set pressure – Richter KSEA/F Series Safety Valves User Manual
Page 18: 3 pressure setting, 4 set pressure tolerances, 5 seat tightness test, Tests, Lift 18, Adjustment of set pressure, Pressure setting

Series KSEA/F
Page 18
9530-052-en
Revision 03
TM 7128
Edition 05/2008
Lowering the bellows onto the seat
For this purpose screw the adjusting screw 538
into the spring bonnet 513 until the spacer can be
freely moved.
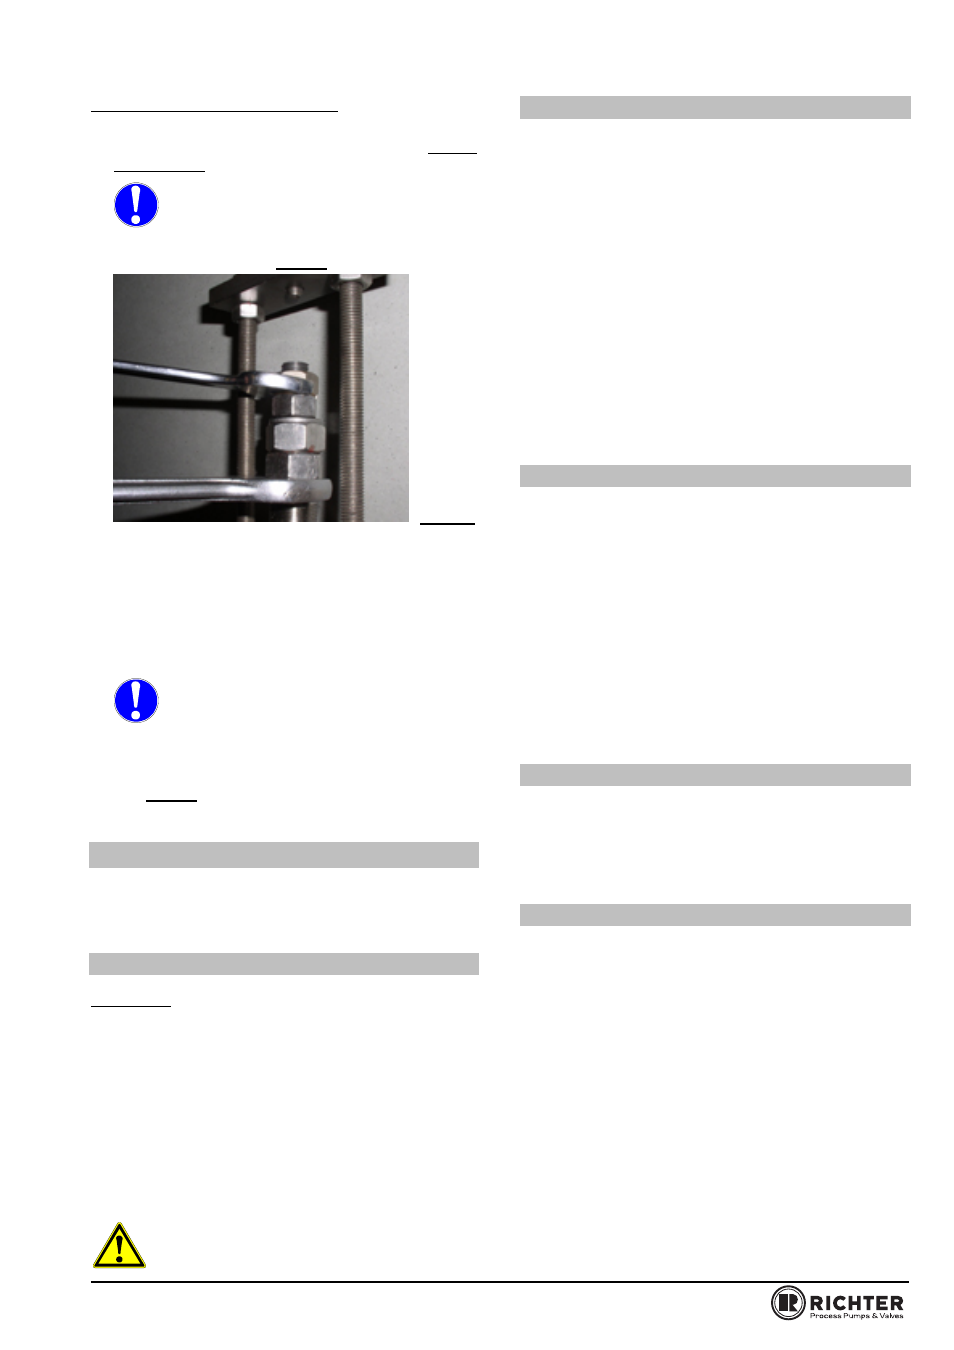
When tightening the adjusting screw 538,
hold the spindle 802 with a wrench on the
counter nut to prevent it from turning so
that the bellows 206 or the spring-type pin 939/1
are not damaged. See Fig. 25.
Fig. 25
Undo the counter nut and remove the spacer.
Now the valve can be set to the specified set
pressure.
Secure the spindle nut 534 and hex. nut with self-
locking feature 929/1 on the end of the spindle and
counter against each other. Set the adjusting
screw 538 accordingly.
When screwing the hex. nut with self-
locking feature 929/1 on or off the spindle
802 or when setting the adjusting screw
538, hold the spindle with a wrench on the counter
nut to prevent it from turning so that the bellows
206 or the spring-type pin 939/1 are not damaged.
See Fig. 25
9.9 Tests
Following the assembly of the valve, the lift and the
test pressure must be checked.
9.9.1 Lift
Lift check:
Remove the cap nut 935/1 from the lifting cap 535
and determine the height of the stem 802 up to the
upper edge of the lifting cap 535.
Determine the dimension from the raised face of
the valve inlet to the plug in both the closed and
fully opened state.
Actuate the lifting lever 238 until the mechanical
travel stop can be felt.
The measurement can be made with a slide calliper
gauge and a depth indicator to DIN 862.
The lift is derived from the difference in the
two heights. It must be at least as high as
the lift given in the test certificate.
9.9.2 Adjustment of set pressure
According to UG-136 (d)(4) each pressure relief valve
shall be tested to demonstrate its popping or set
pressure. Pressure relief valves marked for gas or
vapour may be tested with air. Pressure relief valve
marked for liquid service shall be tested with water or
other suitable liquid.
In mounted condition the KSEA/F is set by adjustment
of the screw to the required set pressure. For tests
with air the set point is the pressure at which the valve
discs moves in the opening direction a larger amount,
as compared with the corresponding movements at
higher or lower pressures.
For tests with water, the correct testing point is the
pressure measured at the valve inlet, at which the first
steady stream of liquid is visually detected at the valve
outlet.
9.9.3 Pressure setting
When a single pressure relief device is used, the set
pressure marked on the device shall not exceed the
maximum allowable working pressure of the vessel.
When the required capacity is provided in more than
one pressure relief device, only one pressure relief
device need be set at or below the maximum
allowable working pressure, and the additional
pressure relief devices maybe set to open at higher
pressures but in no case at a pressure higher than
105% of the maximum allowable working pressure.
The correct set pressure is documented on the
inspection sheet.
9.9.4 Set pressure tolerances
According to UG-134 (d)(1) the set pressure tolerance
shall not exceed ± 0,138 bar (± 2 psi) for pressures up
to and including 4.83 bar (70 psi) and ± 3% for
pressures above 4.83 bar (70 psi).
9.9.5 Seat tightness test
After completion of the tests required by UG-136
(d)(4) seat tightness test shall be conducted.
This test should take place on a test bench with a
neutral medium such as air or water.
Regarding their suitability and precision, the
employed pressure gauges must conform to the
requirements of the ASME Code Section VIII,
Division 1, UG-102.
Unless otherwise designated by a Manufacturer's
published pressure relief valve specification, the
seat tightness test and acceptance criteria shall be
in accordance with API 527-1991.
The valve shall be vertically mounted on the test
stand.
To check the seat tightness pressure, the pressure
in the valve inlet is slowly decreased until the valve
is bubble-tight.
