Speaker connections, Single-wired system connections, Connector panel – Revel Voice User Manual
Page 8
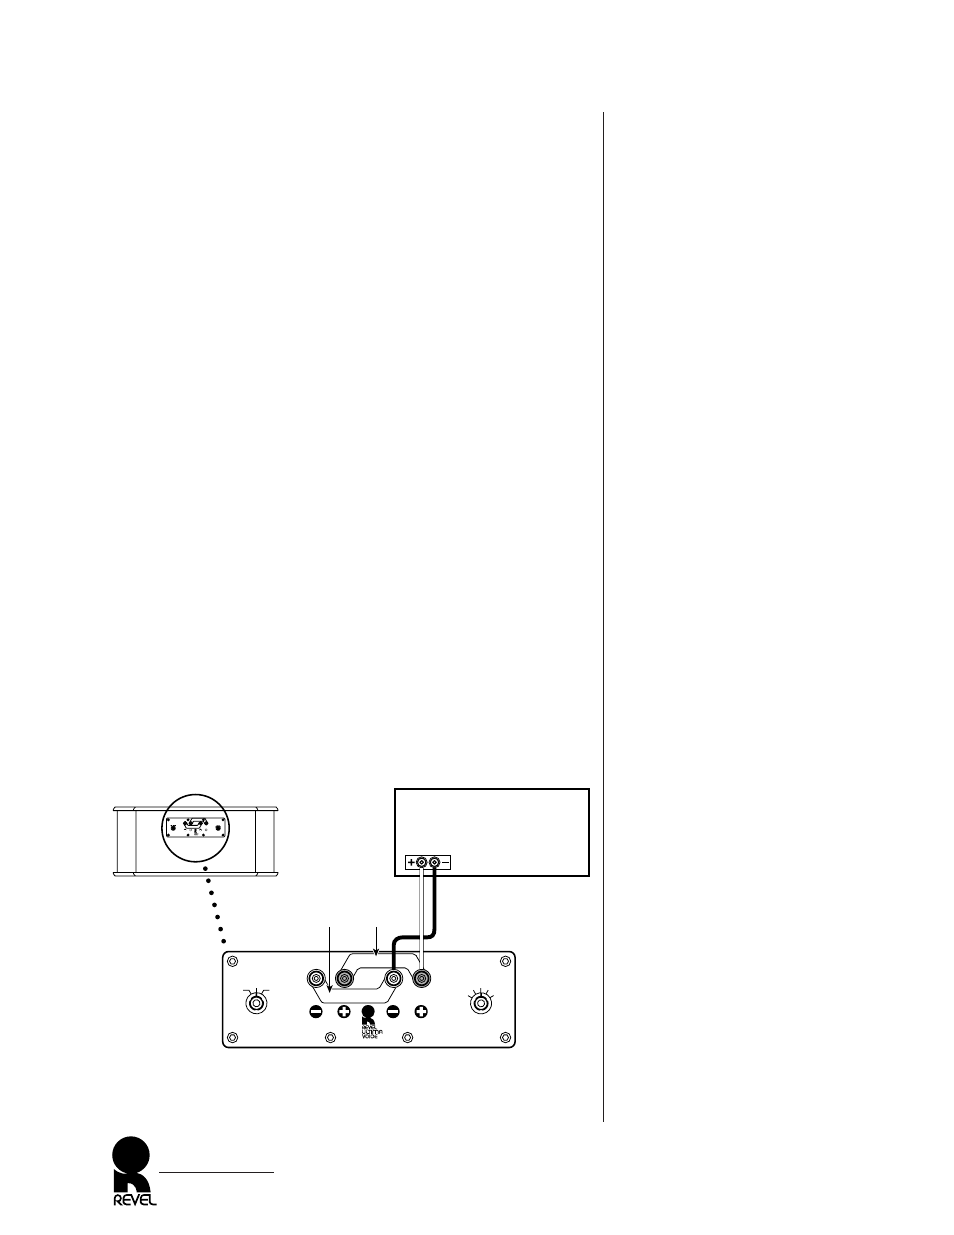
Figure 6. How to connect the
VOICE center-channel speaker
in a single-wired system, the most
common type of installation.
SPEAKER CONNECTIONS
The VOICE center-channel speaker can be connected to your audio
system in three different ways: single-wired, bi-wired or bi-amplified.
Please read the following three sections before proceeding with the
actual connections. Also, be sure to observe the following points:
• Use high-quality speaker cable (maximum total loop resistance
of 0.1 ohms per channel) with high-quality connectors between
the speaker and your audio system. Consult your Revel dealer as
to specific recommendations for your application.
• Turn off all audio system power before making any connections.
• Read the owner’s manuals that were included with your audio
components to confirm their connection procedures.
• Verify correct polarities (i.e., + to + and - to -) when making
connections. Failure to do so will cause poor imaging and
diminished bass response.
• For bi-wired or bi-amplified applications, remove the shorting
straps on the rear of the VOICE speaker (refer to Figures 7, 8,
and 9 on the next three pages).
SINGLE-WIRED SYSTEM CONNECTIONS
For most applications, simply leave the shorting straps in place and
connect the
+
and
−
from a single amplifier channel to the HIGH
FREQUENCY INPUT terminals on the rear of the speaker, as
shown in Figure 6.
VOICE Speaker
Owner’s Manual
8
VOICE Rear
Install straps for
single-wired operation
Note:
Remove straps
for bi-wired
or bi-amplified
operation
Install straps for
single-wired operation
Low Frequency Input
High Frequency Input
High Frequency
Level (dB)
0
+.5
-.5
+1
-1
Placement
Compensation
(See Owner's Manual)
Serial Number
Revel Corporation
Chatsworth, California
Made in U.S.A.
On Top Of
Monitor
Flush
Mounted
Stand
Mounted
Amplifier
(rear)
(one channel shown)
white
red
Connector Panel
Shorting Straps
(leave in place)
Install straps for
single-wired operation
Install straps for
single-wired operation
Low Frequency Input
High Frequency Input
High Frequency
Level (dB)
0
+.5
-.5
+1
-1
Placement
Compensation
(See Owner's Manual)
Serial Number
xxxx
On Top Of
Monitor
Flush
Mounted
Stand
Mounted