RCBS Rifle Bullet feeder - Dillon Conversion Kit User Manual
Page 5
ASSEMBLY
Reference the part schematic on page 11 for more
information.
You will need the following tools in order to assemble
and install this Kit:
• 3/32” hex key/ Allen wrench
• 5/32” hex key/ Allen wrench
• 3/8” open end wrench or small adjustable wrench
This Product Instruction Manual is meant to supplement
the manual you received with your RCBS Rifle Bullet
Feeder, not replace it. You will need to reference that
document to complete your Bullet Feeder installation.
Contact RCBS if you need another copy or see our
website (www.rcbs.com) to download one.
Bowl Support Tubes
Assemble the Bowl Support Upper Tube (#781312) and
Lower Tube (#781313) to each end of the Tube Coupling
(#781314) using the four 1/4-20 x 1/2” BHCS (Photo
1). Tighten screws securely with a 5/32” hex key/ Allen
wrench.
The Bullet Feeder Support Tube Assembly can now be
clamped to the Case Feeder Support Tubes on your
Dillon Press.
Powder Measure Adapter
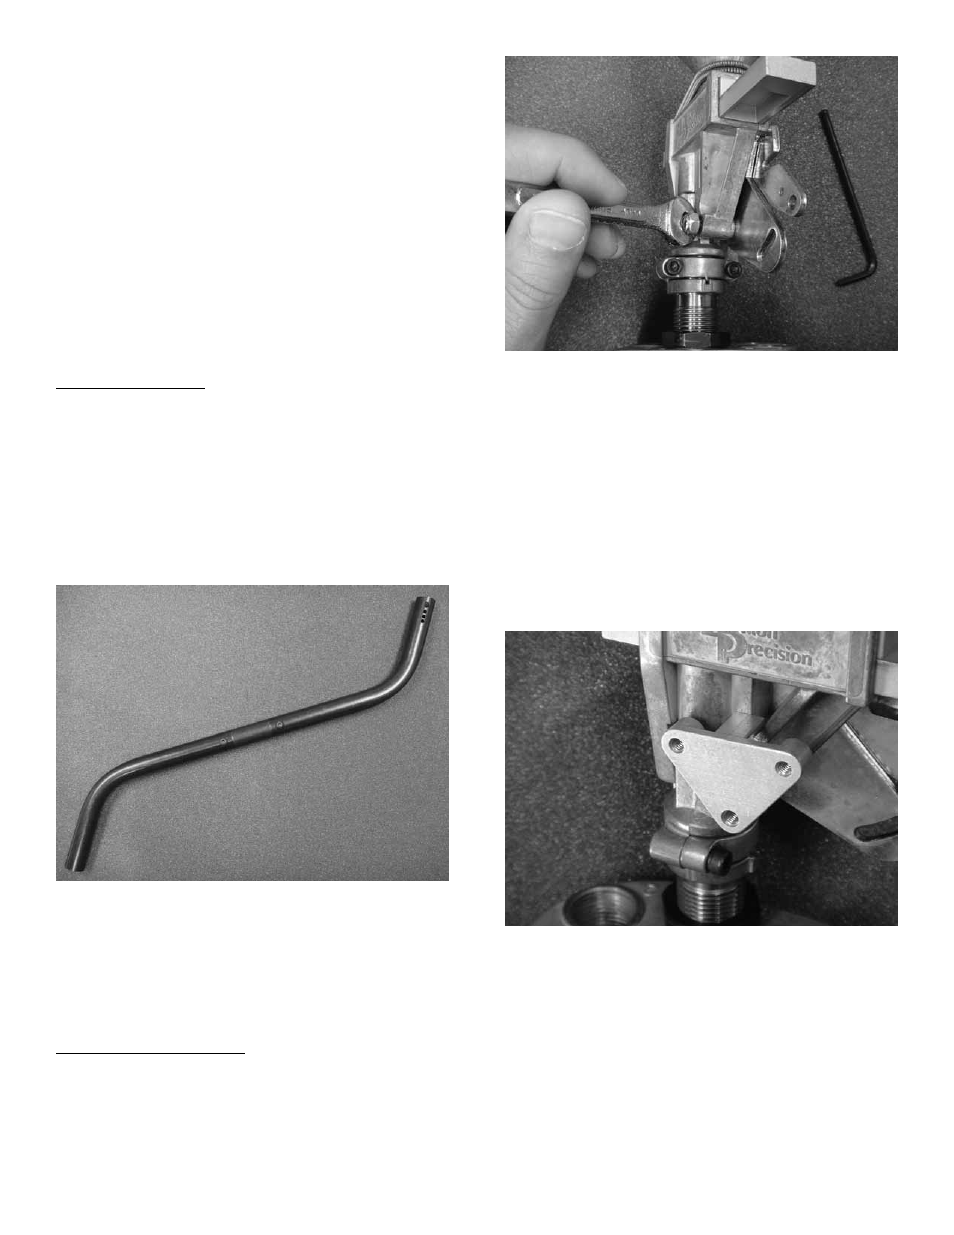
Remove the locknut from the Bellcrank Bolt of the
Powder Measure (Photo 2) using a 3/8” wrench. Save
the locknut for future use if desired. Do not remove the
Bellcrank Bolt from the pivot hole and try to minimize
the movement of Bellcrank Assembly Brackets.
Photo 2. PM Bellcrank Locknut
Install the triangular PM Bracket (#781310) using the
existing Bellcrank Bolt, if possible. If it is damaged,
replace it with the 10-32 x 1-1/4” SHCS provided
with this Kit. Ensure the PM Bracket is in the correct
orientation (Photo 3). Do not fully tighten the Bellcrank
Bolt at this time. Check to verify the Bellcrank Cube is
correctly engaged in the Powder Bar’s slot (consult your
Powder Measure Manual for more information). Now
tighten the Bellcrank Bolt until snug using a 5/32”
hex key.
Photo 3
Next mount the Cam (#181253) onto the “L”-shaped
Adjustment Bracket (#781311) with a 8-32 x 1/2” Long
BHCS and 8-32 Hex Nut (Photo 4), using a 3/32” hex
key. Note the flats of the Hex Nut fit within the slot
on the back of the Bracket (Photo 5). Slightly tighten
the BHCS so it is easy to adjust later during setup of
the Press.
Photo 1. Support Tube Assembly
5