RCBS Bullet Feeder - Pistol Kit User Manual
Page 6
- 6 -
Install the Bullet Guide into the die body, the tapered
inner portion is the “top” of the guide. Bullet guides are
stamped on the side for identification.
Photo 6
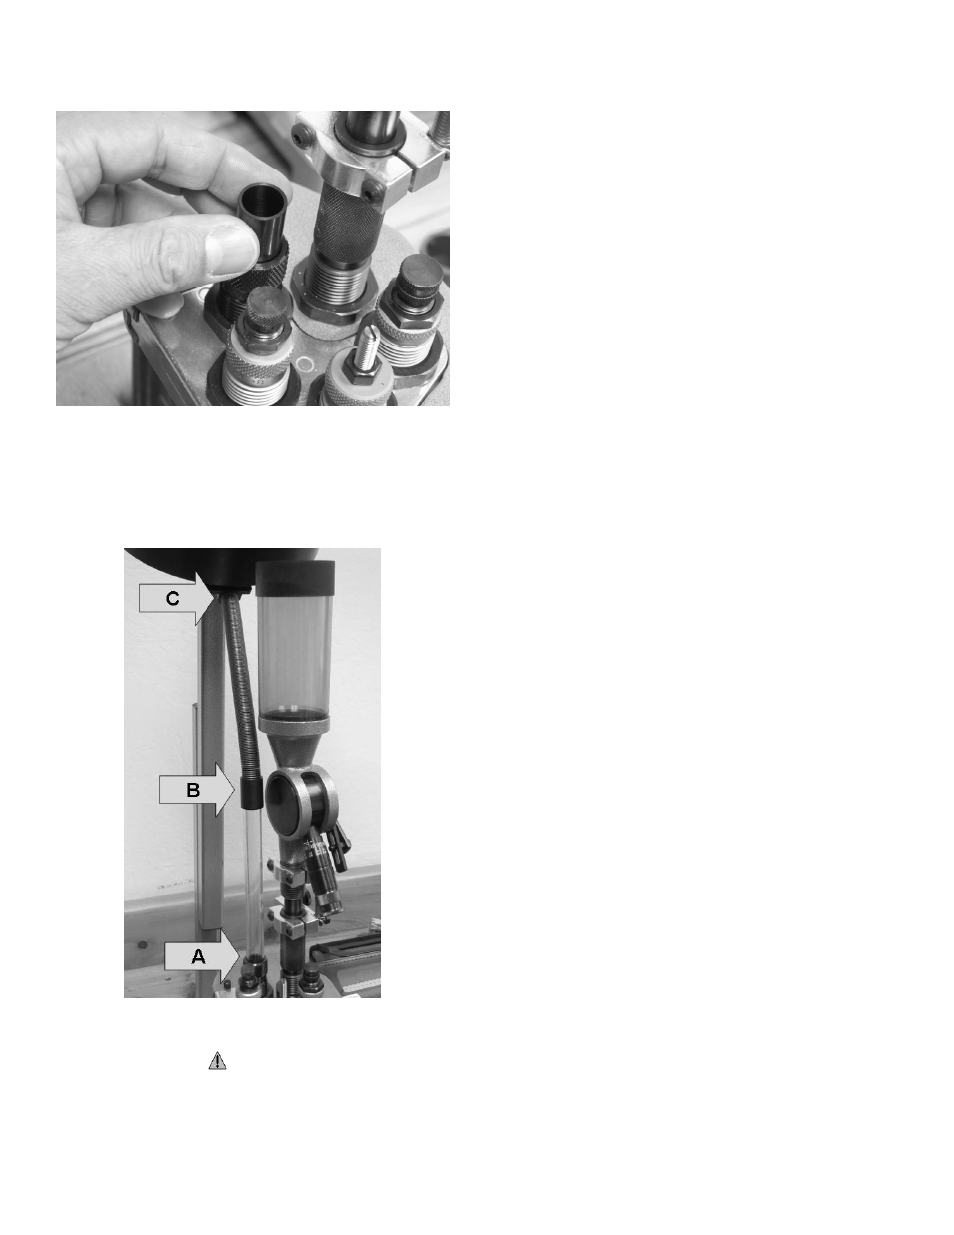
Place the proper plastic Lower Clear Tube(A) into the
top of the Bullet Die and place the Tube Adapter(B) on
the top.
Install the Continuous Spring tube into the top of the
Tube Adapter and into the Bowl assembly(C).
Photo 7
For short 9mm and .38 bullets, the Upper Tube 9mm
needs to be installed.
CAUTION Move the micro
switch out of the way to install the 9mm Upper Tube
adapter. Failure to do so will cause the switch to break,
the motor will then not shut off and continually feed
bullets potentially burning out the motor or breaking
parts in the Bowl.
When you are ready to load, fill the Bowl with ~100
bullets and connect the Power Supply. The Bowl will run
until the feed Tubes fill up with bullets. Add another ~100
bullets to bowl.
You are now ready to begin your loading session.
OPERATION
With the Bowl filled with bullets and power applied, the
Bullet Wheel will orient the bullets and fill the feed
Tubes.
The Bullet Guide in the top of the Bullet Die aligns the
bullet for feeding through the Bullet Fingers.
The case will expand the Bullet Fingers and allow one
bullet to be placed on the case mouth. As the case is
retracted, the Bullet Fingers close, preventing the next
bullet from passing through the Bullet Die.
As the press handle is operated and a case is brought
up into the Bullet Die, a bullet will be placed on the case
mouth. The weight of the bullet stack puts enough
pressure on the placed bullet to prevent it from falling off
the case as it moves to the next station to be seated and
crimped.
Add more bullets to the Bowl as needed. NOTE: The
sorting plate may not feed the last 10-20 bullets
ADJUSTMENT
Bullet Die
The position of the Bullet Die must be adjusted to
properly place the bullet on the case mouth at the top of
the press stroke. This is a trial and error adjustment.
Case mouths should be belled/flared .030” over the
bullet diameter. For example:
9mm
.385”
.38/.357 .387”
.40
S&W .430”
.45
ACP .481”
With the Bullet Die partially threaded into the press and
the plastic Lower Clear Tube filled with bullets, run a
properly flared case up into the Bullet Die. Thread the
Bullet Die into the press until you hear a bullet drop or
see the bullet stack move down. Thread the Bullet Die
down a further ½ turn and temporarily lock the Bullet Die
lock ring. Run another properly expanded and flared
case up into the Bullet Die to check the setting. If a bullet
is placed on the case and no other bullets fall through
the die, the setting is correct. Lock the Bullet Die lock
ring. If a bullet is not fed, loosen the Bullet Die lock ring
and thread the die down in ½ turn increments until the
proper setting is achieved.
Depending on how level your reloading bench is or the
type of bullet that you are using, you may need to
change the angle position from the middle 35° to 40° or
45°. A steeper or shallower angle is achieved by moving
the Bracket Pin to one of the other positions.