Eng lish – BenQ PE7700 User Manual
Page 13
13
Overview
Eng
lish
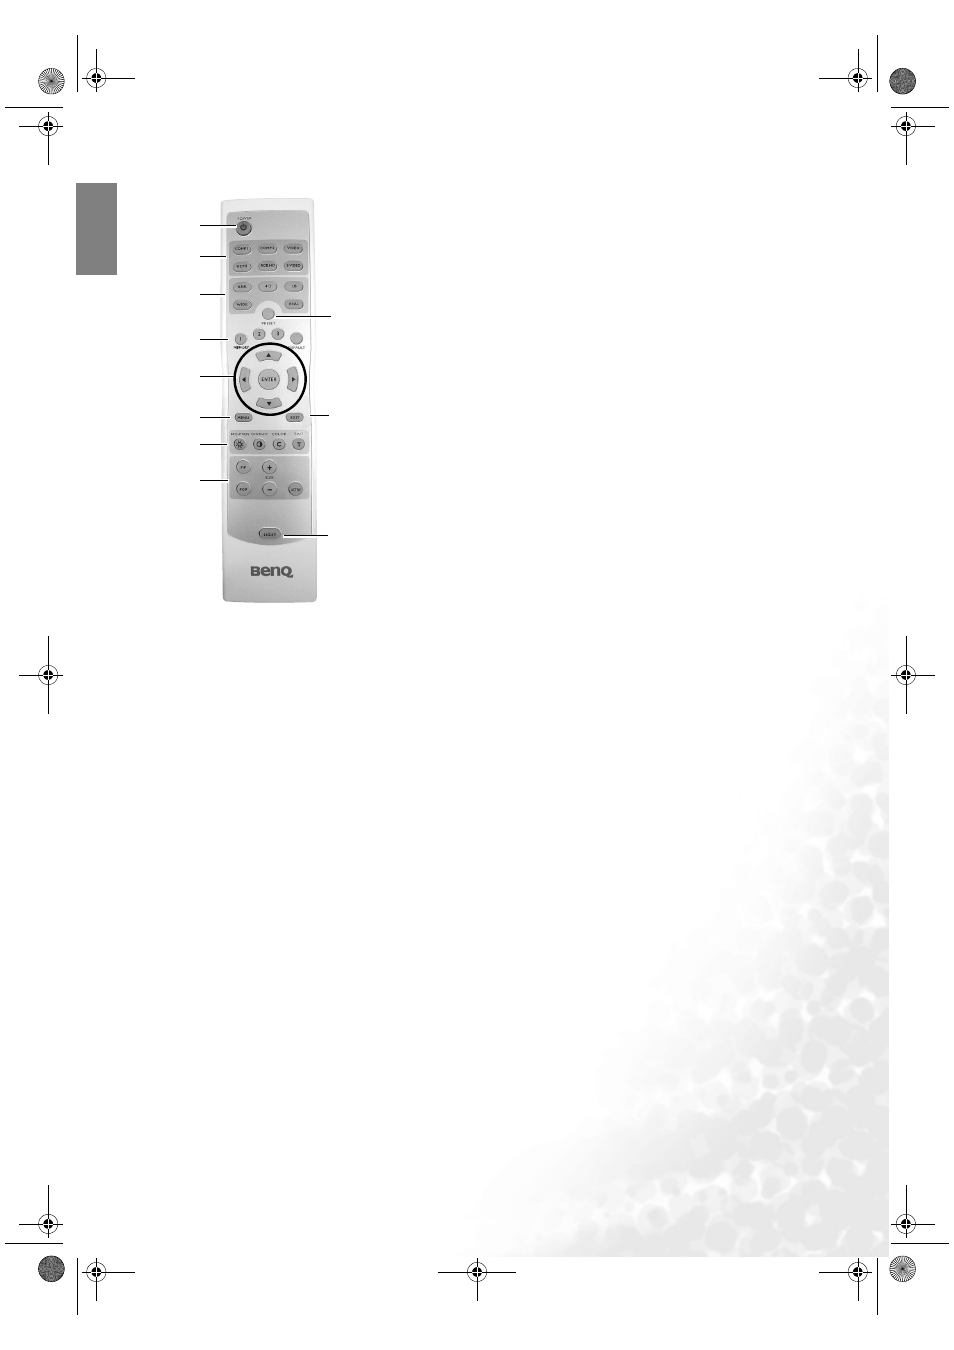
1.
POWER (Refer to pages
19
,
23
and
32
for more information.)
Press and hold this button to turn the projector on when it is in the
standby mode. Or press this button twice to turn the projector off.
2.
Source buttons (Refer to
27
for more information.)
Selects an input source to display on the projector.
3.
Aspect buttons (Refer to
26
for more information.)
Selects the image aspect ratio to suit the input signal.
4.
Memory (1, 2, 3 and default) buttons (Refer to
26
for more
information.)
Restores settings saved in memory locations 1, 2 and 3 or restores the
default settings for the current input source.
5.
Arrows (c/e/d/f) (Refer to
25
for more information.)
Used to select the desired menu or to make adjustments.
ENTER (Refer to 25 for more information.)
Opens the selected items of the menu.
6.
MENU (Refer to
25
for more information.)
Turns the on-screen display control menu on or off.
7.
Picture quality adjustment buttons (Refer to
25
for more
information.)
8.
PIP and POP buttons (Refer to page
22
for more information.)
To turn the PIP or POP function on or off, press the PIP or POP button. Adjust the size of the PIP image
by pressing the + or - button. If you want to switch between main window and sub-window, or left
window and right window, toggle ACTIVE so that you can adjust the image settings in the selected
window.
9.
Preset (Refer to page
21
for more information.)
Selects one of the preset modes to suit your program type.
10. EXIT (Refer to
25
for more information.)
Exits and saves any changes made using the menu.
11. LIGHT
Turns the remote control’s backlight on.
3
4
2
1
5
6
7
8
10
9
11
PE7700-e.book Page 13 Monday, January 10, 2005 11:20 AM