Installation and commissioning, Mounting & site selection – HF scientific 19998 Triple Validation Turbidimeter - 0-100 NTU User Manual
Page 11
TVT 1 (5/02)
5
Rev. 2.6 (.pdf)
3.0 Installation and Commissioning
3.1 Mounting & Site Selection
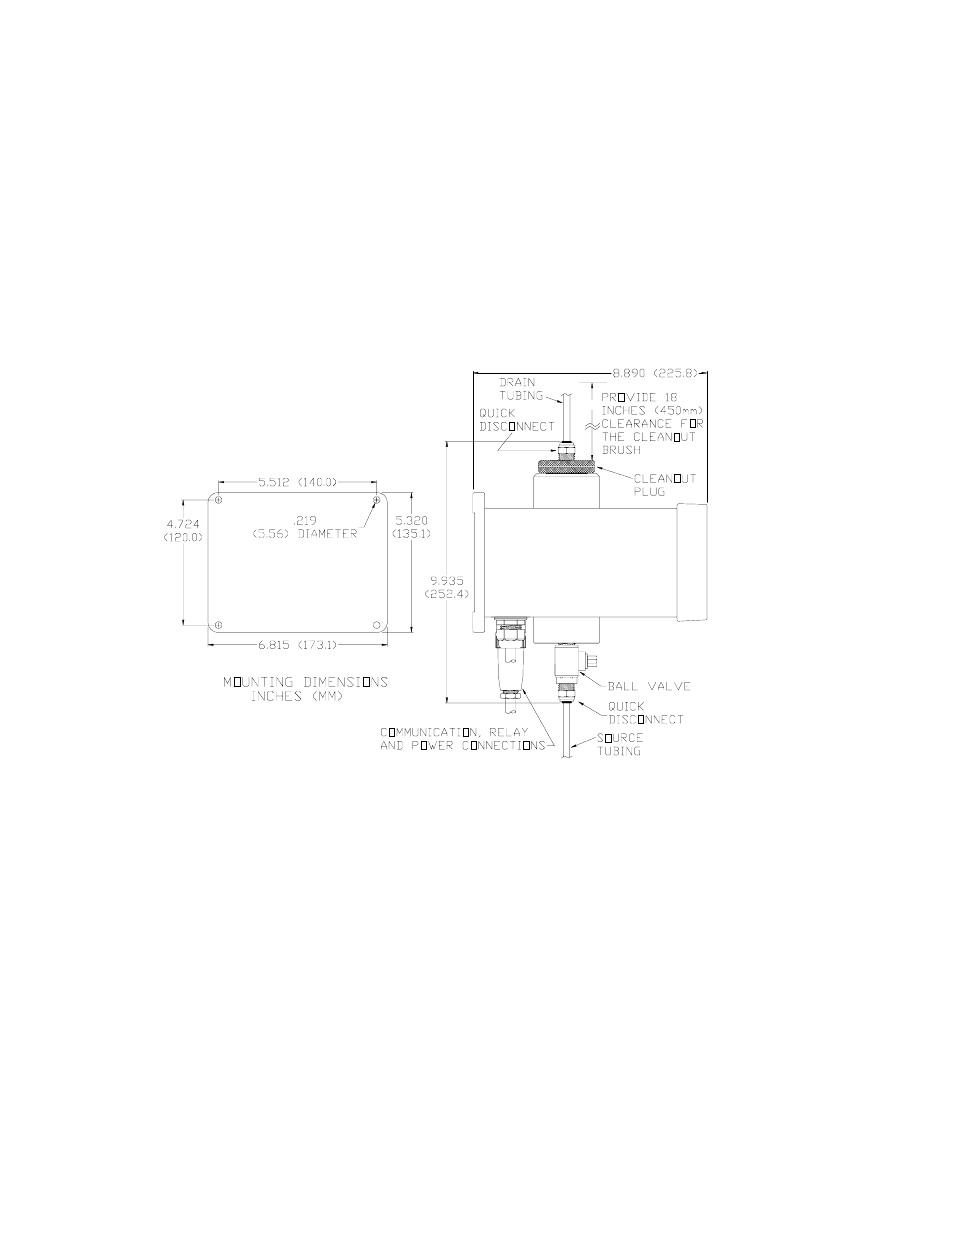
The instrument is designed for wall mounting. If wall mounting is not practical, the
instrument can be mounted on any suitable level surface. For ease of service there should
be about 45cm (18”) free area above the instrument; this will ensure enough room for
calibration and cleaning the optical well. Choose a location that is easily accessible for
operation and service and ensure that the front display rests at eye level. The overall
mounting dimensions of the instrument are shown in Figure 3. The recommended
mounting screws (four are required) are M6 (or ¼”).
Figure 3: Overall mounting dimensions of the instrument
It is critical that the instrument be mounted as close as possible to the sampling point to
ensure an accurate reading of turbidity (within 6-10 ft of the sampling point).
Note: If the instrument is to be mounted onto a metal surface that is grounded, or if any of
the mounting hardware contacts a grounded object, the plastic mounting bars
included in the shipping package should be used to ensure isolation of the 4-20 mA
signal. Figure 4 provides a depiction of the use of the mounting hardware. Attach
the two mounting bars to the back of the instrument as shown in Figure 4 first.
Then, mount the instrument to the wall. The mounting bars will accept screws up to
¼” diameter.