Service of power components, Disassembly, Assembly – E-flite UMX Beast 3D BNF Basic User Manual
Page 10
10
EN
Service of Power Components
Disassembly
CAUTION: DO NOT handle propeller parts
while the fl ight battery is connected. Personal
injury could result.
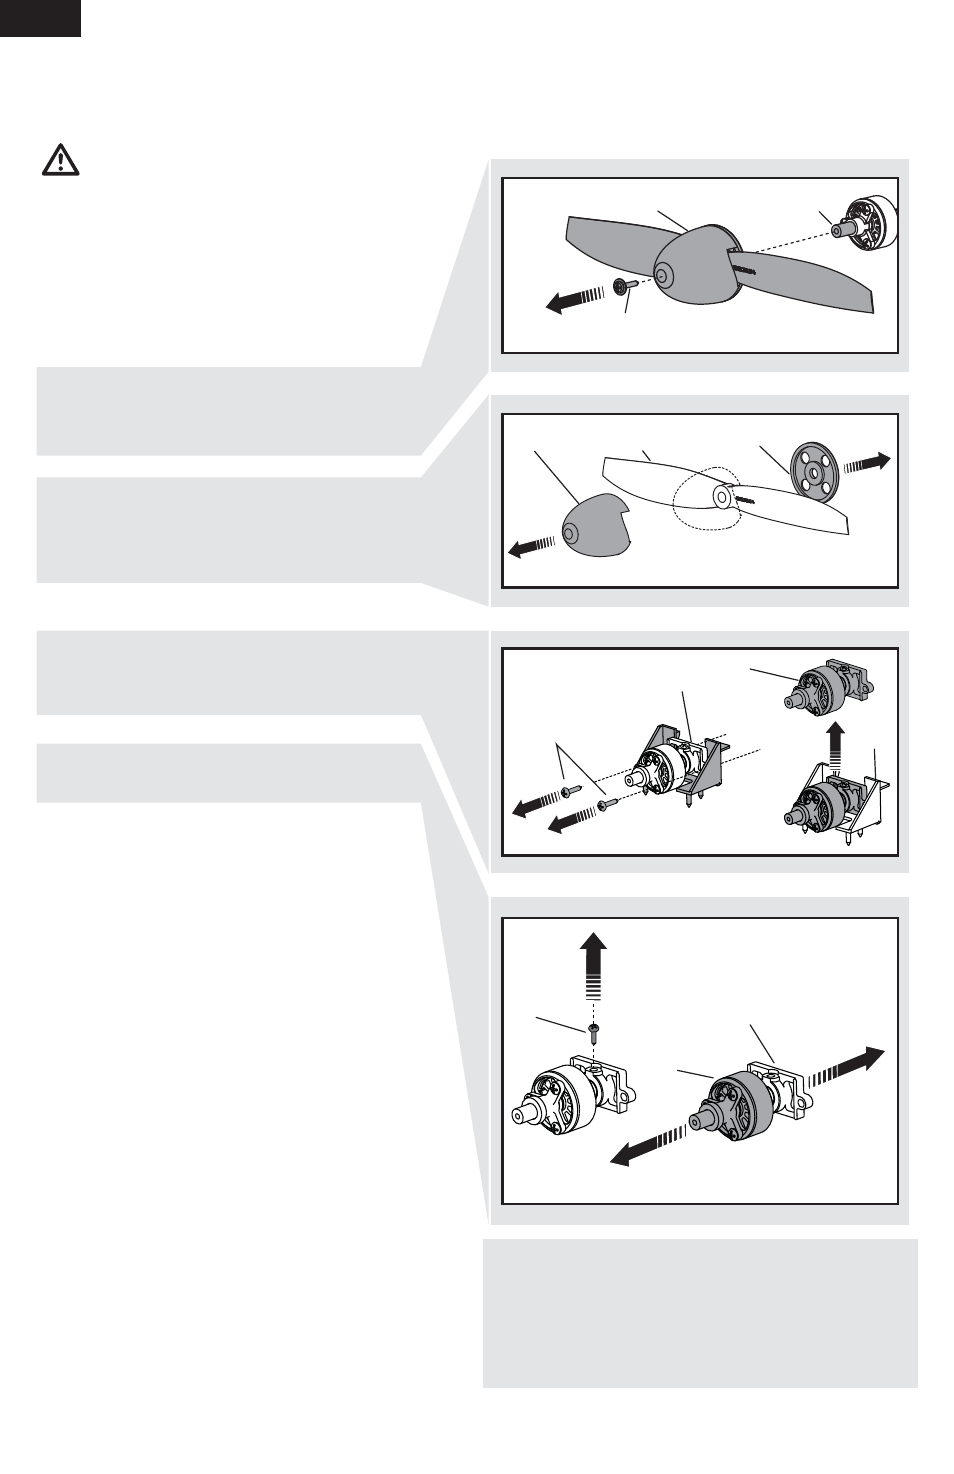
Propeller
1. Remove the battery hatch by gripping the
front of the hatch, then pulling it up and
away from the fuselage.
2. Carefully loosen screw (A) inside the spinner,
then remove the propeller assembly (B) from
the motor shaft (C).
3. Remove the spinner (D) and glue from the
backplate (E) to free the propeller (F) and
backplate. The motor magnet may attract
screws to the motor.
Motor and Firewall
1. Remove 2 screws (G), the firewall (H) and
motor (I) from the fuselage motor
mount (J).
2. Remove the top screw (K) from the
firewall (H) and motor (I).
3. Disconnect the motor wire connector from
the ESC/receiver connector.
Assembly
Motor and Firewall
1. Connect the motor wire connector to the
ESC/receiver connector so the wire
colors align.
2. Install the motor in the firewall using a screw
in the top of the firewall.
3. Attach the firewall to the fuselage motor
mount using 2 screws.
Propeller
1. Install the backplate and propeller on the
motor shaft using a screw. The numbers on the
propeller must face out from the fuselage for
correct propeller operation.
2. Install the spinner on the propeller and
backplate using foam-compatible CA.
3. Put the foam battery hatch on the fuselage and
slide it back to fully engage the fuselage.
A
F
D
E
B
G
H
I
J
K
H
I
When the fuselage must be opened for access to
servos or receiver, first cut the tape or decals before
opening the canopy hatch.
Removing tape or decals may remove paint from
the fuselage.
C