Parts needed, Tools and adhesives needed – E-flite Odyssey EP Electric Glider User Manual
Page 10
10
Parts Needed
• 3- or more-channel radio system with 3 standard servos and
hardware (not included)
• Radio packing foam (not included)
• Adapter plate if micro servos are used
Tools and Adhesives Needed
• Small Phillips screwdriver
• Hobby knife with #11 blade
• Pencil or felt-tipped pen
• Double-sided servo tape
• Velcro
®
Note: Velcro
®
tape is used for mounting the receiver and
battery pack.
Step 1. Install the grommets and eyelets in the three servos per
the instructions included with the radio.
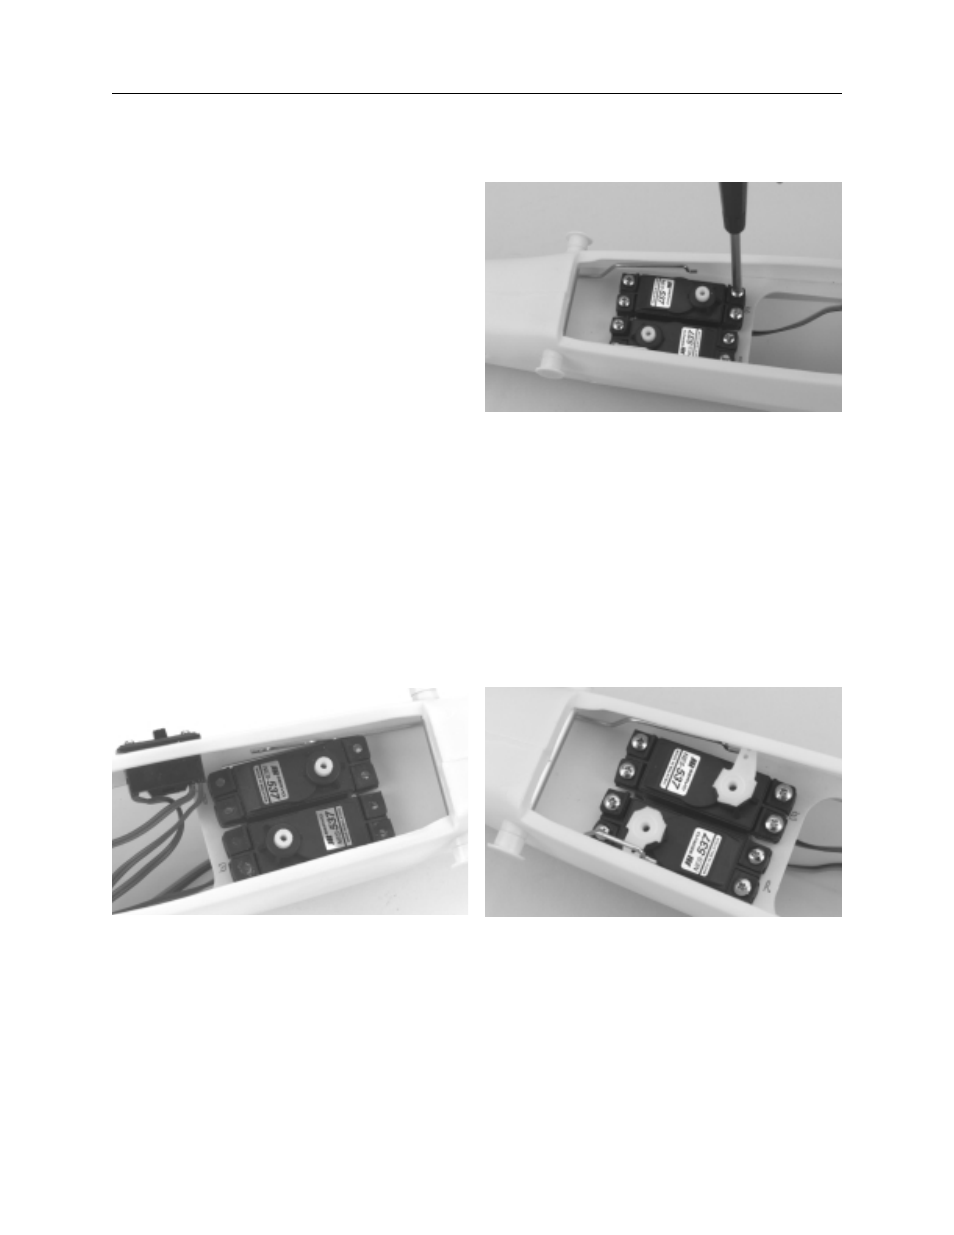
Step 2. Locate the servo tray mounted in the fuselage.
Note: The rails have holes drilled for standard servos. If you
plan to use micro servos, use the plywood square to mount
them. Trial fit the two servos on the rails. Try to place each servo
close to the sides of the fuselage, as shown below. It's a good
idea to remove the two servo arms at this time to make it easier
to fit the servos in place
Step 3. Using a Phillips screwdriver, screw the eight screws to
secure the servos.
Step 4. Remove the servo arms from the servos if you have not
already done so. Only one arm of a servo arm will be used, the
other three will be trimmed off so the arms do not bind with the
side of the fuselage. Please refer to the photo below before trim-
ming the arm. The elevator and motor control servos will utilize
the bottom arm as you look down at the servo arm; the rudder
will utilize the upper arm as you look down at the servo arm.
Trim off the other excess arms using a sharp hobby knife.
Step 5. Electronically center the servos and install the servo
arms.
Section 4: Installing the Radio