Maintenance, Filter change frequency, Replacement filter cartridges – Watts OF210-1 User Manual
Page 4: Filter cartridge replacement procedure
4
Maintenance
Routine maintenance of your OneFlow
®
System involves periodic
filter cartridge changes and/or replacement of sump O-rings. If the
system sizing recommendations have been followed, the OneFlow
®
System will provide a six (6) month filter replacement interval
on most tap water for the OF110RC cartridge. The OneFlow
®
Cartridge OF110RM should last one (1) year.
Filter Change Frequency
OF110RC • 6 months since installation or last filter change.
• Reduced water flow.
OF110RM • 12 months since installation or last filter change.
If filter change frequency is less than 6 months due to pressure
drop, it may be necessary to add additional prefiltration or evalu-
ate system sizing recommendations.
Replacement Filter Cartridges
OneFlow
®
Systems are designed, tested, and certified with OneFlow
®
filter cartridges with proven performance, size and operating capacities.
Use of replacement cartridges other than those specified will void war-
ranties, certifications and may compromise equipment protection, water
quality and cartridge life.
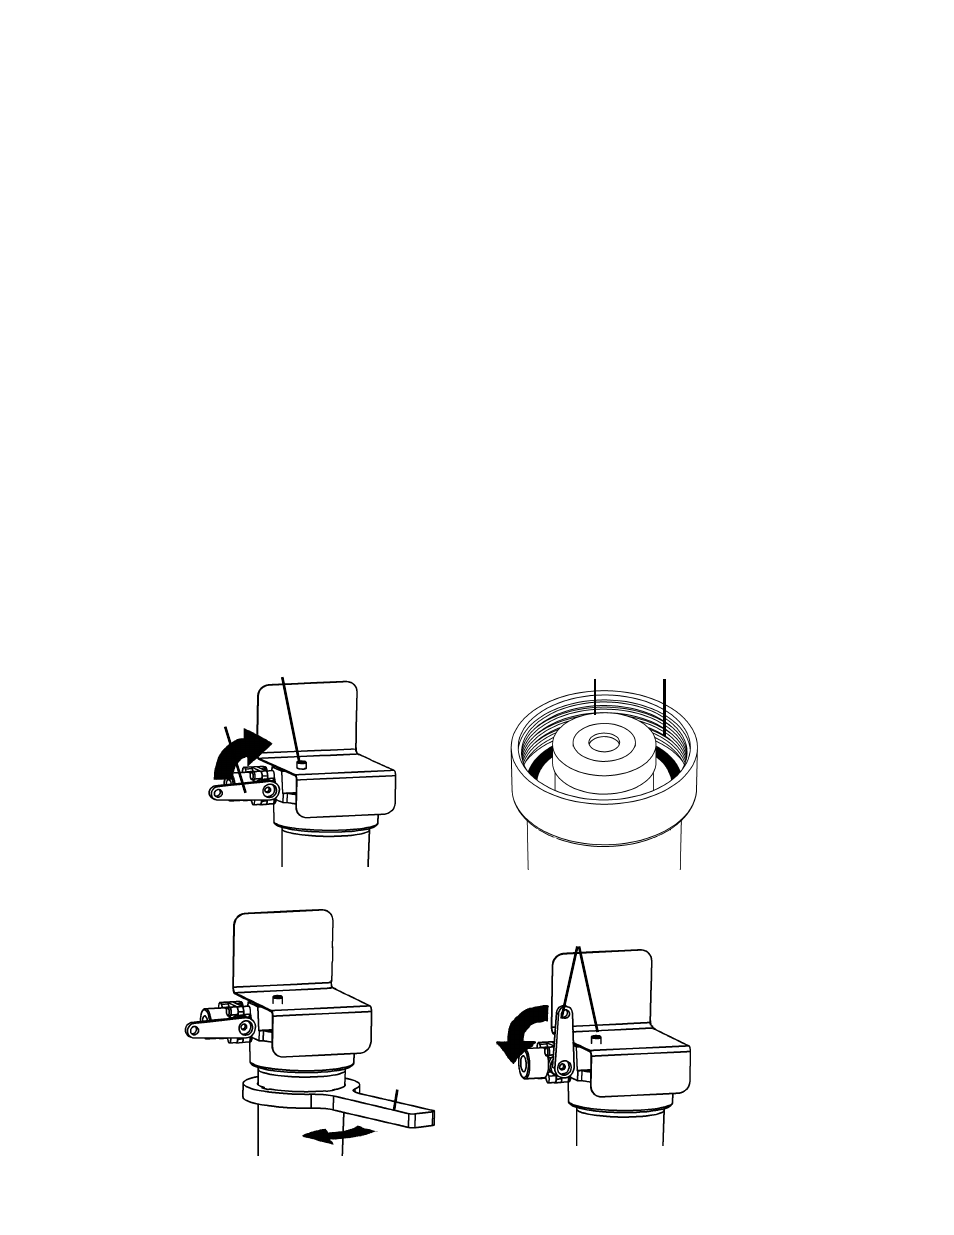
Filter Cartridge Replacement Procedure
IMPORTANT: Determine whether all equipment connected to
the OneFlow
®
system must be turned off prior to shutting off
water supply from filters.
1. If required, turn off equipment.
2. Turn OFF water to OneFlow
®
system by closing Inlet Ball Valve.
3. Press the red button to release pressure.
4. Remove housing(s) - use filter wrench if necessary.
5. Clean inside of housing sumps with warm water. If desired,
disinfect housings using a teaspoon of household bleach.
Add to filter bowl and fill with water. Let stand 5 minutes and
discard.
6. Insert new cartridges into filter housings. Match cartridge
model numbers to model numbers on bracket.
7. Make certain the O-ring is properly positioned and reinstall
filter housings (hand tighten only). Check O-ring for damage
and replace if damaged or distorted.
8. Slightly open the inlet ball valve; push the red pressure relief
button to release trapped air until a small amount of water
comes out - release the red button and fully open the ball valve.
9. Open the flush valve downline from the filter housing (if
equipped) and flush the new cartridges to drain or to bucket
for two (2) minutes or until water runs clear. If no flush valve
is present, disconnect line from equipment to flush to drain.
10.
VERY IMPORTANT: With water supply inlet valve OPEN and
water flow confirmed, turn on connected equipment. Failure
to supply water to equipment may cause serious damage.
11. Record filter change on the service log.
8.
3.
2.
4.
7.
6.