Adding a printer – ClearCube I/Port Users Guide User Manual
Page 27
• 17
If the user does not require printers or serial ports, it is best to disable re-direction
to prevent any potential bandwidth loss caused by the host OS carrying out any
sort of detection or other processes for these devices.
•
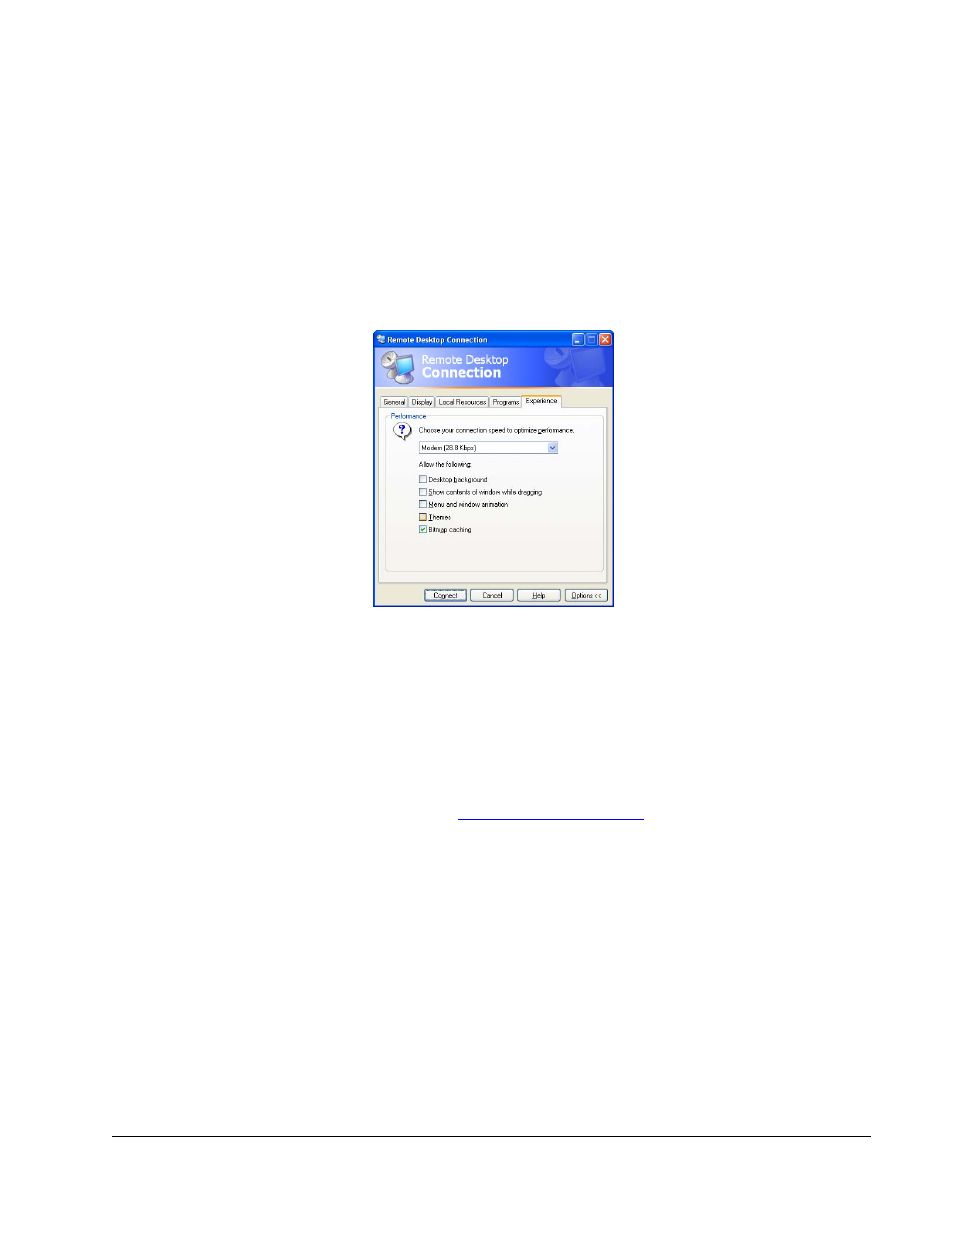
Experience – Selecting a connection speed causes specific items listed in the connection
speed pull-down menu to become checked or unchecked. Generally, the desktop
background, especially if it is an image, is a significant source of performance slowdowns.
The reason is that every time a window is moved within an RDP session, new parts of the
background get exposed and need to be re-transmitted. This is generally a slow and
time-consuming process. It is preferred, almost under any bandwidth conditions, to not
use a picture background.
Adding a Printer
Installing a USB-attached local printer on an XPe I/Port requires installation steps both at the
I/Port and on the host. You need administrator privileges on both systems.
To perform the tasks at the I/Port, do the following:
1. Disable the Write Filter (see "
2. Install the printer driver from a USB-attached storage device.
3. Double-click on the Write Filter icon in the system tray and select Commit changes to
disk and disable write filter. The I/Port reboots automatically.
4. After the I/Port reboots, select Start > Printers and Faxes and right-click on the printer
that was just installed.
5. Enable sharing according to the printer driver’s procedures.
6. Select Start > Control Panel > Firewall.
7. Select the Exceptions tab.
8. Highlight the File and Printer Share service and select Edit.
9. In the Edit a Service window, click the checkboxes required to enable the printer. At a
minimum, UDP ports 137 and 138, and TCP port 139 must be open.
Figure 12. RDP Experience Tab