Fig. 2 – Bell'O CW340 User Manual
Page 5
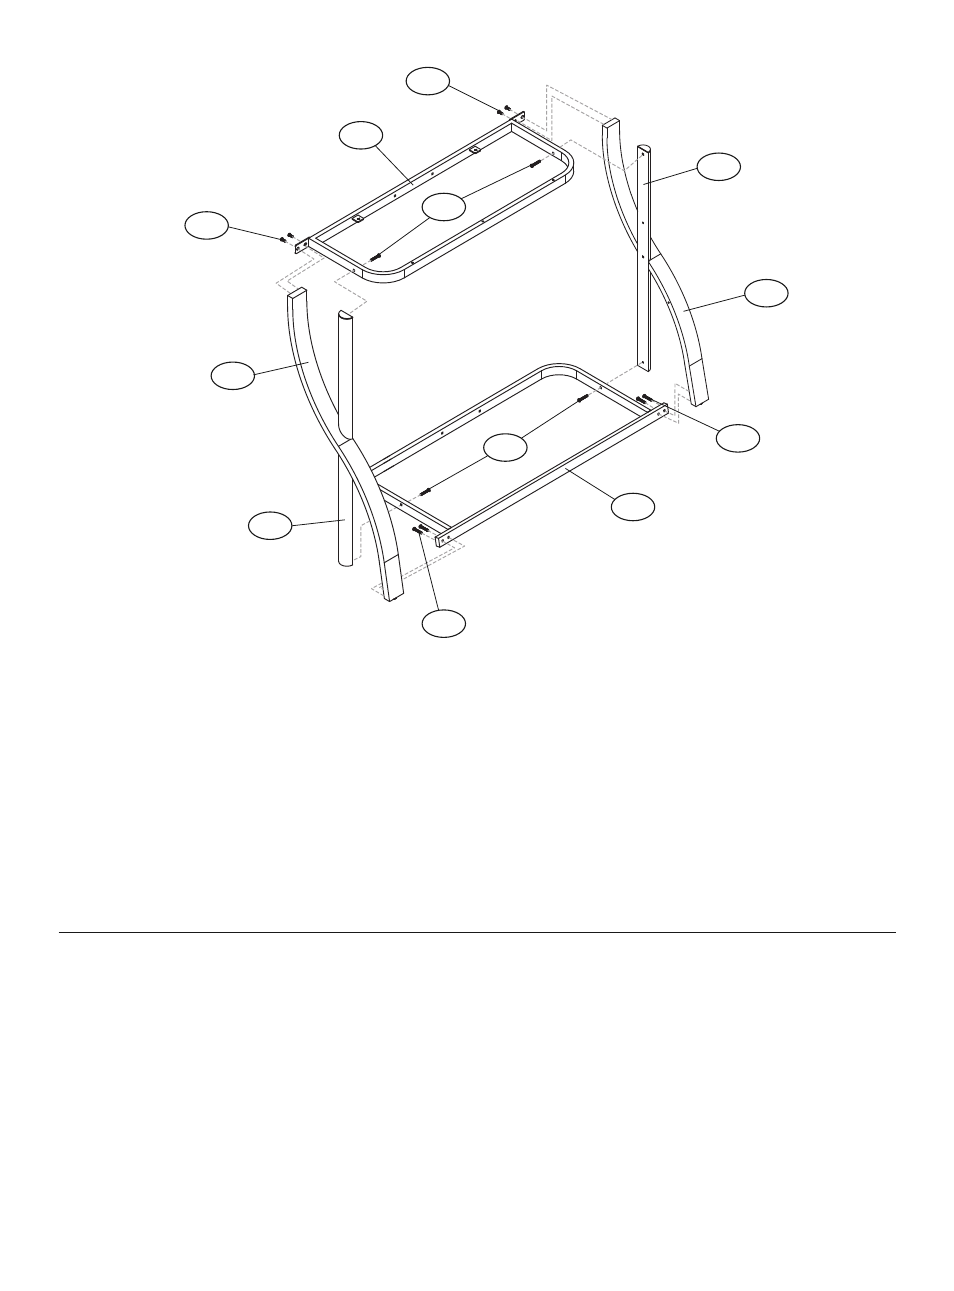
Fig. 2
yF15
yF10
yF12
yF16
yF13
yF11
yF2
yF2
yF3
yF3
yF3
yF3
3. AttAcH the bottoms of the right and left Curved wood legs (yF12, yF13) to the Bottom shelf support Frame (yF16) as shown
using two 28 mm screws (yF3) for eACH leg. Do not yet fully tighten.
4. AttAcH the tops of the right and left Curved wood legs (yF12, yF13) to the top shelf support Frame (yF15) as shown using
two 15 mm screws (yF2) for eACH leg. Do not yet fully tighten.
5. AttAcH the bottoms of the right and left Black Chrome Posts (yF10, yF11) to the Bottom shelf support Frame (yF16) as shown
using one 28 mm screws (yF3) for eACH Post. Do not yet fully tighten.
6. AttAcH the tops of the right and left Black Chrome Posts (yF10, yF11) to the top shelf support Frame (yF15) as shown using
one 28 mm screws (yF3) for eACH Post. Do not yet fully tighten.
7. Make sure all parts are properly attached and that the preassembled stand is sitting flat on a level floor surface. NOw GO BACK
AND fULLy TIGhTEN ALL SCREwS AND BOLTS.
3. AttAcHer le bas des pieds en bois incurvés droit et gauche (yF12, yF13) au cadre support de plateau inférieur (yF16) comme
sur l'illustration à l'aide de deux vis de 28 mm (yF3) pour CHAQue pied. Ne pas encore serrer complètement.
4. AttAcHer le haut des pieds en bois incurvés droit et gauche (yF12, yF13) au cadre support de plateau supérieur (yF15) comme
sur l'illustration à l'aide de deux vis de 15 mm (yF2) pour CHAQue pied. Ne pas encore serrer complètement.
5. AttAcHer le bas des montants chromés noirs droit et gauche (yF10, yF11) au cadre support de plateau inférieur (yF16) comme
sur l'illustration à l'aide d'une vis de 28 mm (yF3) pour CHAQue montant. Ne pas encore serrer complètement.
6. AttAcHer le haut des montants chromés noirs droit et gauche (yF10, yF11) au cadre support de plateau supérieur (yF15)
comme sur l'illustration à l'aide d'une vis de 28 mm (yF3) pour CHAQue montant. Ne pas encore serrer complètement.
7. s'assurer que toutes les pièces sont correctement fixées et que le meuble préassemblé est posé à plat sur une surface plane et
horizontale. À PRÉSENT, REVENIR EN ARRIÈRE ET SERRER COMPLÈTEMENT TOUS LES BOULONS ET VIS.