Assemble the column and base plate, Assembly, Rubber feet adjustment – Bang & Olufsen BeoLab 1 - User Guide User Manual
Page 5
5
Assemble the column and base plate
To prevent the column from being
scratched, we recommend that you
do not remove the foamy wrapping
completely. Just un-wrap it at the
bottom-end of the column to get
access to the screw holes, socket
panel, etc.
Due to the weight of the base
plate, it is packed in a separate box.
Open the box with the base plate,
find the bag with the screws and
the Allen key, then assemble the
column and base plate as
illustrated.
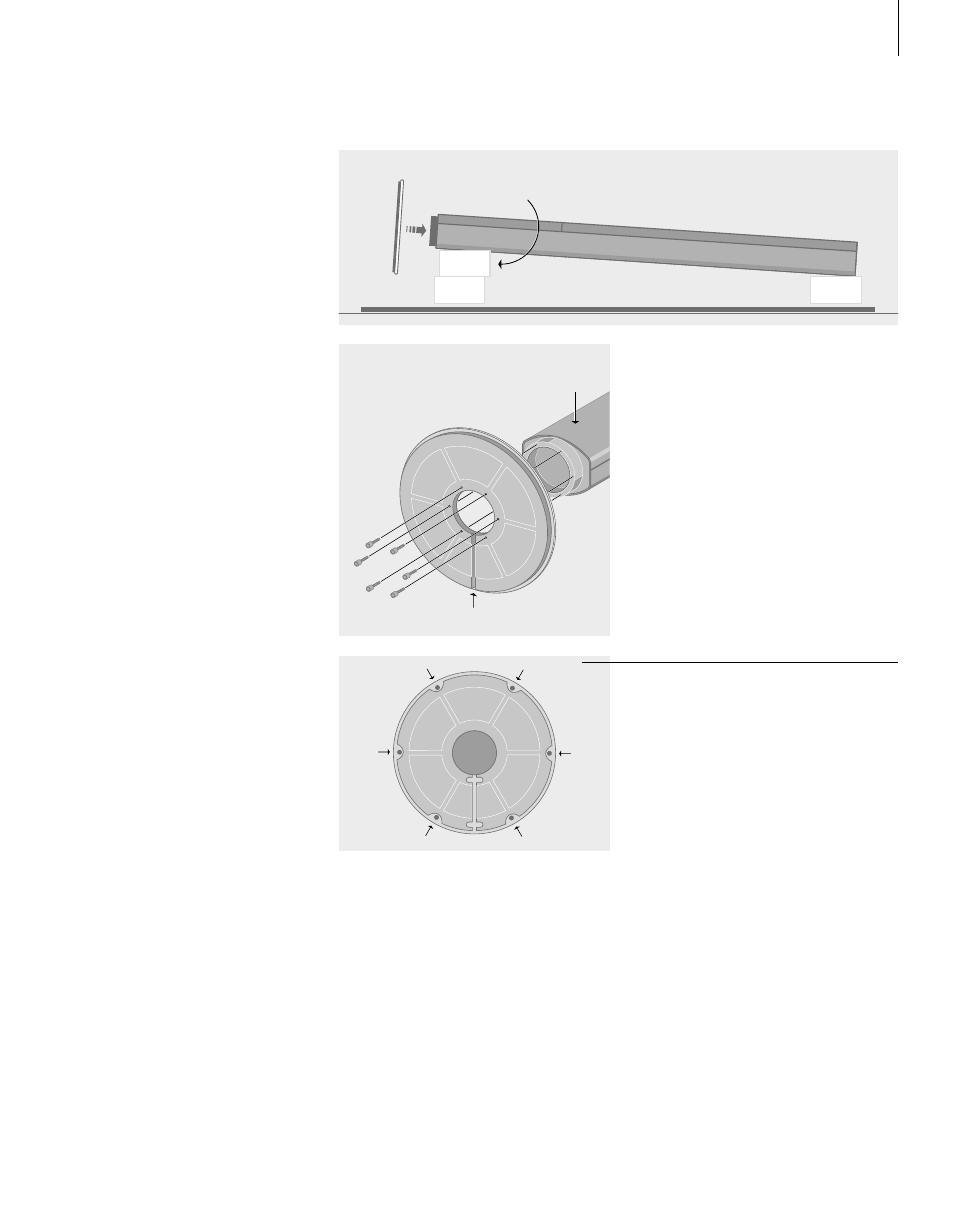
Assembly: While the BeoLab is still lying on
the packaging, lift it up at the base-end and
place an extra piece of packaging material
underneath.
Fix the base plate into place. The groove for the
cables must point downwards (A), and the base
plate guiding pin will engage the corresponding
hole in bottom part of the column. Fasten the
base with the six screws provided.
Rubber feet adjustment: To compensate for an
uneven floor surface the BeoLab 1 base plate
has been fitted with six adjustable rubber feet
(indicated by the little arrows).
Adjust if appropriate, but wait until you have
raised and placed the loudspeaker.
A
BeoLab 1 front