Brinkmann 810-8750-S User Manual
Page 9
8
810-8905-S & 810-8907-S
ROTISSERIE BURNERS
CAUTION: Only use specified natural gas
orifice for your grill.
Note:
It is helpful to keep the screws with the
components as they are removed for
ease of reassembly.
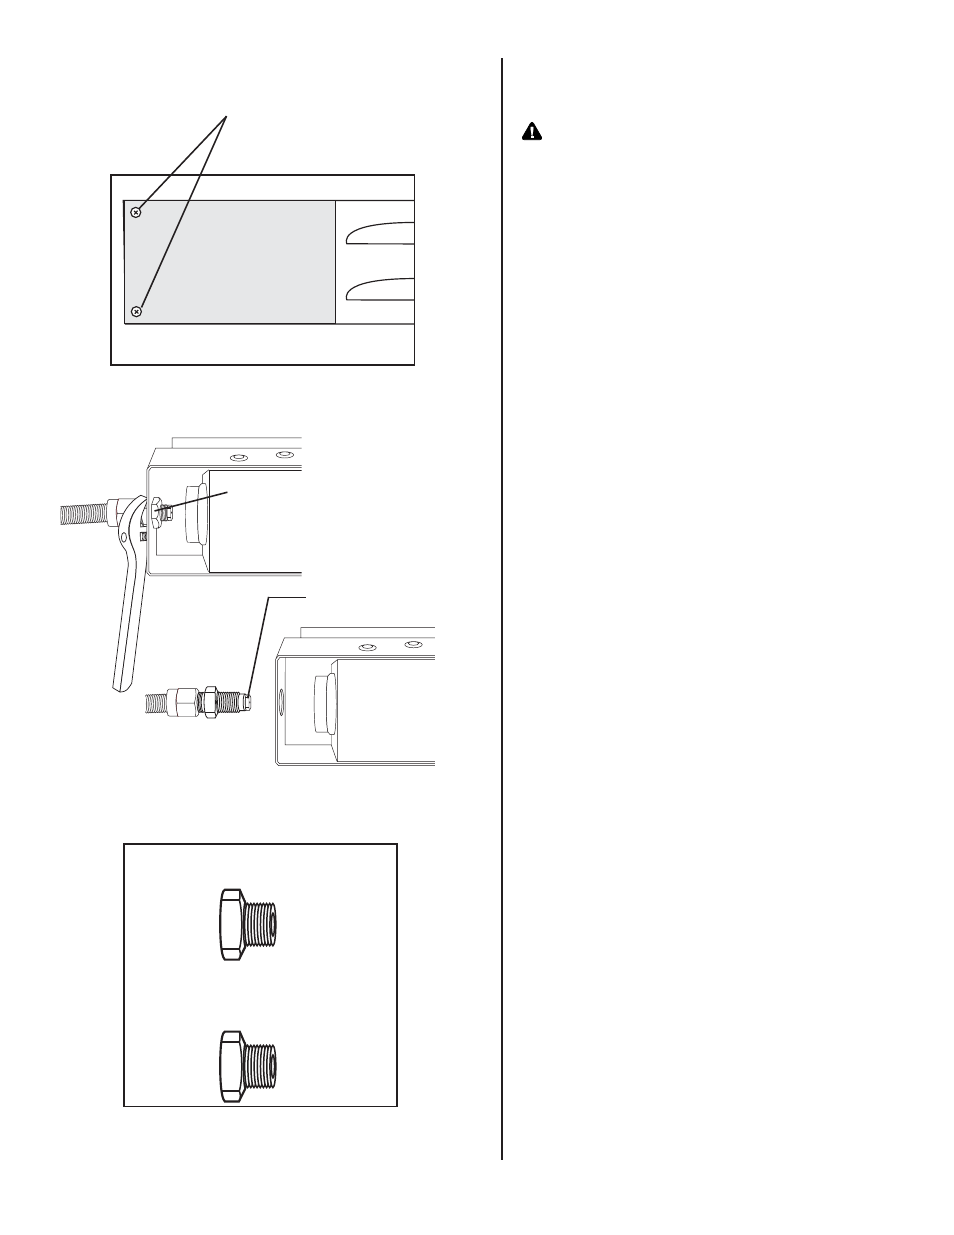
Step 13
Remove rotisserie cover bolts and remove
rotisserie cover to gain access to the rotisserie
LP gas orifice on back side of grill.
Step 14
Using an adjustable wrench to hold the gas
line secure, use the open end wrench
provided to loosen the gas line retaining nut.
With the rotisserie gas supply line detached from
the housing, use two wrenches to remove the
LP brass orifice from the gas supply line.
Replace the LP gas brass orifice with the
proper natural gas orifice. (1.51mm BLUE)
Note:
Bending the hose could damage the
supply line.
Step 15
Reattach gas supply line to the rotisserie
housing by securing with the retaining nut
removed in Step 14.
Note:
Leave the back panel off until the
end of conversion and all gas leak
testing has been completed.
Step 16
Re-install the rotisserie cover using the nuts and
bolts that were set aside in Step 13.
Step 17
Carefully replace each burner, making sure
burner openings slide over valve nozzles.
Screw each burner "foot" down using
screwdriver and screws that were set aside in
Step 4.
Step 18
Replace warming rack, cooking grills, heat
shields and grease trays.
Note:
Follow directions in the leak testing
section of this manual before using this
grill.
1.51mm
Existing Rotisserie LP
Gas Orifice
Retaining Nut
Brass Orifice
Replacement Rotisserie
Natural Gas Orifice
(identified by number)
Rotisserie Burner 1.51mm (BLUE)
Cover Bolts