Jar assembly, How to use, How to use blender jar assembly – Black & Decker MGD250 User Manual
Page 4
1. Be sure the unit is “off” (O) and plug
the cord into a standard electrical outlet.
2. Place the food to be blended into the
Jar.
3. Put the Lid on the Jar before beginning. Be
sure that the Cap is in
position by placing the
tabs in the Cap into the notches into the Lid
and twisting close. When crushing ice or
hard foods, keep one hand on the Lid.
4. Select the desired speed setting:
• Use settings 1-2 for stirring,
chopping, and mixing; setting 3-4
for grinding, beating, and creaming;
setting 5 for heavy-duty blending
such as liquefying.
• For quick blending tasks, turn the
Control Knob to the Pulse (P)
position for a few seconds, then
release. Use the Pulse for best
results when crushing ice.
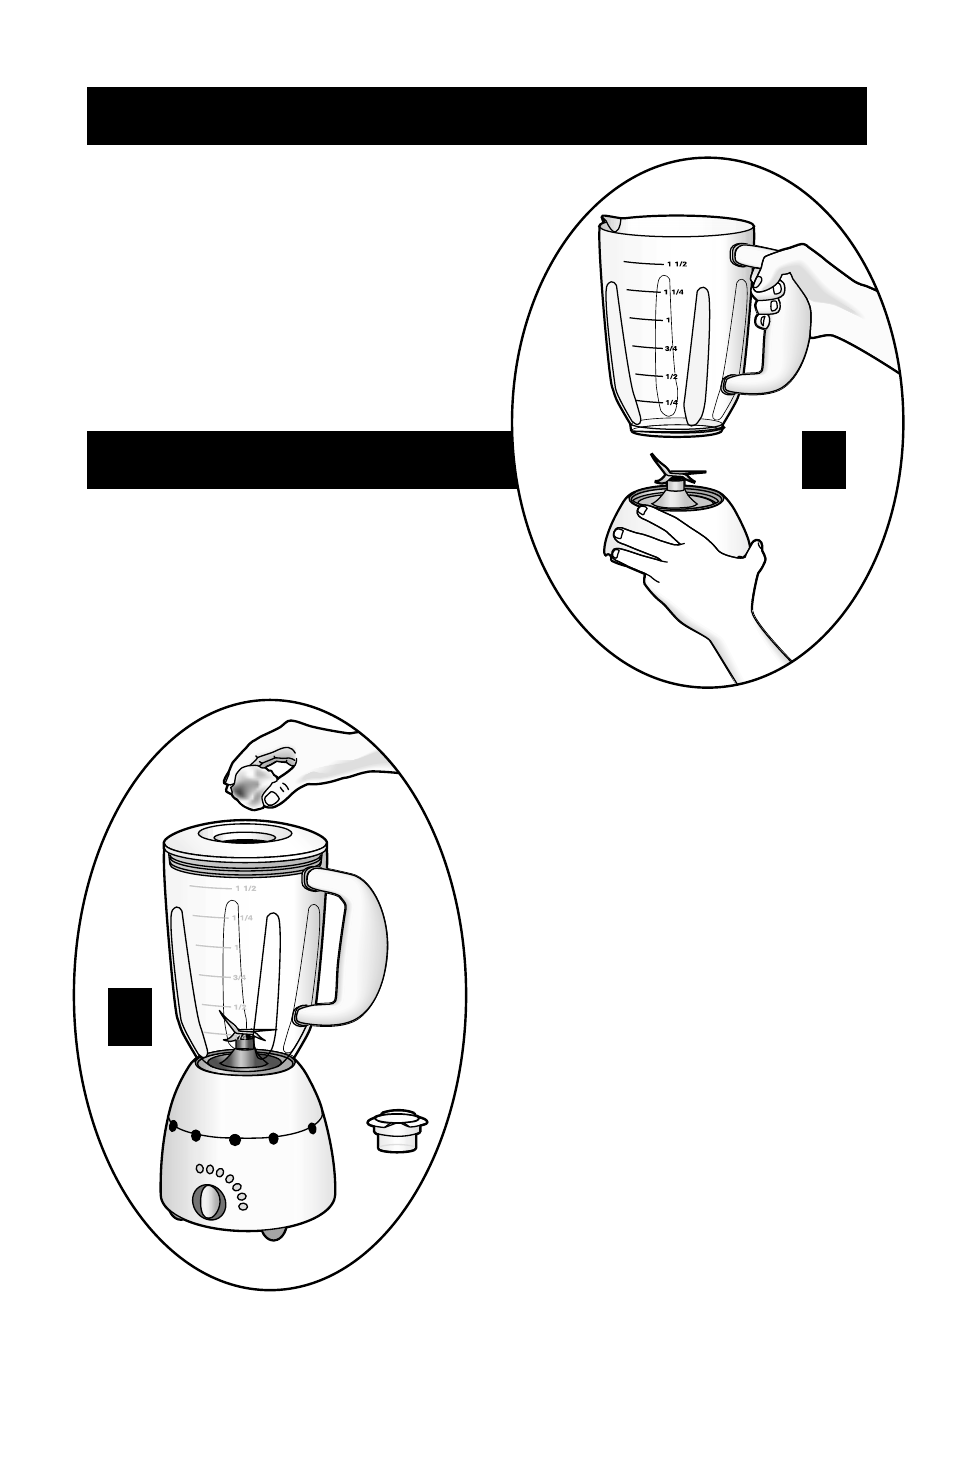
5. If you want to add ingredients while
the Blender is on, remove the Cap by
twisting it and lifting it out. Place
ingredients through the Lid opening. (B)
6. When finished blending, turn to the “off” (O)
position.
7. To remove the Jar, lift it from the Unit Base. Remove the Lid before
pouring.
HOW TO USE
BLENDER JAR ASSEMBLY
4
1. Before first use, wash all parts except the
Unit Base. To reassemble, put the Gasket on
top of the Blade Assembly, place the Blade
Assembly into the Jar Base, and turn the
Jar Base clockwise until tight. (A)
2. Place the Jar onto the Unit Base and
twist slightly in either direction to be
sure the Jar is properly “seated.”
A
B