1 disassemble – 3D Robotics IRIS Plus Upgrade Kit User Manual
Page 2
2
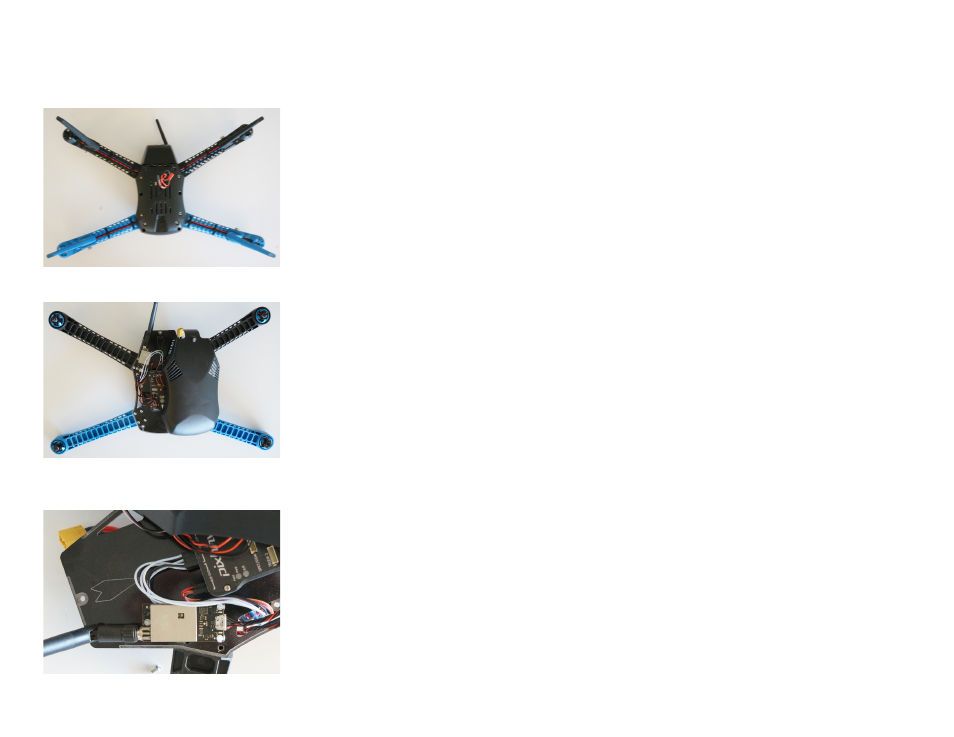
1 Disassemble
Remove the screws in the bottom shell and inside the battery compartment.
For more specific instructions on removing the replacing the shells, visit 3dr.com/iris/info.
In the next step, you’ll temporarily disconnect some of the cables connecting to Pixhawk:
DF13 connectors are difficult to remove without damaging the ports. Use the prying tool to lift
the edges of the connector gently away from the port. Once the connector is separated from the
port by a few millimeters, it will be easy to remove from the port. Do not pull on the wires or use
heavy pressure when handling connectors. A video demonstrating DF13 connector removal can
be found under the Upgrade Kit section at 3dr.com/iris/info.
Turn IRIS over, and remove the top shell. If there are any cables held together with zip ties, carefully cut
the zip ties. Remove all cables from the pins at the end of Pixhawk, and disconnect the cables from the
following Pixhawk ports:
-GPS
-POWER
-TELEM
-BUZZER
-SWITCH
-USB
On the I2C splitter (rectangular module with a row of five connectors), find the cable that connects the
splitter to Pixhawk’s I2C port. Leave that cable in place, and disconnect all other cables from the I2C
module.
You should now be able to pull the top shell away from the bottom shell completely. Set it aside for now.
Remove the three white, plastic screws holding the telemetry radio in place.