Wolo 7000 SERIES Infinity 1 User Manual
Page 5
30. To remove bulb, simply press down and turn counter clockwise. The bulb should easily be able to
be removed from the socket. Dispose the bad bulb out of reach of children and in an
environmentally safe manner.
31. Never handle the glass of the new bulb with your fingers, doing so will shorten service life. If by
accident you touch the bulb, clean with household glass cleaner.
32. Position the new bulb into the socket, depress the bulb and turn clockwise. IMPORTANT: There is
a rubber gasket on the edge of the lens. Make sure the gasket is positioned properly to prevent
water and dirt from entering inside the light. Place the lens back onto the light's base and secure
the lens with screws that were removed earlier.
33. Place the lens back on the light bar’s base and secure in place using the four screws removed
earlier. Be careful not to over tighten screws.
BULB REPLACEMENT FOR TOP CENTER
ROTATING LIGHT
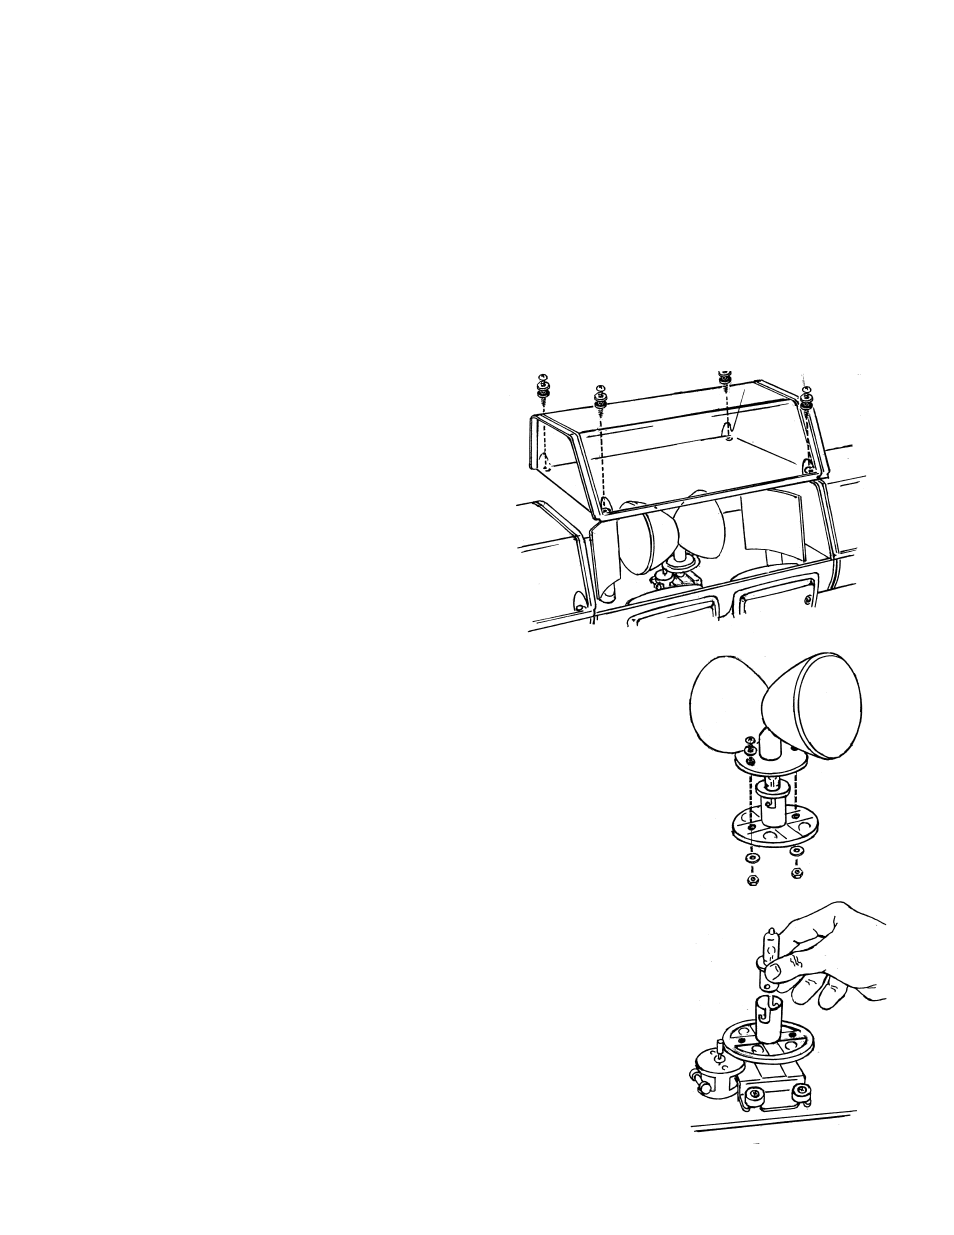
34. You will need to remove the center lens from the
light bar to change the bulb. Remove the four
screws that secure the lens. Once the four screws
are removed the lens can be removed from the
light's base. See fig. 10
35. Replacement bulb type: use only halogen
796/ 35watt halogen, 12 volt. Current draw: 2.73
amps.
36. The lighthouse lens is secured in place by the two
screws at its base. Remove the two screws and nuts. The lighthouse lens
can now be removed and you will have access to the halogen bulb. See
fig. 11.
37. To remove bulb simply press down and turn counter clockwise. The bulb
should easily be able to be removed from the socket. Dispose of the bad
bulb out of reach of children and in an environmentally safe manner. See
fig. 12.
38. Never handle the glass of the new bulb with your fingers, doing such will
shorten service life. If by accident you touch the bulb, clean with
household glass cleaner.
39. Position the new bulb into the socket, depress the bulb and turn clockwise.
Make sure the gasket is positioned properly to prevent water and dirt from
entering inside the light.
40. Place the lighthouse lens back into position and secure with the two
screws and nuts, etc. removed earlier.
Fig. 10
Fig. 11
Fig. 12