Connect ductwork, Wiring – Best K42 User Manual
Page 7
- 7 -
8" ROUND
METAL DUCT
DECORATIVE
FLUE
DUCT TAPE
CONNECT DUCTWORK
1. Use screws (4.8x38mm) and wall anchors
to secure flue mounting bracket to the
ceiling or wall as shown.
2. Use 8" round metal duct to connect the duct
collar on the hood to the ductwork above.
3. Use duct tape to make all joints secure and
air tight.
4. Connect the upper flue to the bracket with
screws provided (3.9x9.5mm).
5. Slide the lower flue downward, until it fits
properly around hood.
6. Secure decorative flue to hood with screws
provided (3.9x9.5mm).
FLUE
MOUNTING
BRACKET
FASTEN
FLUE
MOUNTING
BRACKET
TO CEILING OR
WALL WITH
SCREWS
(4.8x38mm)
FASTEN
FLUE TO
HOOD & FLUE
MOUNTING
BRACKET WITH
SCREWS
(3.9x9.5mm)
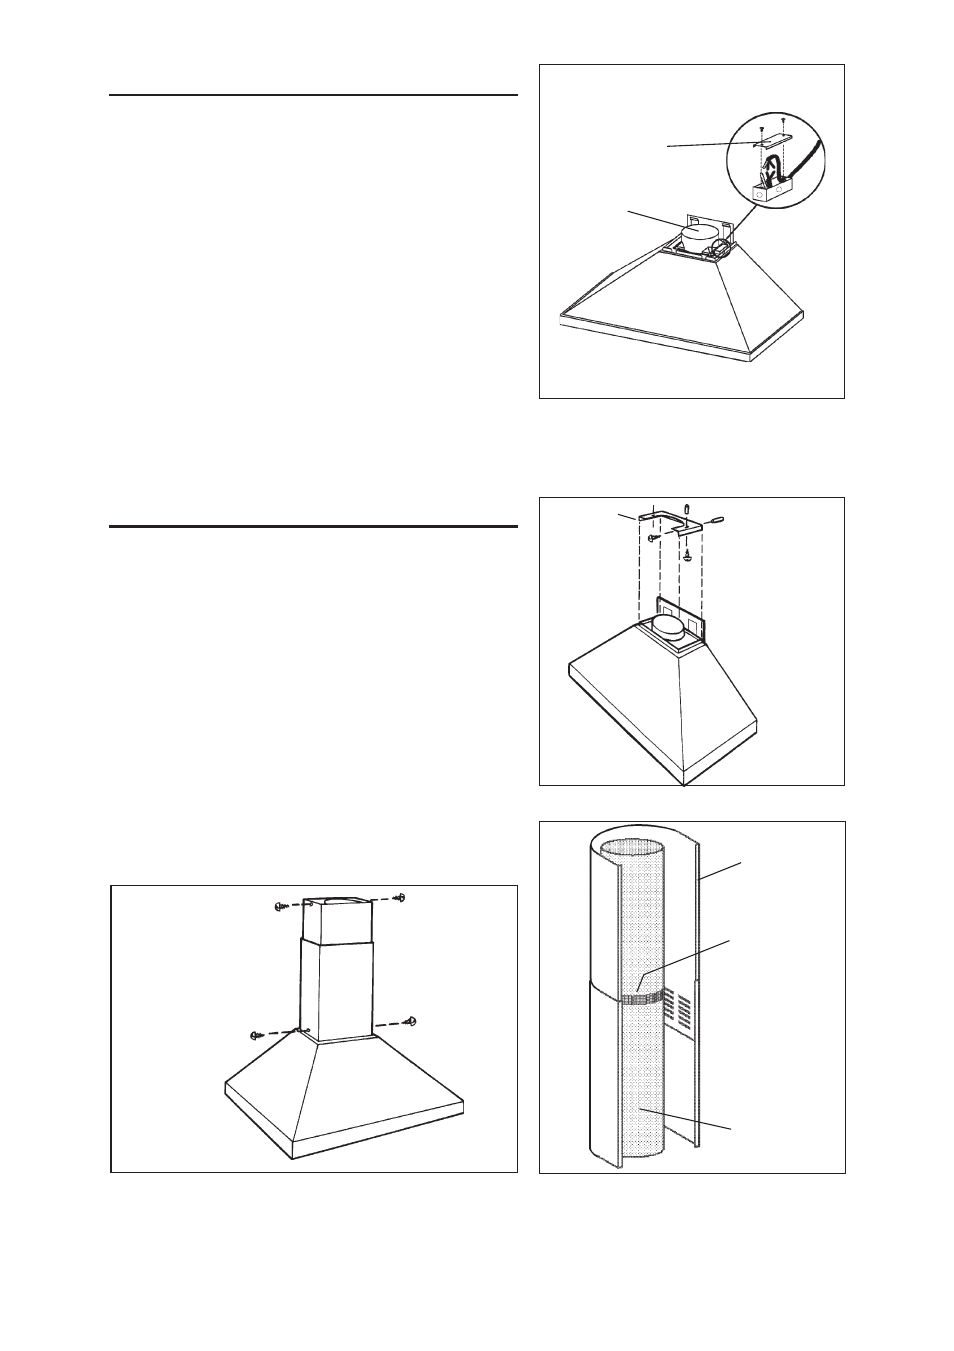
WIRING
Note: This range hood must be properly
grounded. The unit should be installed by a
qualified electrician in accordance with all
applicable national and local electrical codes.
1. Remove the wiring box cover. Remove a
knockout from the wiring box.
2. Secure the conduit to the wiring box
through a conduit connector.
3. Make electrical connections. Connect white
to white, black to black and green to green.
4. Replace wiring box cover and screws. Make
sure that wires are not pinched between
cover and box.
WIRING BOX
COVER
DUCT
COLLAR