Warning – Traditions Vortek Ultralight User Manual
Page 14
20
19
20
warning:
DO NOT ATTEMPT TO DISSASSEMBLE THE RECEIVER. THIS
INCLUDES ANY PINS HOLDING THE RECEIVER TOGETHER.
CLEAN AS A COMPLETE UNIT. IF YOU ATTEMPT TO
DISSASEMBLE ANY PART OF THE RECEIVER IT WILL
AUTOMATICALLY VOID ANY WARRANTY ON THIS FIREARM
AND CAN MAKE THE FIREARM UNSAFE FOR USE AND MAY
CAUSE MAJOR INJURY OR DEATH.
VIII. IGNITION & BREEch PLUGS
Your muzzleloader is equipped to use a standard 209 shotgun
primer for the ignition. The 209 primer area is built directly into
the breech plug. Make sure that you remove the 209 breech
plug and clean the threads of both the breech plug and inside
of the barrel before ever firing your muzzleloader. You must
lubricate the thread of the breech plug with Traditions breech
plug grease before you install it back into the barrel. This will
help prevent the breech plug from getting stuck inside the
barrel after shooting.
Note: Breech plugs will wear out over time and should be
replaced periodically. We recommend that you purchase at
least one extra breech plug for emergencies in the field or at
the range. We recommend that you replace your breech plugs
after every year and nipples after every hunting season.
Removal/Cleaning of the Accelerator Breech Plug:
a.
using your fingers rotate the breech
plug counter clockwise to remove
from the barrel. The Accelerator
Breech Plug removes in just 3 full
rotations from the barrel.
b. using ez Clean solvent and a soft
bristle brush remove the factory oil and grease from the
threads of the breech plug.
c.
Inspect the o-ring to be sure it is not worn or damaged.
If so remove and replace with a new one.
19
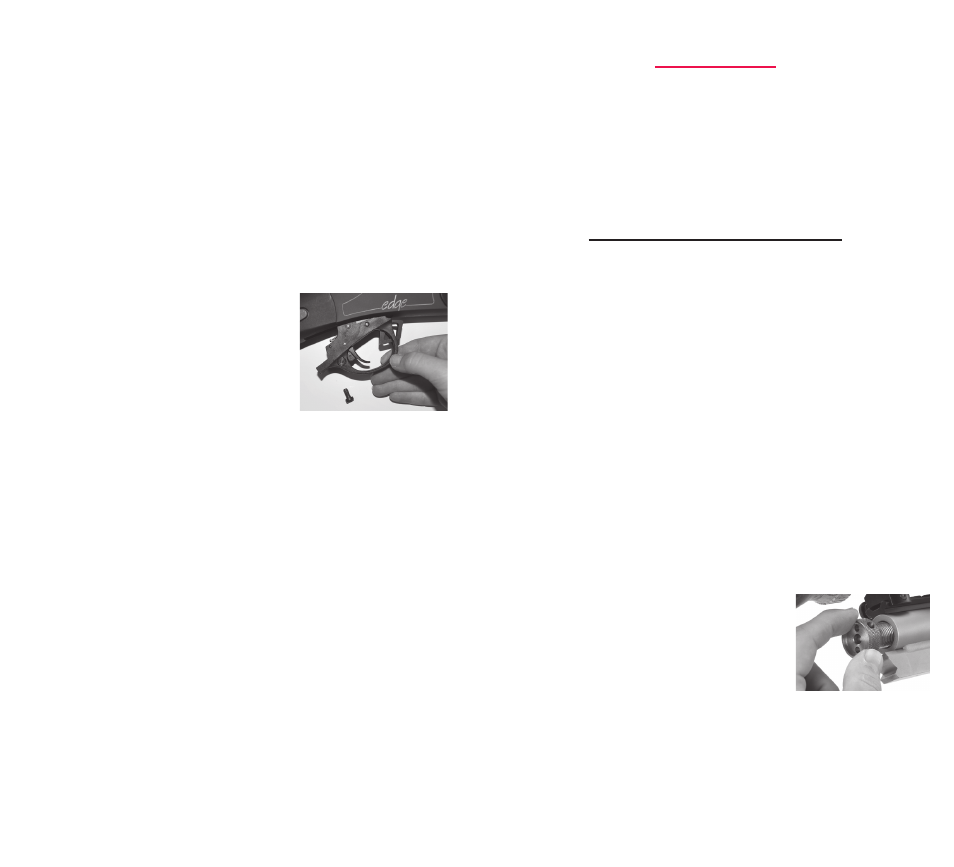
Removal of drop out trigger group:
In order to help you keep your gun in top working order, the
Vortek is equipped with a drop out trigger group for easy
cleaning and maintenance.
To remove the trigger group, follow these steps:
1. If you have your hammer spur attached, remove it at this
time and set aside.
2. using a 4 mm Allen head wrench, remove the screw
behind the trigger assembly while keeping pressure on
the trigger guard.
3. Once the trigger screw is out, the
trigger group will now pivot out of
the receiver.
4. Remove the release lever spring
which is located on the front of the
trigger assembly. Place aside.
5. using a cleaning solvent spray and a brush clean out the
inside of the trigger assembly and remove any fouling that
is inside. Once you have cleaned out the fouling, rinse the
trigger assembly under running water to remove any left
over solvent and fouling.
6. Dry the trigger group by wiping down with a clean rag and
shake out any remaining water and let air dry, or using an
air hose, spray out the remaining water.
7. Reinstall the trigger group by following the removal steps
in reverse.
Note: make sure that the release lever spring is firmly
mounted on the trigger group and install it into the hole in
the release lever. The trigger group will pivot down into
place. keep pressure on the trigger guard while installing
the trigger group screw.