Slide number 3, Power assist™ boxes, Operation and maintenance guide – TapeTech PA10H Power Assist Box User Manual
Page 3: Better – faster – every time, Operation
Operation and Maintenance Guide
1380 Beverage Drive, Suite W
Stone Mountain, GA 30083
1-800-426-6256 | 678-892-2323
Better – Faster – Every time
Updated 04 2012
© 2012 TapeTech Tool Co. All Rights Reserved
www.tapetech.com
Operation
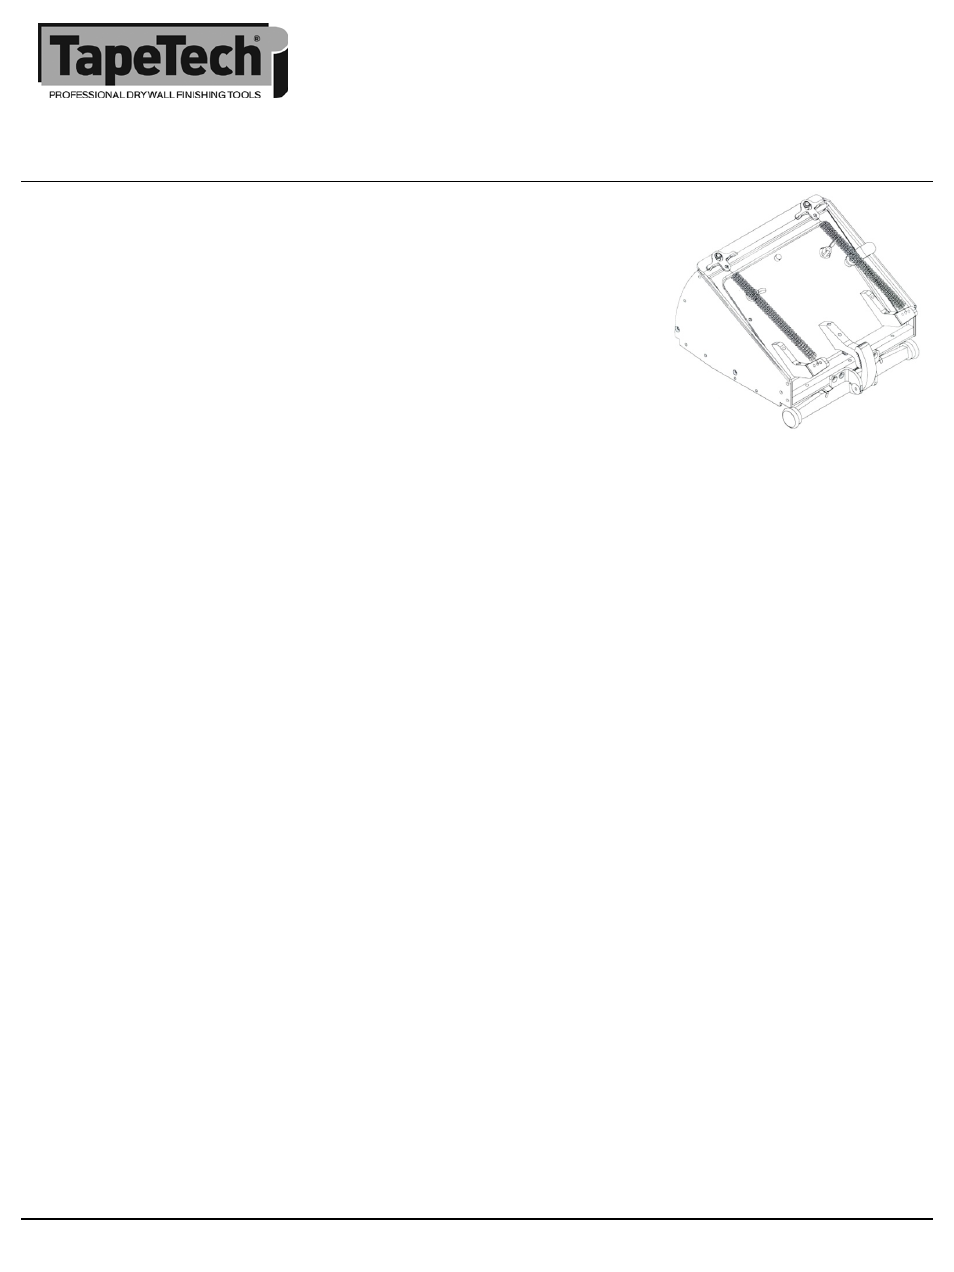
The Power Assist™ Box applies joint compound over taped joints while
automatically dispensing joint compound with the power assist feature. It
comes in three widths, generally used for finishing as follows:
7”
(175 mm):
applies bed coat
10
” (250 mm):
applies finish coat
12”
(300 mm):
applies skim coat
This tool requires little effort to operate and is designed to produce uniform results every time.
The Power Assist™ Box is controlled by the box handle. These handles come in multiple lengths from
34” to 72” as well as an XTender™ Handle that adjusts between 41” and 63“. The handle is attached to
the box by sliding the box onto then handle and tightening the two wing nuts.
Notice the spring arms mounted on the pressure plate of the box. These arms are connecting points
for the power assist springs. The other end of the springs is attached to the top of the radius plate by
stretching them over and onto the spring mounts. Pull the pressure plate out to the fully open
position. Note that the pressure plate will “catch” in that position and be held there. There is a “lock”
mounted on the right side of the pressure plate that holds the tool in the fill position. Fill the box with
joint compound through the opening behind the blade using the slot adapter and Loading Pump.
The finishing box wheels activate the power assist mechanism. This is done by pressing the box against
the wall in such a way that the axle is compressed and the “prawl” or “catch” releases the cog on the
pressure plate. The joint compound will not flow until this “catch” is released. As soon as the catch
releases, compound will start slowly flowing from the box. Move the box along the joint to be finished.
You will need to apply very little pressure to keep the joint compound flowing from the box. The
amount of pressure needed will vary with conditions and compound consistency. Note, if you have
trouble getting the “catch” to release, try placing the box on the wall, wheels first.
The adjustable metal blade trowels the compound with the precise crown needed. This is set using the
crown adjustment dial. This dial controls the amount of crown left by the box with #1 being the most
amount of crown (more joint compound applied) and #5 the least (less joint compound applied).
Before starting to run any joint, lock the box handle at a slight angle by squeezing the handle grip with
one hand. Your other hand should grip the handle near the box.
Near the middle of the joint, lock the handle and by gradually decreasing pressure, remove the box
from the wallboard surface with a sweeping motion. The flow of joint compound does not stop
immediately. It is suggested that you sweep the wheels off the wall about 6” (150 mm) earlier than
would normally be done to keep excess compound from flowing onto the outside of the box.
Reverse hand positions and begin again at the other end of the joint. Again move the box along until
you reach the previous stopping point. Lock the handle and remove the box from the surface with a
sweeping motion. This procedure is followed for all ceiling joints and horizontal wall joints.
Power Assist™ Boxes
Models: 24TT, 28TT, 33TT, PA07H, PA10H & PA12H