Figure 7 figure 5, Figure 4, Figure 6 – Spaulding Lighting Cimarron CL1S User Manual
Page 3
INSTALLATION INSTRUCTIONS - CIMARRON LED SMALL (CL1S) SHEET 3 OF 4
SAVE THESE INSTRUCTIONS
701 Millennium Boulevard Greenville, SC 29607 (864) 678-1000
www.hubbelloutdoor.com
NOTES:
For replacement LED Assemblies and Drivers please contact Hubbell Lighting for any replacement parts.
Contact your local distributor or agent to confirm parts availability prior to ordering replacement parts.
FIGURE 7
FIGURE 5
3
12
7
4
FIGURE 4
ARM
SUPPLY WIRES
SECURE WIRE
INSIDE POLE
FIXTURE
WIRES
FIGURE 6
POLE COVER REMOVED
12
4
7
12
3
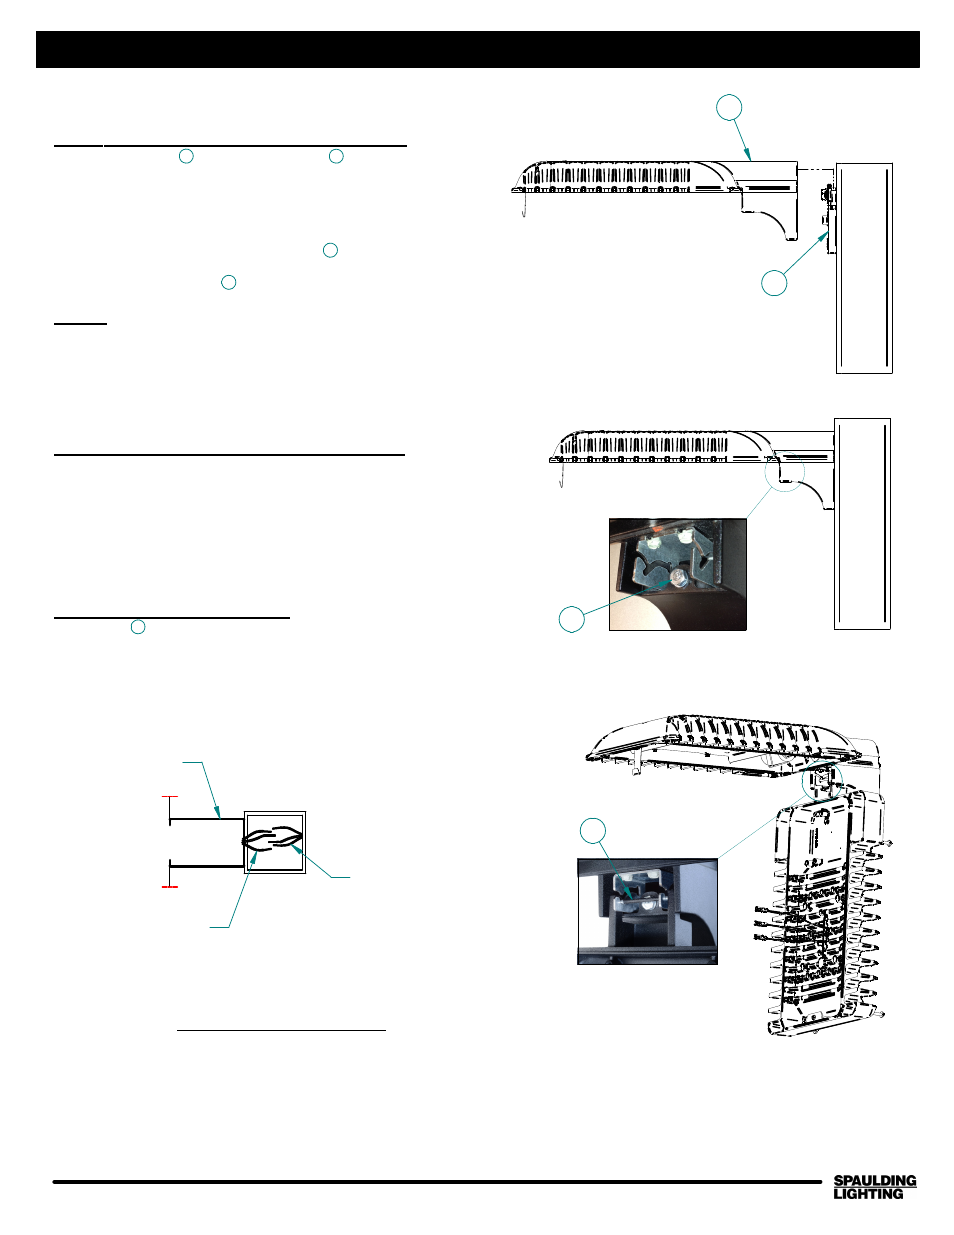
3.) Mounting Fixture to Pole (See Fig. 4 & 5)
Place the Housing over the mount plate while tilting up at
a slight angle above horizontal, and then lower back down to
horizontal once oriented on the plate making certain the wires
are not pinched. For ease of installation, the mount plate will
hold the weight of the fixture prior to tightening the captive hex
screw.
Secure with the 1/4-20 captive hex screw already
in the arm of the housing.
Torque 1/4-20 hex screw to approx. 15-20 ft-lbs.
Wiring
POWER MUST BE OFF
(Wiring must be performed by a qualified electrician)
NOTE: This LED unit is equipped with an electronic driver
having universal voltage adaptability and can accept input
voltage within the range of 120V - 277V or as a specified option
of 347V - 480V.
4.) Wire Connection inside Pole (See Fig. 6)
Wire service leads to fixture leads according to local and
National Electrical Codes.
Wire connection to be made inside pole with fixture wires and
supply wires (By others). Secure wires inside pole.
Connect ground wire to green wire making sure to tie in the
green wire from the Surge Protector, connect black to black and
white to neutral. Supply Voltage must match Driver Voltage.
Push wires back inside pole, reinstall pole cover.
5.) Reinstall Door (See Fig. 7)
Hang door in the open position by inserting the door hinge
pin into the slot of the hinge bracket.
Reconnect wire connector(s) to LED's.
Close door and re-attach with (4) 10-24 captive screws.
•
•
•
•
••
•
•
•
•
•
•
•
•
•