Care and maintenance – Schroth Racing QuickFit And QuickFit Pro BMW MINI (2001-2006) User Manual
Page 10
10
To use the Quick Fit Pro with a HANS® Device, be sure to
make note of the following points:
•
Install the belt as you would normally
•
Place the HANS® device on your shoulders
•
Carefully place the shoulder belts of the Quick Fit Pro
over the yoke of the HANS®
•
Be sure that the shoulder belt adjusters fall either
entirely on or entirely off the yoke of the HANS®. If
necessary, adjust the length of the tail strap to the
correct length.
•
Tighten lap belts and shoulder belts as you normally
would, making sure that the shoulder belts stay on the
yoke of the HANS® while doing so.
•
Once the belts are tight, they will stay on the HANS®
device without any further adjustments.
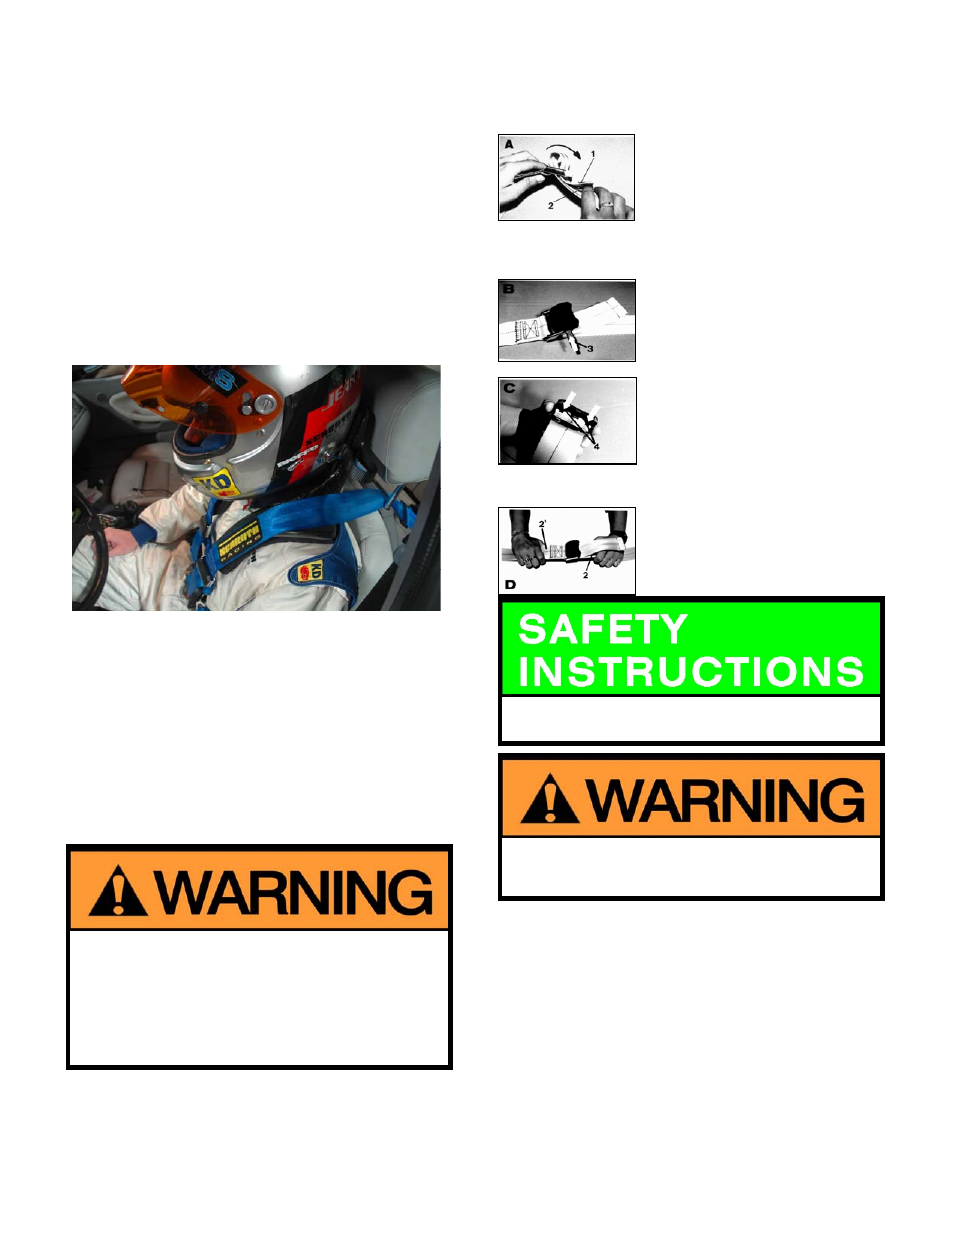
The following picture depicts correct use of the Quick Fit Pro
with a HANS® Device:
CARE and MAINTENANCE
1 Inspection
Check the safety belt once a month for any damage. Cuts,
tears and other damage to the belt will greatly reduce its
effectiveness. Replace the belt or damaged parts immediately
with original Spare Parts (see page 18, Spare Parts). Never
use a damaged harness belt, use the standard 3-point belts
which remain available for use.
Make sure the buckles are free of any obstruction and lock
securely.
Modified belts or such belts that have been resewn are not strong
enough and are dangerous in an accident.
Never modify, disassemble or repair the belts yourself.
For parts that can be replaced, use only original SCHROTH Spare
Parts.
Only original SCHROTH Accessories may be used with the
harness belt system.
Use of non-authorized parts and Accessories can reduce the
effectiveness of the harness belt system.
• Any changes made to the belt will automatically void the
warranty.
Never use any restraint system that does not function
properly. If questions arise, immediately contact your
importer or the manufacturer!
Figure A:
Fold the strap to a loop and insert it
upwards throughout the metal frame and
turn the loop as indicated.
Note:
The strap part protruding from the
adjuster for further adjustment [1] must
be located above the stress taking strap
[2].
Figure B:
Position the plastic cover on top of the
loop and insert the metal retainer [3]
through the guides of the plastic cover
and the strap loop.
Figure C:
Keep the metal retainer positioned
between your thumb and forefinger.
Slide the plastic cover backwards onto
the metal frame as indicated until both
ratchets [4] locks with a distinct clicking
sound into the detentions in the metal
frame.
Figure D:
Check by pulling both stress taking
straps [2] and [2`] the adjustment device
will lock safely.