S&S Cycle In-Tank Fuel Pump User Manual
Page 4
4
8. If the tank was previously used, eliminate trace gasoline.
9. After all fabrication and painting has been completed on the tank, be sure to thoroughly clean the inside of the tank to eliminate welding
residue, blasting media, metal shavings, rust, and any other contaminant that could plug the filter or affect the fuel pump. Problems with
the fuel system are often caused by inadequate cleaning of the tank or by use of sealants not compatible with gasoline or gasoline/ethanol
blends.
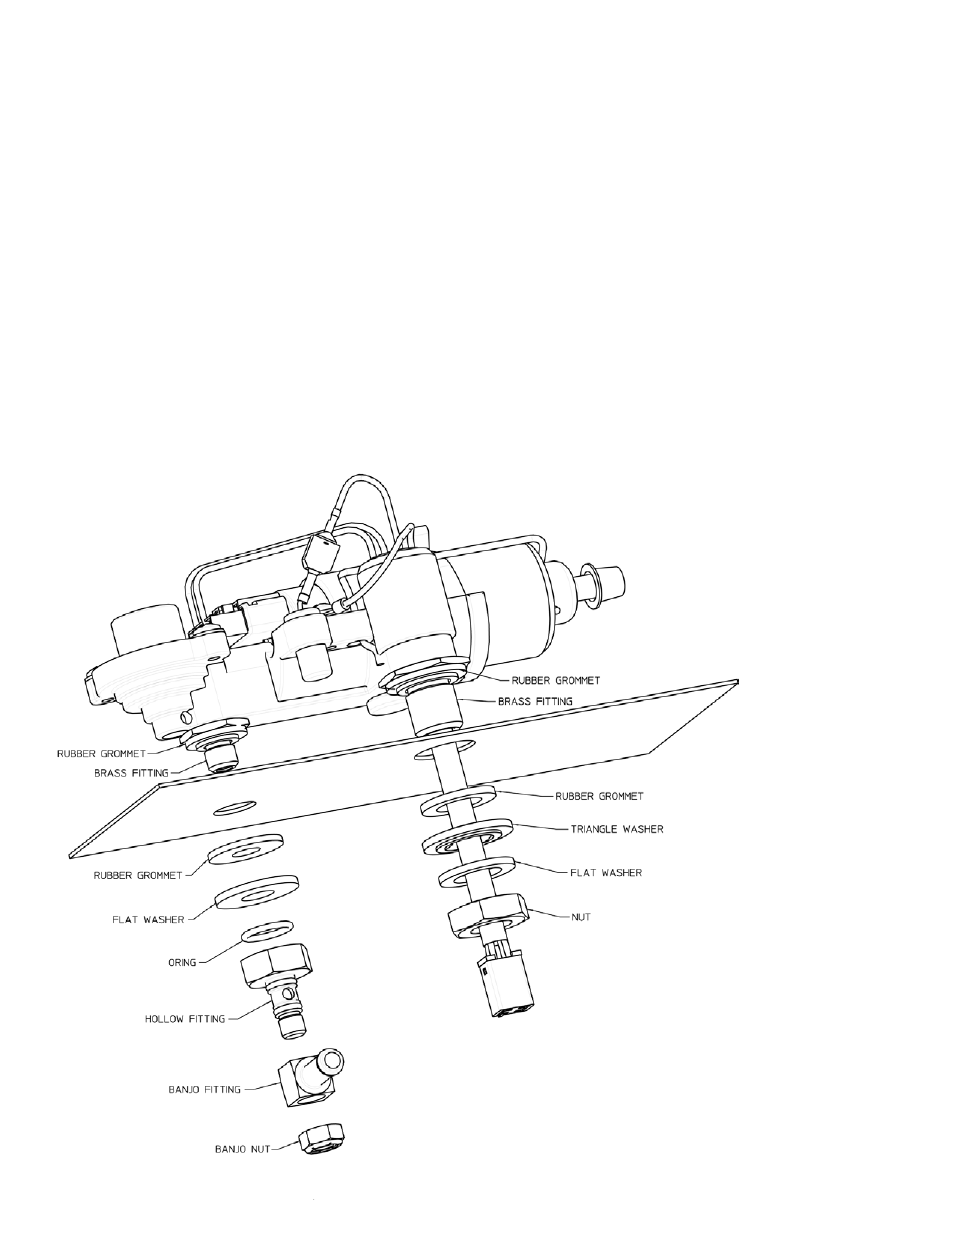
Final Pump Installation (See Figure 4)
1. Verify that the brass electrical and fluid fittings in the pump’s aluminum frame have 60 to 75 in-lbs of torque applied.
2. If not already in place, install the in-tank grommets on the brass fittings (see Figure 4)
3. Determine the length of hose required to properly locate the inlet filter in the tank, and cut to length.
4. Slide the hose clamps over the hose and insert the white fuel inlet fitting of the pump on one end and the filter fitting in the other.
5. Be sure that the hose is oriented so that the filter will naturally be pushed towards the bottom of the tank when the pump is installed.
6. Crimp the hose clamps over the filter and pump inlet fittings and install the assembly in the tank or mounting plate.
7.
See Figure 4: Install the external grommets, washers, and hardware on the fuel pump fittings. Using
Figure 4 as a guide, pay close attention
to the order and orientation of the various parts.
8. Torque both the brass nut for the electrical fitting and the hollow fuel fitting to 60–75 in-lbs.
Order of Installation of Tank Hardware
Figure 4