Mounting the standby battery – RKI Instruments 49-8104RK User Manual
Page 6
6 • 49-8104RK Standby Battery
CAUTION:
Before continuing, confirm that the positive wire (red) and the negative wire (black)
are not shorting to each other. Each wire has shrink tubing on the end to prevent
shorting. Leave the shrink tubing on.
9.
Install the wire jumper between the “+” connection of the top battery and the “-”
connection of the bottom battery (see Figure 1). This wire is one of three wires in a
small bag included with the shipping contents.
Mounting the Standby Battery
1.
Select a mounting site close to the controller that requires standby power. Consider
the following when you select the mounting site.
•
Select a site where the standby battery is not likely to be bumped or disturbed.
Make sure there is sufficient room to perform maintenance procedures.
•
The conduit hub on the top of the standby battery housing makes wiring to a
controller convenient if the standby battery is mounted below a controller.
2.
Open the standby battery door and remove any packing materials from the housing.
Be careful not to lose the three wire nuts that are provided for wiring connections.
3.
Close and latch the standby battery housing door.
4.
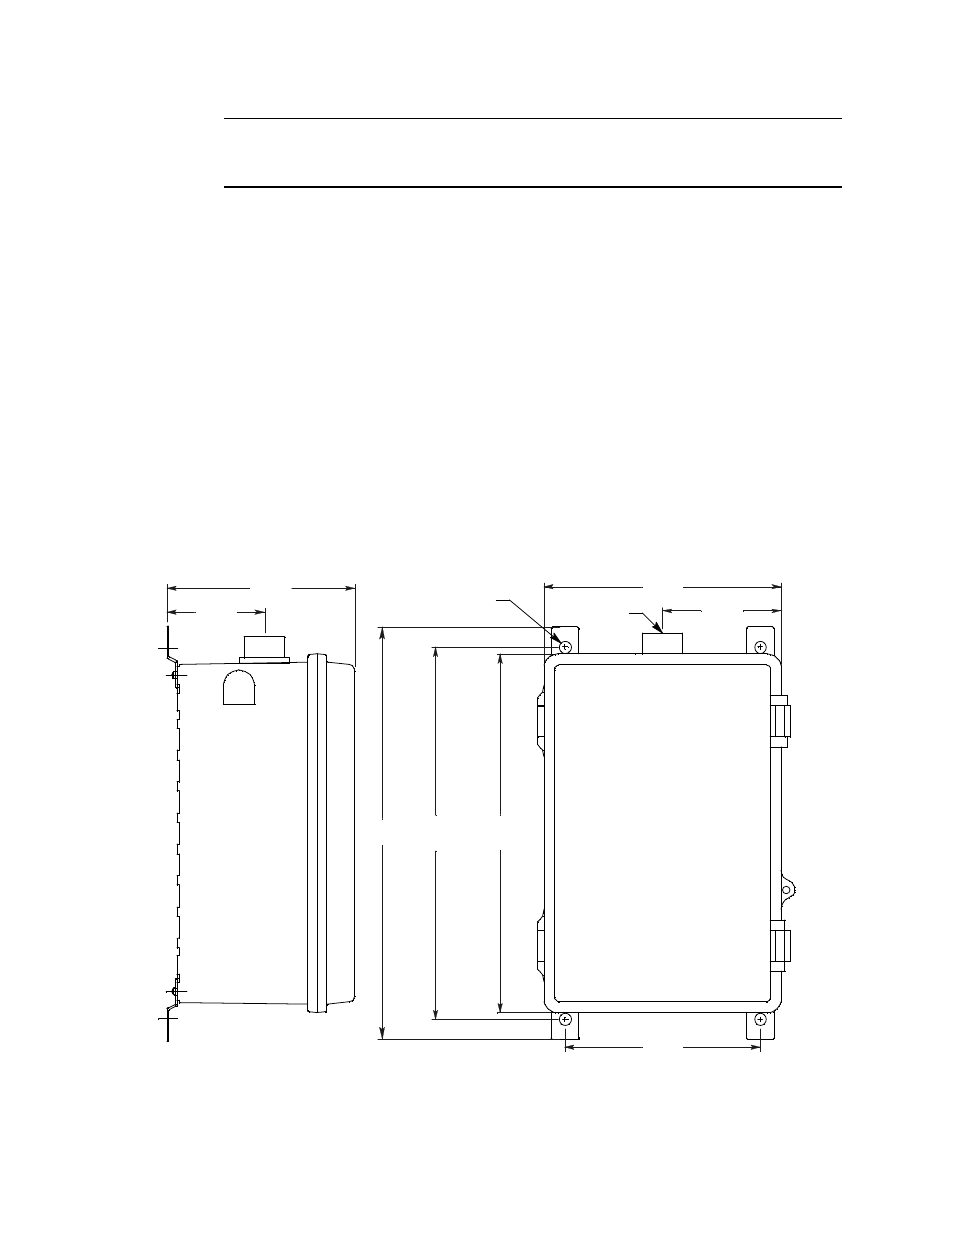
The standby battery is shipped with the mounting feet positioned behind the housing.
Loosen the screws that secure the feet to the housing, rotate the feet to their mounting
position as shown in Figure 3, then tighten the screws.
Figure 3: Outline & Mounting Dimensions
5.
Insert 1/4 inch screws through the slots in the mounting feet at each corner of the
housing to secure the housing to the mounting surface.
3.74
7.48
3/4" Conduit
Hub
6.15
3.07
5.91
11.88 Max
1/4" Screw, 4X,
User Supplied
13.00
11.28
11.38 Min