Purenex 7 Stage Reverse Osmosis System 100 GPG Per Day User Manual
Page 9
9
STEP 5: SYSTEM START-UP
1. Make sure all tubing are not kinked.
2. Turn Tank Valve to OFF position, Faucet lever OFF. (for RD106 only)
3. Turn RO faucet lever to continuous flow posit ion. Lever points up. (for RD-106 only)
4. Turn cold water supply main valve on slowly. Also turn input ball valve ON. When the system is pressurized,
check for leaks. If leak is found, tighten the connection.
5. Wait 5 minutes, the water should start drip ping out of the RO faucet, and then wait 10 more minutes to allow
water to flow through the system, and air trap inside the system can be released.
6. Turn Tank Valve to ON position, lever is parallel to the tubing. (for RD-106 only)
7. Turn the RO faucet lever to OFF. Now the purified water will start going into the storage tank. (for RD-106)
8. Wait 3 hours for the storage tank to be filled up.
9. DO NOT DRINK THE FIRST BATCH OF WATER PRODUCED BY THE SYSTEM. For RD-100 let pure
water drain out for about 1 gallon
10. After storage tank is full, turn the RO faucet lever to continuous flow position, (Lever points up) to discharge the
first batch of water. Wait until it’s completely discharged. (for RD-106 only)
11. After discharging the tank, turn the RO faucet to OFF position. Now the RO system is refilling the tank.
12. After the tank is filled up again, you can start enjoy the pure water. Job Well Done!
NOTE: Check for leaks daily for the first week after installation.
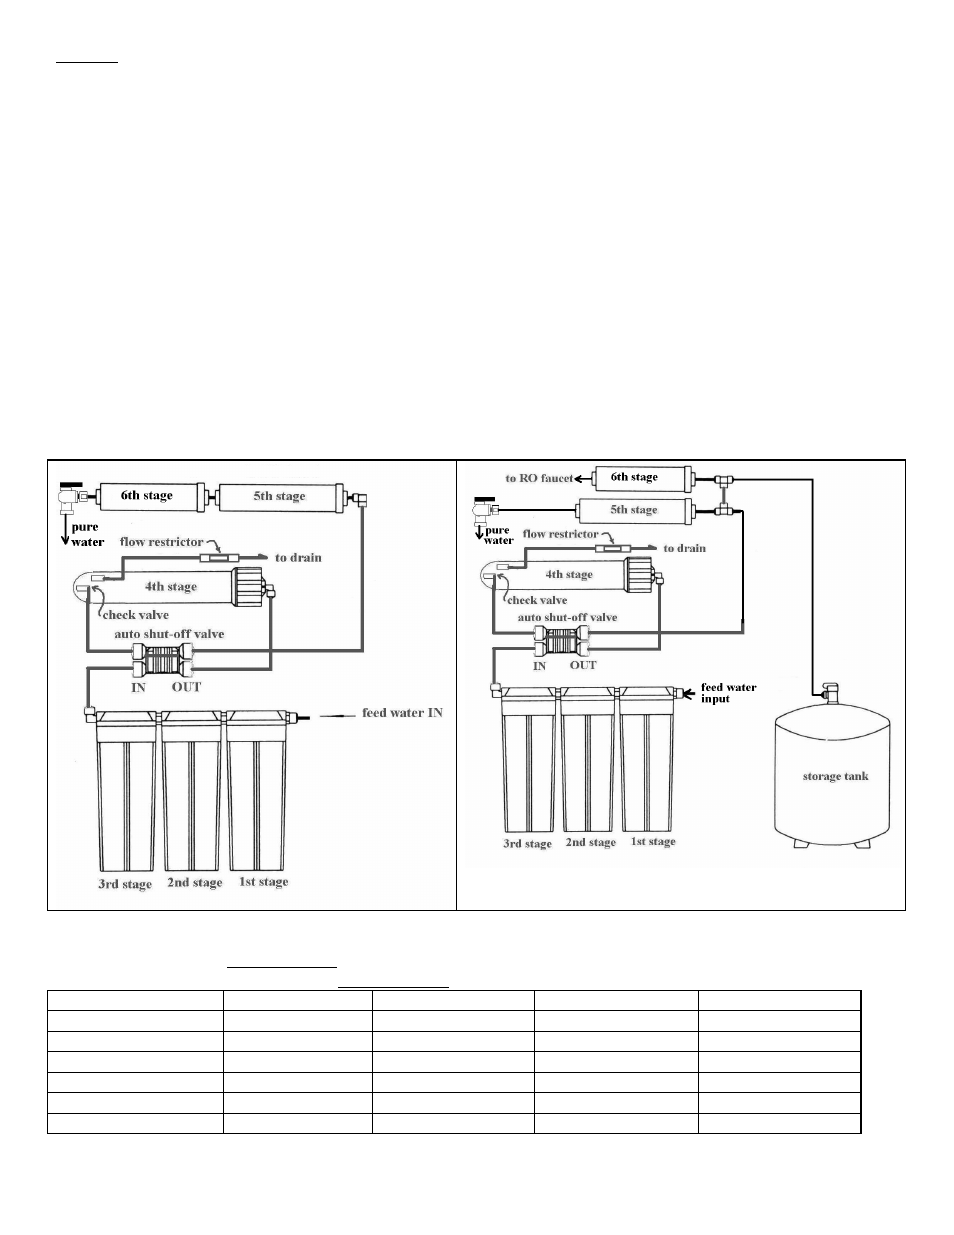
Flow Diagram for 6-Stage Reverse Osmosis+ DI Water Systems
MODEL: RD-100
MODEL: RD-106
SERVICE RECORD:
DATE OF PURCHASE:
DATE OF INSTALLATION/SERVICE:
Service Date
Date
Date
Date
Date
1
st
stage sediment
2
nd
stage carbon
3
rd
stage carbon
4
th
stage membrane
5
th
stage DI filter
6
th
stage inline carbon