Purenex 7 Stage Reverse Osmosis System 100 GPG Per Day User Manual
Page 7
7
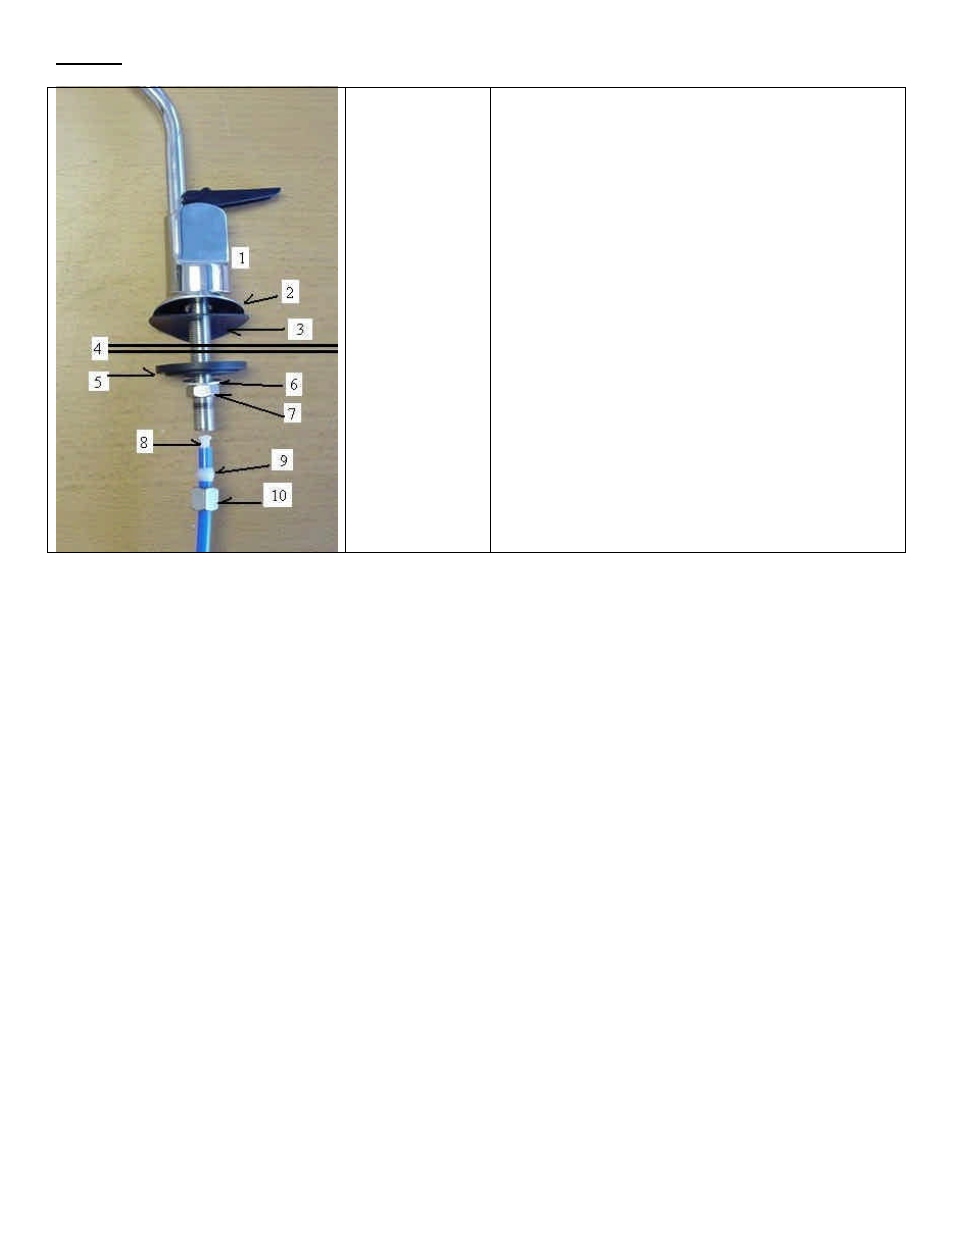
STEP 2: INSTALLING THE DISPENSING FAUCET
1. faucet base
2. small washer+
chrome plate
3. large washer
4. kitchen sink
5. bottom plate
6. lock washer
7. lock nut
8. tube insert
9. sleeve
10. faucet nut
drill 1/2” hole on
the sink
The faucet should be positioned with aesthetics, function
and convenience in mind. An ample flat surface is
required for the faucet base so that it can be drawn down
tight. Also check the under sink area of the desired
location to see if there is ample space to complete the
faucet installation.
If the space is not available on the upper sink area, the
faucet could be positioned on the counter top at the edge
of the sink. Be sure to watch for obstructions below, i.e.,
drawers, cabinet walls, support braces, etc. If the counter
top is ceramic tile, the method for drilling the hole should
be the same as for porcelain sink.
NOTE: The sink drilling process, although not
complicated, requires a certain amount of caution and
forethought. Porcelain sink can chip if care is not
exercised.
PORCELAIN ENAMEL SINK/ STAINLESS STEEL SINK/ ALUMIUM SINK
A 1/ 2” hole is required for the faucet. It is recommended that you get special drill bit for porcelain and tile counter. If
you don’t have the special drill bit, then you need to pay special attention.
1. Place a piece of masking tape or duct tape on the determined location where the hole is to be drille d.
2. Use a variable speed drill at slow speed with 1/8” drill bit, and drill a centering hole in the center of the desired
faucet location. Use lubricating oil to keep the drill bit cool while drilling.
3. Enlarge the hole using a 1/ 4” drill bit.
4. Enlarge the hole using 7/16” or 1/ 2” drill bit. Keep bit well oiled and cool, then drill slowly.
5. File or clean the surrounding area and remove the masking or duct tape. (NOTE: the metal chips on porcelain will
stain very fast)
6. DON’T put Teflon tape at the tip of the threaded mounting base of the faucet since it’s a compression fitting.
7. Pass the small rubber washer, the escutcheon plate (chrome base plate), large rubber washer according to the
diagram through the threaded mounting tube at the base of the faucet
8. From under the sink, install the locating washer, lock water, and nut. Then screw on tightly.
9. According to the diagram, pass brass nut through the BLUE tubing first, then plastic sleeve (preferred), or brass
sleeve, then the plastic insert. Push the white plastic sleeve against the insert.
10. Screw on the Blue tubing with brass nut to the faucet base. Uses wrench to tighten the nut but don’t over tighten
it. Too tight would cause leak.
11. Pull out the 3/8” O.D. spacing tube from RO faucet and insert the spout into the faucet base while holding the
black lever handle in horizontal position.
12. The spout is 360-degree swivel. The faucet lever can be pushed down for dispensing or pull up for continuing
dispensing.