Purenex 7 Stage Reverse Osmosis System 100 GPG Per Day User Manual
Page 11
11
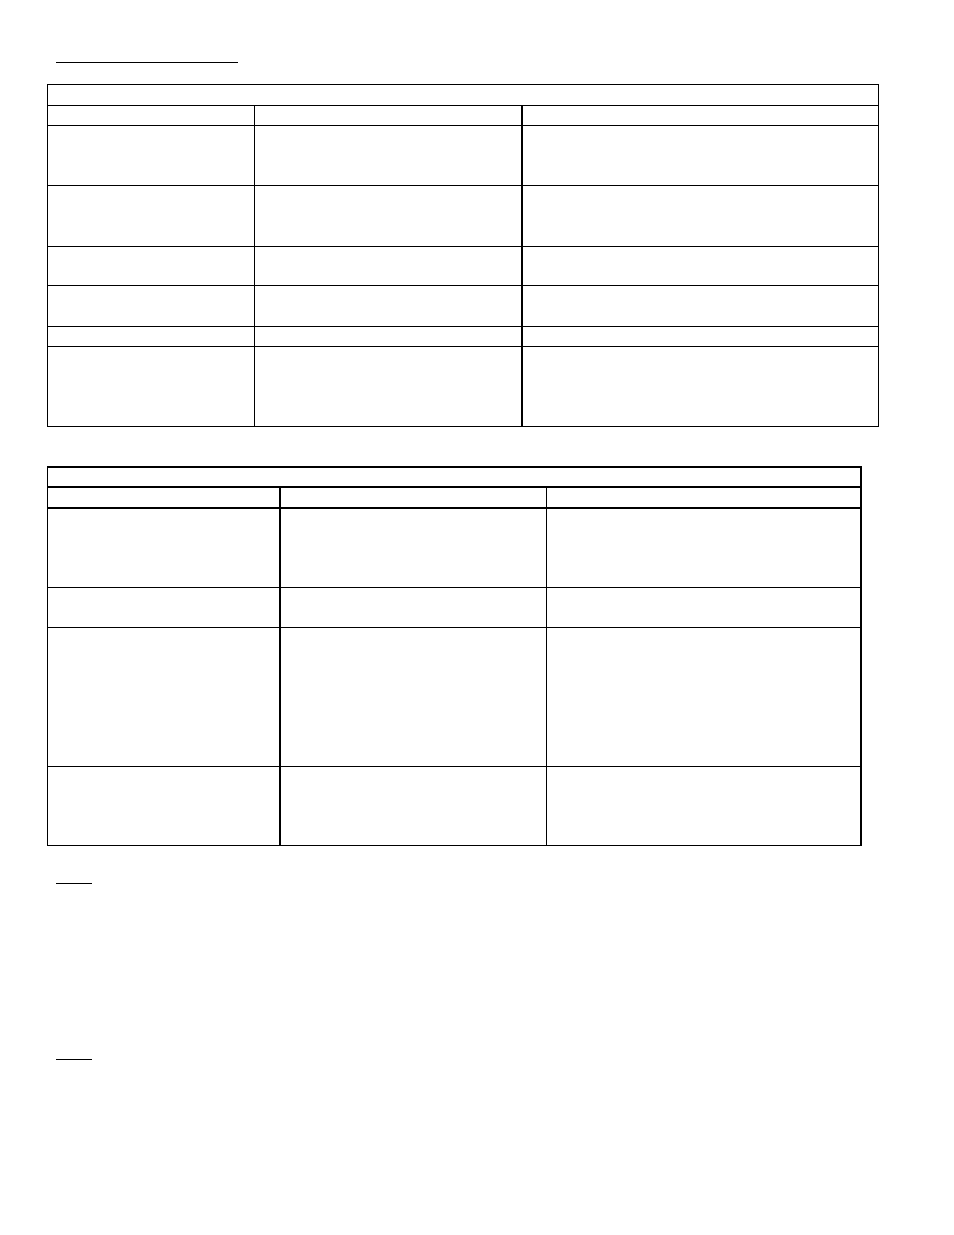
TROUBLE SHOOTING
NOTE: Turn off the system before servicing.
Installation Troubleshooting
PROBLEM
POSSIBLE CAUSE
SOLUTION
No or low water production 1. Feed water valve in not turn on
2. Tank valve is not turn on
3. Tubing is kinked
1. Turn on feed water valve
2. Turn on tank valve
3. Straighten the tubing
Leak at filter housing
1. Housing is not tighten
2. Damaged or misaligned O-ring
3. Housing has cracks
1. Tighten housing
2. Re-aligned O-ring or replace
3. Replace housing
Leak at fitting thread
1. Not properly tighten
2. Fitting has cracks
1. Use Teflon tape, re-tighten
2. Replaced it
Bad-tasting water
1. Not yet flush the system
2. Tubing connection incorrect
1. Discharge water from tank
2. Check flow diagram
Milky/Cloudy water
1. Air in system/filters
1. This is normal, continue use it for 2 weeks
Noise from drain
1. Saddle valve mounted too high
1. Lower the saddle valve
When system is making water, waste water to
drain is normal, when storage tank is full, drain
should stop
Troubleshooting
PROBLEM
POSSIBLE CAUSE
SOLUTION
When turn on the RO faucet,
only small amount of water
come out.
1. Lifting the tank to see if there is
still water inside. Heavy or light ?
1. If it’s heavy, you need to recharge tank,
following recharge procedure
1b. If its light, the water either is not going
in or the system is not making water.
Vibrating noise or very loud
high pitch noise
1. From the auto shut-off valve
1. If the noise is too unbearable, shut-off
valve should be replaced.
Drain water never shut off
1. Auto shut-off valve is worn out
or becoming ineffective
2. Storage tank not enough pressure
3. Water supply pressure is near 40
psi or below
4. Cold water temperature
5. Filters are clogged up
1. Replace auto shut-off valve
2. Follow recharging tank procedure
3. Increase feed water pressure
4. Can’t do anything about it.
5. Replace filters
Low water production
1. Storage tank problem
2. Clogged filters
3. Kinked tubing
4. Clog flow restrictor
1. Follow recharging tank procedure
2. Replace filters
3. Straighten the tubing
4. Replace flow restrictor
Note: Clogged filters: How do you know if the filters are clogged up? For the pre-filters, sediment filters and carbon
filters; check the pressure difference before and after the filters. If there is significant difference in pressure that means
the filter is clogged. Turn OFF tank valve and cold water main valve then open the RO faucet to depressurize the system,
then disconnect the tubing after the bottom three pre-filters, then turn ON the cold water main valve. If you get very
strong water pressure, (as strong as water going into the system) then the bottom 3 pre-filters are not clogged. If the water
pressure is much smaller, unlike a burst of water pressure, then the bottom 3 pre-filters need to be replaced.
Note:
Checking a clogged membrane uses different method. Use a water quality meter TDS meter to check the condition and
performance of the RO membrane (4
th
stage filter)
Note: Clogged flow restrictor: When you disconnect the black tubing going into the saddle valve, and the RO system is
in the processing of making water (by turning on the RO faucet), there should be a small steady flow of drain water. If
you do not get any drain water, the flow restrictor may be clogged, then you need to replace a new flow restrictor ASAP,
and discontinue using the system.